Menu Rule Sumamry
What Is Rule Summary?
Menu Rule Summary allows users to create rules for their menus to meet state, government, and local guidelines for menu preparation. By creating these rules in the backend, you can monitor your menus without having to constantly refer back to documents and look to posted guidelines. Simply input the guidelines and regulations as “Rules” in this section, and your menus will display these rules and tell you if your menus are in the “Red” “Yellow” or “Green” for meeting these rules that you set forth. You can customize rules to apply to certain grades, states, schools, etc. which can help your company keep track of important guidelines for menu creation.
Navigate To Menu Rule Summary
Click on Master on the main navigation menu.

Find the Menu tab and click on it.
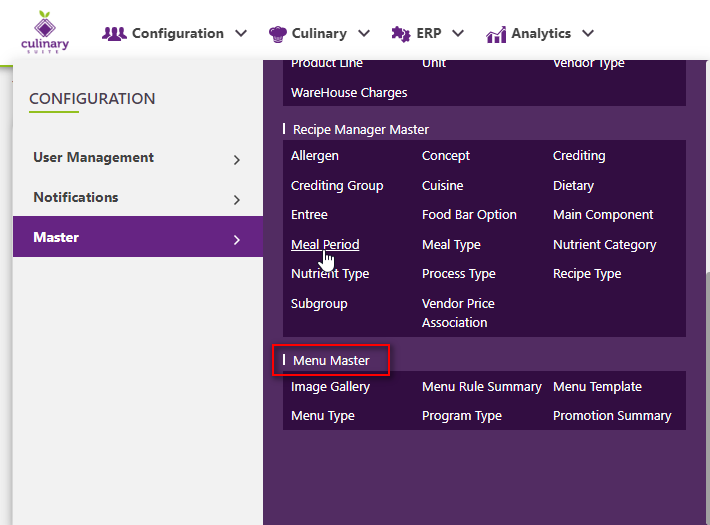
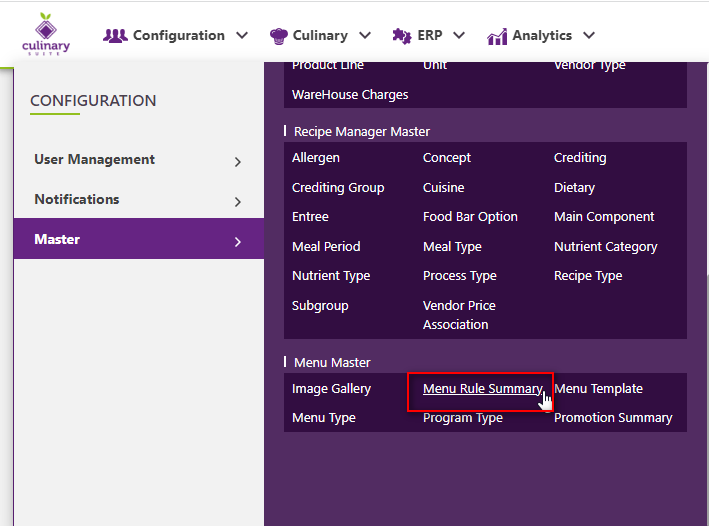
A new screen appears which shows the list of all of the core Menu master tables. Locate the one which says Menu Rule Summary and click on it.
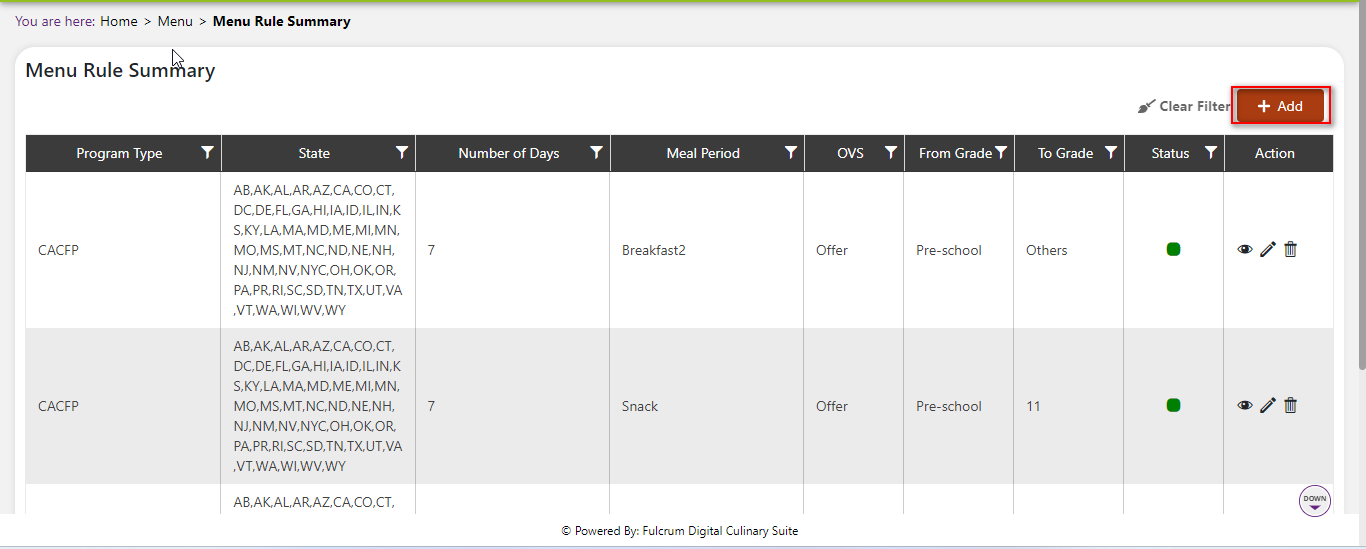
This will open up a screen where you can see all the active and inactive Menu Rule Summaries that are available for your company.

Add A New Menu Rule Summary
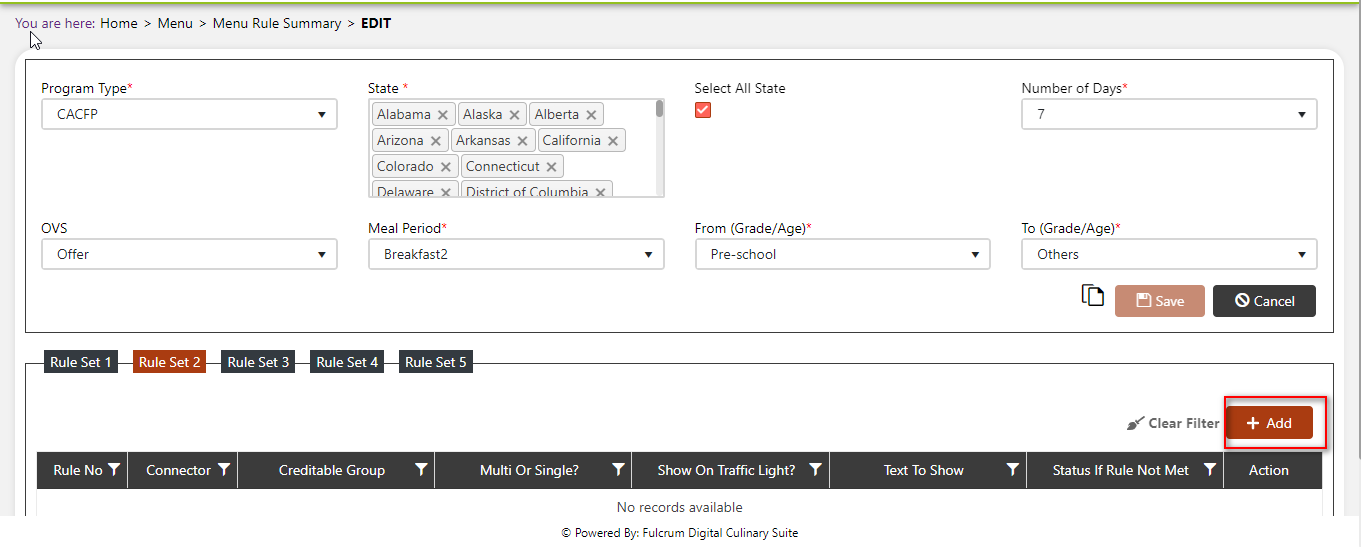
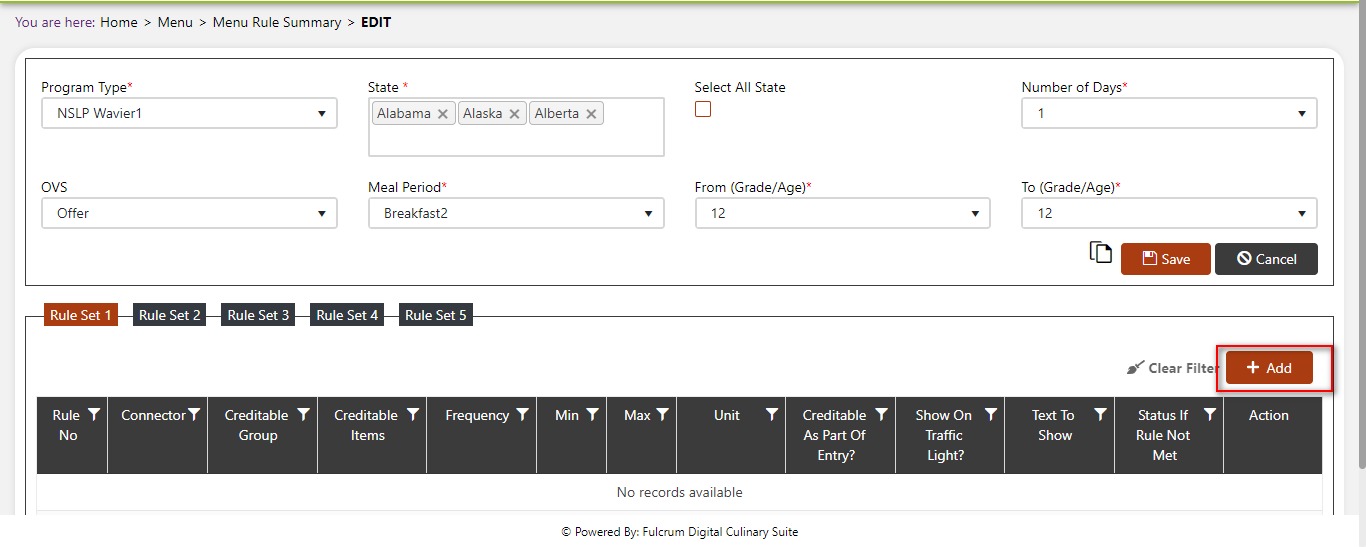
Click the Add button on the top right side of the screen.
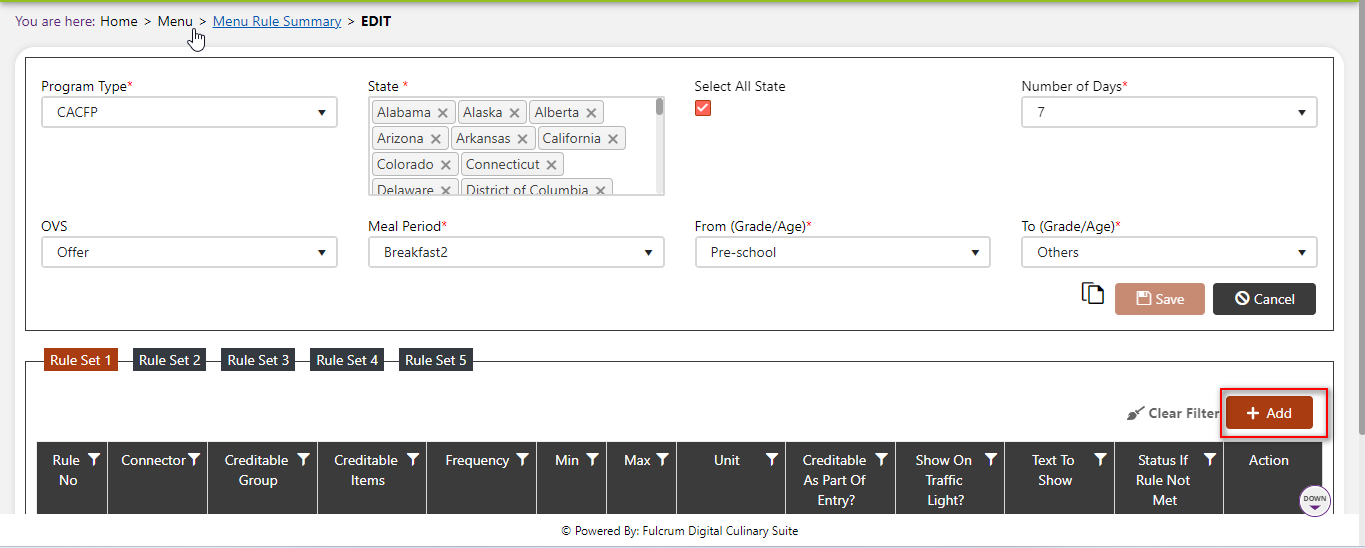
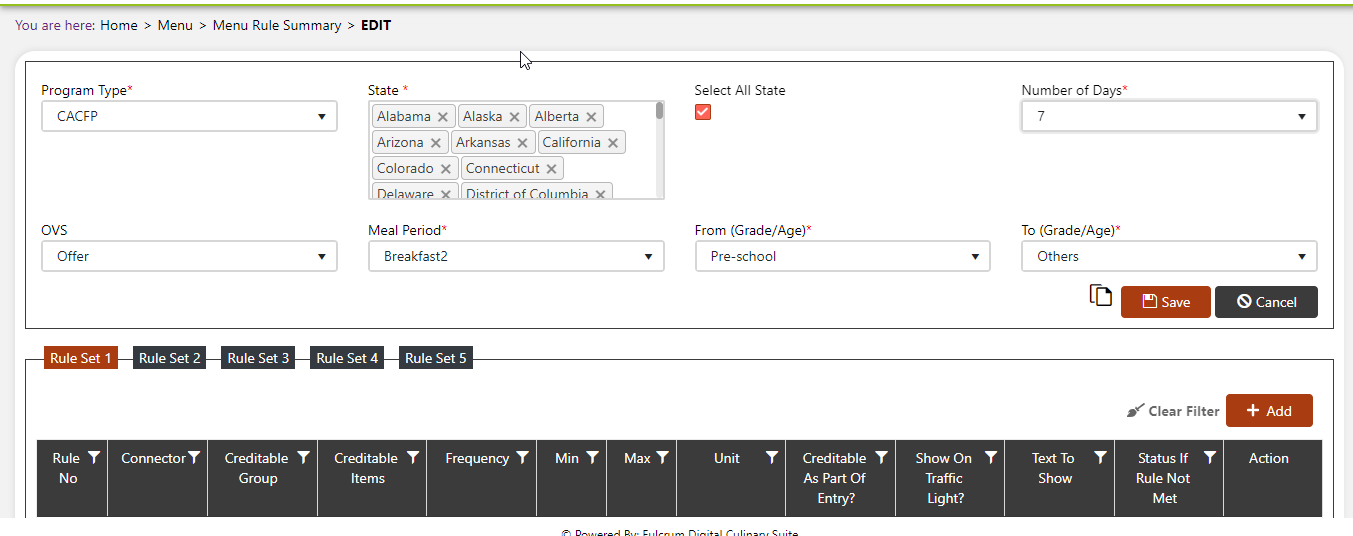
The system will open a popup screen in which you can fill in the following fields (Note: Mandatory fields are indicated by the * next to the name):
- Program Type*: Click the dropdown arrow in the textbox to choose from the Program Types listed.
- State*: Click within the textbox to see a list of states to choose from. Click the box again to choose more than one state.
- Select All States: Click this if you want to select all states.
- Meal Period*: Click the dropdown arrow in the textbox to choose from the Meal Periods listed.
- From Grade/Age*: Click the dropdown arrow in the textbox to choose from the Grades listed. If you want it sorted by age, choose “Others”.
- To Grade/Age*: Click the dropdown arrow in the textbox to choose from the Grades listed. If you choose “Others” in the “From Grade/Age” it will autofill this field to “Others” as well, but it may be changed if you desire.
- Number of Days*: Click the dropdown arrow in the textbox to choose from the number of days listed that these rules will apply.
- OVS: Click the dropdown arrow in the textbox to choose either “Offered” or “Served”
Click the Save button once all the information above has been submitted.
Add To A Rule Set
Click the “Rule Set 1”
Click the Add button to add a rule.
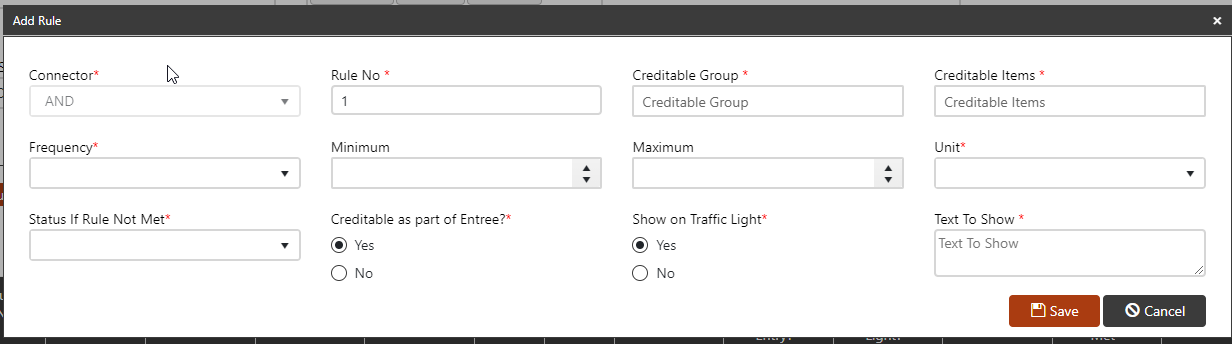
You will see a popup menu opened like the one below.
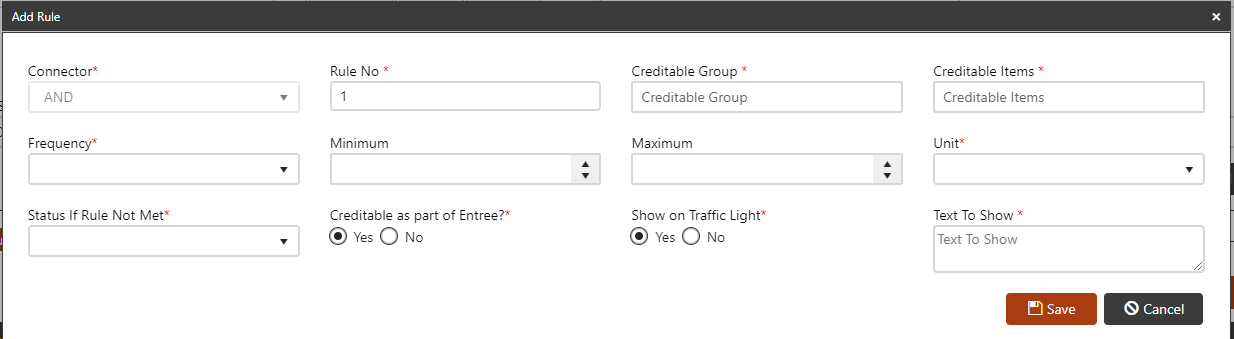
The system will open a popup screen in which you can fill in the following fields (Note: Mandatory fields are indicated by the * next to the name):
- Connector*: This is an automatically filled field by the system.
- Rule No*: This is an automatically filled field by the system.
- Creditable Group*: Click within the box to choose the group of food that will have this rule.
- Creditable Items*: Click within the textbox to see the items that will have this rule.
- Frequency*: Click the dropdown arrow in the textbox to choose from the list provided.
- Minimum: Click the textbox to type in a number or hit the up or down arrows to increase or decrease the amount related to the number of items.
- Maximum: Click the textbox to type in a number or hit the up or down arrows to increase or decrease the amount related to the number of items.
- Unit*: Click the dropdown arrow to see a list of units available for the item you chose earlier. Choose from the list provided.
- Status If Rule Not Met*: If the rule is not met by the menu, choose what will show up to users from the list provided after click the dropdown arrow in the textbox.
- Creditable If Part of Entrée: Click the “yes” or “no” circle if you would or would not like the rule to include ingredients to an entrée to satisfy the rule. For example, if a salad has fruit in it, that would satisfy a rule to have fruit served with a meal if you click “yes”. If you click “no” fruit must be offered as a side or snack option to satisfy the rule.
- Show on Traffic Light*: When you make your menu, you will have “Red” “Yellow” and “Green” indicators that will tell you if your rules are not met, close to being met, or satisfied respectively. This makes it easier to visually see if your menus are meeting your requirements. It is highly recommended to keep this option as “yes”.
- Text to Show*: If you want text to show, click within the textbox and input any text you want users to see with this rule.
Click the Save button.
Click the “Rule Set 2”
Click the Add button to add a rule.
You will see a popup menu opened like the one below.

The system will open a popup screen in which you can fill in the following fields (Note: Mandatory fields are indicated by the * next to the name):
- Connector*: This is an automatically generated field by the system.
- Rule No*: This is an automatically generated field by the system.
- Multi or Single*: Click the dropdown arrow to choose whether this is a multi or single layered rule.
- Creditable Group*: Click in the textbox to see a list of creditable group options to choose from. To choose more than one, click the textbox again.
- Status If Rule Not Met*: Click the dropdown arrow to see a list generated with “Warning”, “Pass”, or “Fail”. Choose from this list.
- Show on Traffic Light*: Choose whether this rule will be featured on the traffic light icon which can be helpful in creating your menu. This is highly recommended.
- Text to Show: Provide any text to show up for this rule.
Click the Save button.
Click the “Rule Set 3”
Click the Add button to add a rule.
You will see a popup menu opened like the one below.
The system will open a popup screen in which you can fill in the following fields (Note: Mandatory fields are indicated by the * next to the name):
- Rule No*: This is an automatically generated field.
- Nutrient*: Click the dropdown arrow to choose from the nutrients listed.
- Of Nutrient: Click the dropdown arrow to choose from the nutrient types listed.
- Frequency*: Click in the textbox to write in a number or click the up or down arrows to increase or decrease the amount.
- Minimum: Click in the textbox to write in a number as the minimum.
- Maximum: Click in the textbox to write in the maximum.
- Unit: Click the dropdown arrow to choose from the units listed.
- Status If Rule Not Met*: Click the dropdown arrow to choose from the list provided.
- Show On Traffic Light*: Click “Yes” or “No” to have this rule featured on the traffic light icon when creating your menu. This is highly recommended.
- Text To Show*: Provide text to show next to the rule.
Click the Save button.
Click the “Rule Set 4”
Click the Add button to add a rule.

You will see a popup menu opened like the one below.

The system will open a popup screen in which you can fill in the following fields (Note: Mandatory fields are indicated by the * next to the name):
- Rule Number*: This is an automatically generated field.
- Stored Proc*: Click on the dropdown arrow to choose from the list provided.
- Return*: Click on the dropdown arrow to choose from the list provided.
- Frequency*: Click on the dropdown arrow to choose from the list provided.
- Status If Rule Not Met*: Click the dropdown arrow to choose from the list provided.
- Show On Traffic Light*: Choose either “yes” or “no” by clicking the circle. This is hi ghly recommended.
- Description*: Add a description of this rule.
- Text to Show*: Add any text that you want to show up for this rule.
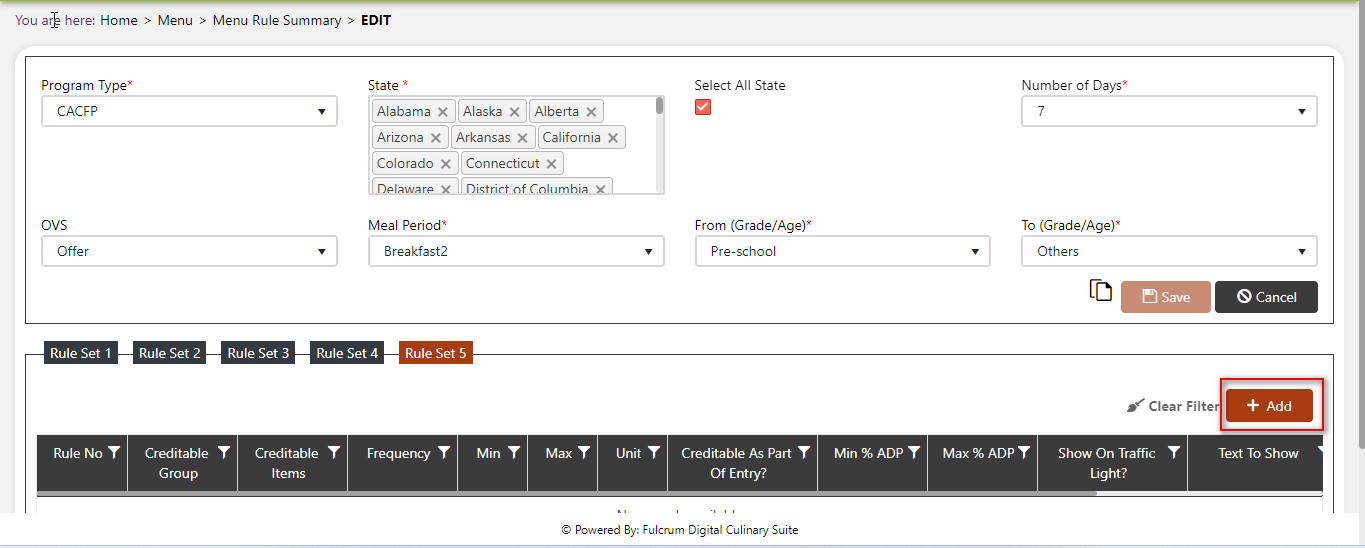
Click the “Rule Set 5”
Click the Add button to add a rule.
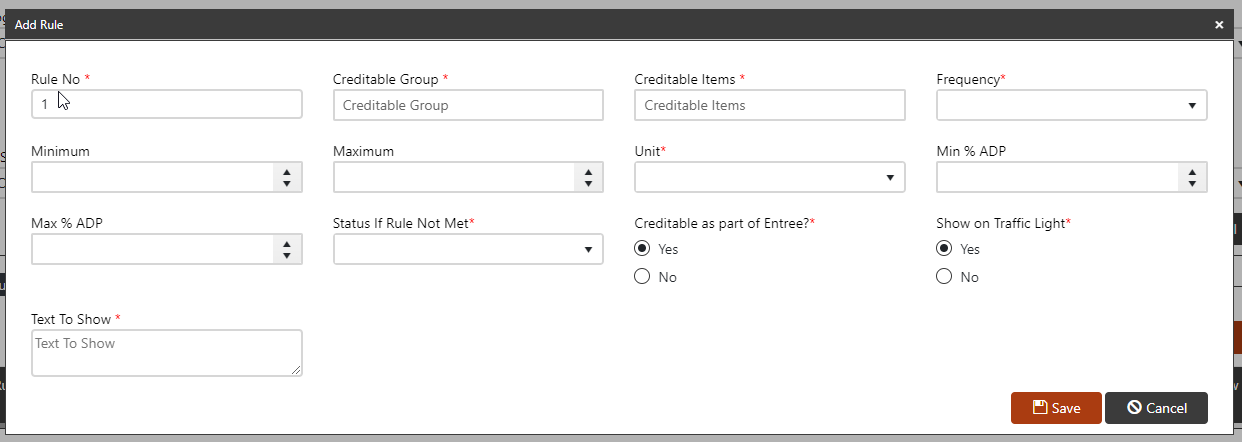
You will see a popup menu opened like the one below.
The system will open a popup screen in which you can fill in the following fields (Note: Mandatory fields are indicated by the * next to the name):
- Rule No*: This is an automatically generated field.
- Creditable Group*: Click in the textbox to see a list of creditable group options to choose from. To choose more than one, click the textbox again.
- Creditable Items*: Click within the textbox to see the items that will have this rule.
- Frequency*: Click on the dropdown arrow to choose from the list provided.
- Minimum: Click in the textbox to write in a number as the minimum.
- Maximum: Click in the textbox to write in the maximum.
- Unit*: Click the dropdown arrow to see a list of units available for the item you chose earlier. Choose from the list provided.
- Min % ADP: Click in the textbox to write in a number as the minimum percentage ADP.
- Max % ADP: Click in the textbox to write in a number as the maximum percentage ADP.
- Status If Rule Not Met*: Click the dropdown arrow to choose from the list provided.
- Creditable As Part of Entrée: Click the “yes” or “no” circle if you would or would not like the rule to include ingredients to an entrée to satisfy the rule. For example, if a salad has fruit in it, that would satisfy a rule to have fruit served with a meal if you click “yes”. If you click “no” fruit must be offered as a side or snack option to satisfy the rule.
- Show On Traffic Light*: Choose either “yes” or “no” by clicking the circle. This is highly recommended.
- Text To Show: Add any text that you want to show up for this rule.
Modify Or Change Status Of Menu Rule Summary
Modify Menu Rule Summary
Click on the pencil icon next to the Menu Rule Summary that you would like to modify.
Users can make changes to everything except certain aspects of the “Rule Sets” regardless of whether the Menu Rule Summary is currently referenced throughout the system.
Within each Rule Set, you cannot have 2 different Crediting Groups that use 2 different units of measure. For this, you need to create a new rule which you can do by clicking the add button again and add a separate new rule there.
To edit a specific rule that you created in a “Rule Set” scroll down to the bottom of the table where you see the scroll bar icon to move the page left or right. Move the bar to the right to see a modify icon which you can use to modify specific rules. Click the plus icon to add another rule to that specific “Rule Set”.
Change Status Of Menu Rule Summary
If you would like to change the status of an existing Menu Rule Summary to Active or Inactive, you will first need to look at the “Change Status” column where you will find either a grey or green shaded circle.

Click on the circle to either activate or deactivate the Menu Rule Summary.
You will be presented with a menu where you will be asked if you want to activate or deactivate the specified Menu Rule Summary.


Click yes to save your changes.