Non Nutritive/Non Nllergenic
What are Non Nutritive/Non Nllergenic attributes?
Non Nutritive/Non Nllergenic attributes are attributes that are associated to products which are not based on the presence of nutrients or allergens (an example of Non Nutritive/Non Nllergenic attribute: Vegetarian, vegan, kosher, etc). One or more of these attributes can be associated to a product. When these products are used inside of recipes, the recipe will automatically pick up the Non Nutritive/Non Nllergenic attributes which are associated to all or one of the products (depending on this setup). You have the option of choosing the number of variants to be considered as “all” Or “one”. If “all” Is selected, then each of the products that are being used in a recipe on a menu must contain the attribute in order for the recipe to contain that attribute. For example, for a recipe to be considered “vegetarian”, all of the products that are being used inside it must also contain the attribute “vegetarian”. Likewise, if you are using this field to track “contains pork”, then you would use the number of variants as “one”. This means that if even one product being used in the recipe contains the attribute of “pork” Then the recipe will be considered as containing pork, even if the other ingredients don’t. You can associate meal types and icons to an attribute if you wish to display it on a menu. This will display the selected icon if the attribute is present on a menu item of the appropriate meal type.
Navigate to Non Nutritive/Non Nllergenic
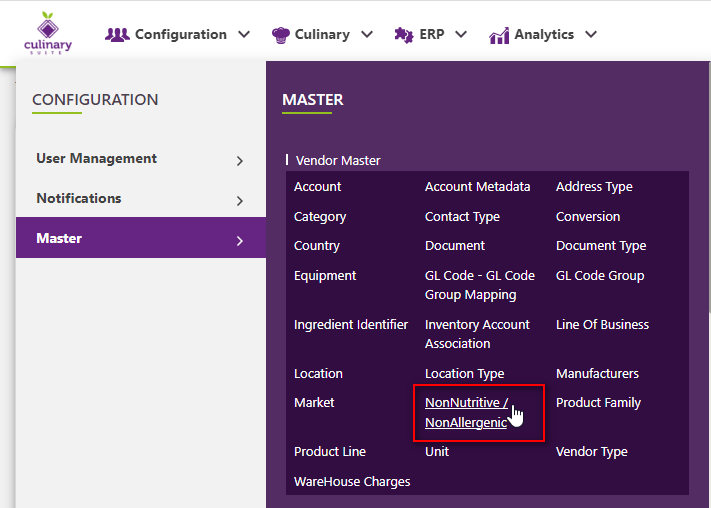
Click on Configuration on the main navigation menu. Locate Master and click on it.
A new screen appears which shows the list of all the core master tables. Locate the one which says Non Nutritive/Non Nllergenic and click on it.

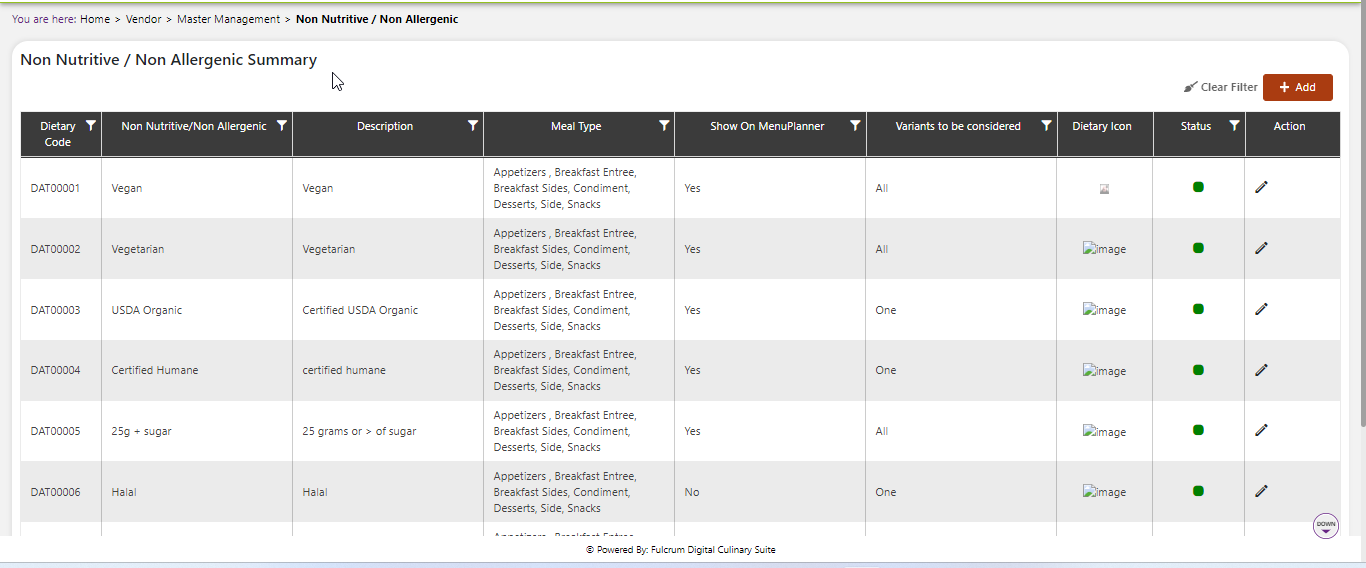
This will open a screen where you can see all of the active and inactive Non Nutritive/Non Nllergenics which are setup for your company.

Add a new Non Nutritive/Non Nllergenic
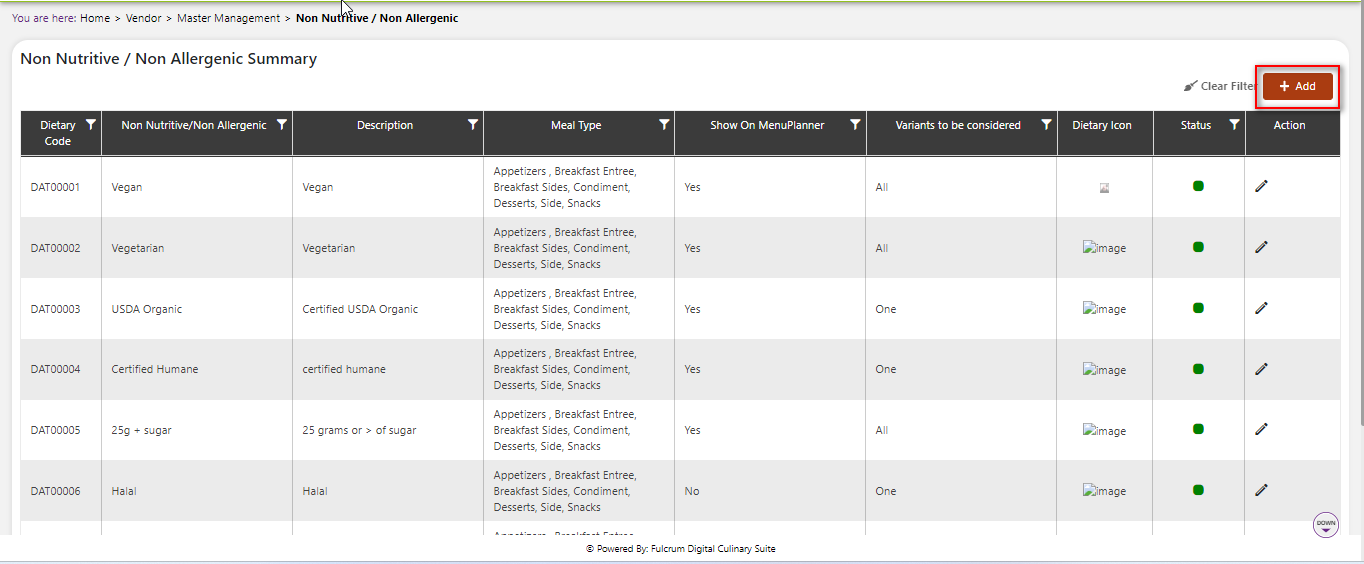
Click the Add button on the top right side of the screen.

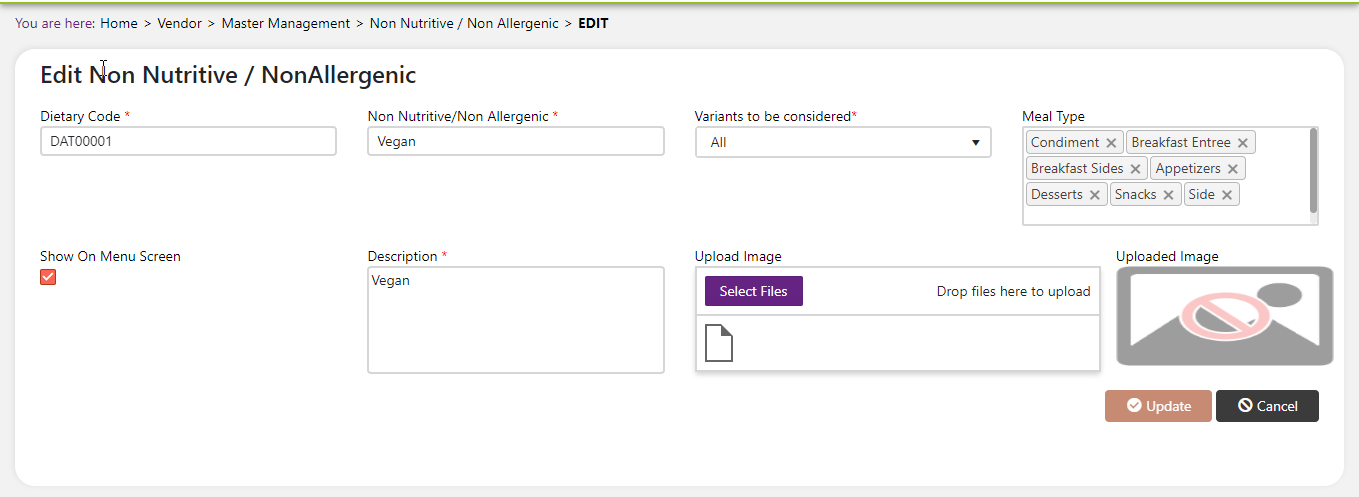
The system will open a popup screen in which you can fill in the following fields
NoteMandatory fields are indicated by the * next to the name
- Dietary code*: Unique code for the system to manage each attribute. This is automatically generated by the system and does not need to be filled in.
- Non Nutritive/Non Nllergenic name*: Provide the name that you would like for this attribute. This is the name you will see for selecting this attribute throughout the system.
- Variants to be considered*: There are two options. Either “all” Or “one”. When “all” Is selected, then all the products that are being utilized in a recipe must all contain the attribute tag in order for the attribute to be present on the recipe. For example, for an attribute like “vegetarian” You may want the variants to be considered as “all”. This would mean that all of the products that are selected in that recipe must contain the “vegetarian” Attribute in order for the recipe to be considered vegetarian. Likewise, for an attribute like “contains pork”, you may want the variants to be considered set as “one”. This would mean that if even one product that is selected in that recipe contains the Non Nutritive/Non Nllergenic attribute of “contains pork” Then the entire recipe will automatically be flagged with that attribute as well. This is especially useful if there are many variant ingredients in a recipe, the attributes of the recipe dynamically calculate depending on what ingredients are being used.
- Meal type: If you wish to display an icon for this attribute on the menu or on the meal planner, then you can tell the system which meal types you would like it to display for. You may want to call out specific attributes on entrée’s but not on sides or condiments. You have the ability to choose those meal types here. Keep in mind that choosing a meal type alone will not make this appear on the menu. You will need to associate an icon image and check the “show on menu” Checkbox. If you do not wish to display the icon or the attribute on the menu, leave this field blank. Please keep in mind that it will display on the meal planner if it is active.
- Description*: Brief description of the attribute. Upload image: Select a small jpeg image (no larger than 58x58px and <5kb) image to upload if you wish to display this attribute on the menu and meal planner. This must be used in conjunction with meal type in order to display. If you do not wish to display this on the menu, then leave this blank.
Click the save button. The Non Nutritive/Non Nllergenic will be active by default.
 | ✓ Set up a “Non Nutritive/Non Nllergenic” Attribute. |
Modify or change status of Non Nutritive/Non Nllergenic
Modify Non Nutritive/Non Nllergenic
Click on the pencil icon next to the Non Nutritive/Non Nllergenic that you would like to modify.
You may make changes to the name, variants to be considered, meal type, icon or description regardless of whether the attribute is currently referenced throughout the system.

Change status of Non Nutritive/Non Nllergenic
If you would like to change the status of an existing Non Nutritive/Non Nllergenic to active or inactive, you will first need to look at the “change status” Column where you will find either a grey or green shaded circle.
Click on the circle to either activate or deactivate the Non Nutritive/Non Nllergenic.
NoteIf the Non Nutritive/Non Nllergenic is already mapped in the system, you cannot deactivate the Non Nutritive/Non Nllergenic until you unmap it everywhere in your system. If this kind of modification is needed you may need to reach out to technical services to discuss the situation and they can direct you further
You will be presented with a menu where you will be asked if you want to activate or deactivate the specified Non Nutritive/Non Nllergenic.
Click yes to save your changes.