Location
What is Location?
Location keeps track of multiple Locations for your business. You can setup as many Locations as you desire and tag them to accounts. This is a great way to manage different cafeteria Locations under one business account. Our Location configuration contains subfields which are important for menu creation, inventory tracking, asset management, and revenue management. Those Location subfields are primary, asset, menu, storage area, Location master revenue, serving line. Within this section there are walkthroughs for each of the subfields.
Navigate to Location
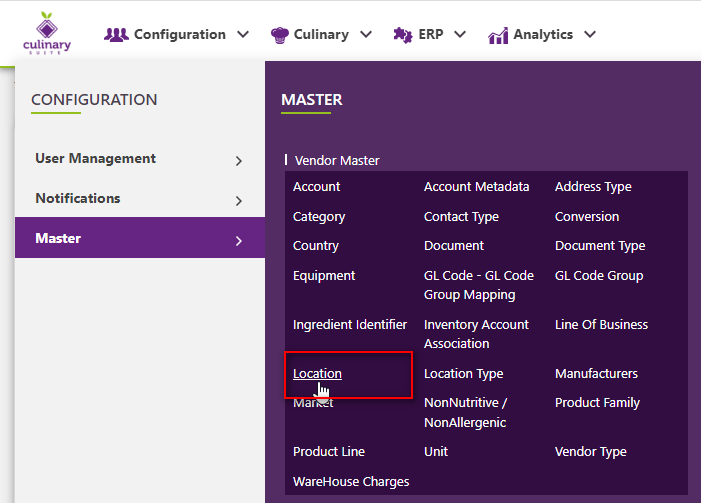
Click on Configuration on the main navigation menu. Locate Master and click on it.

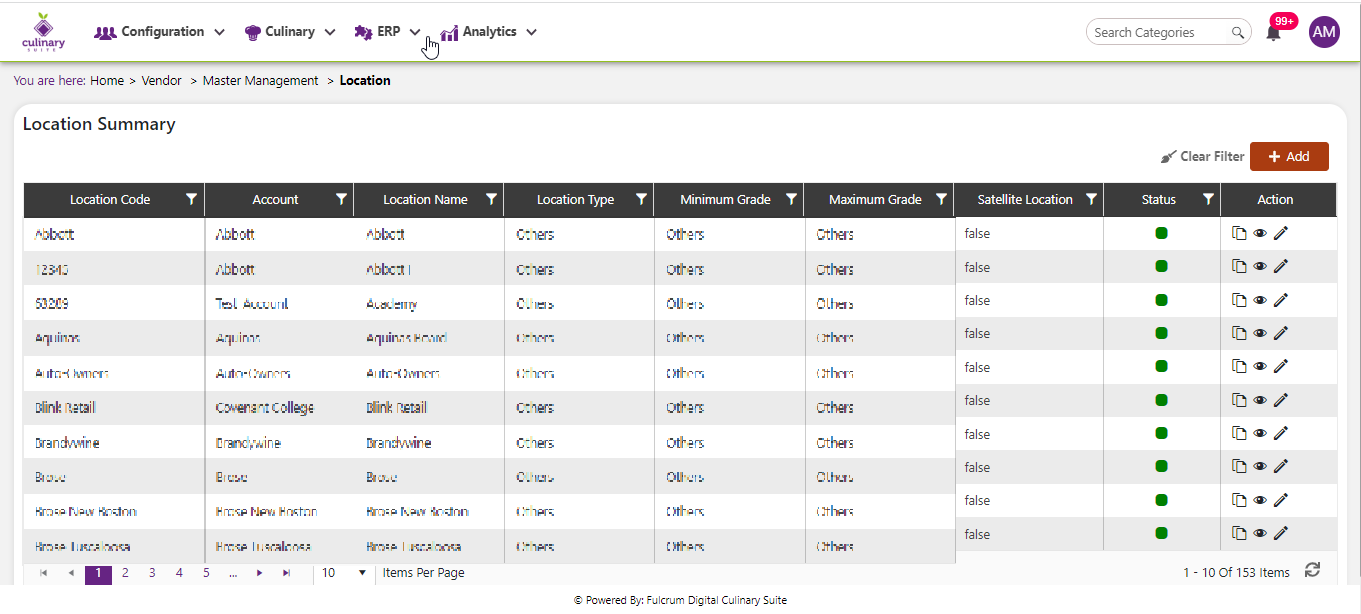
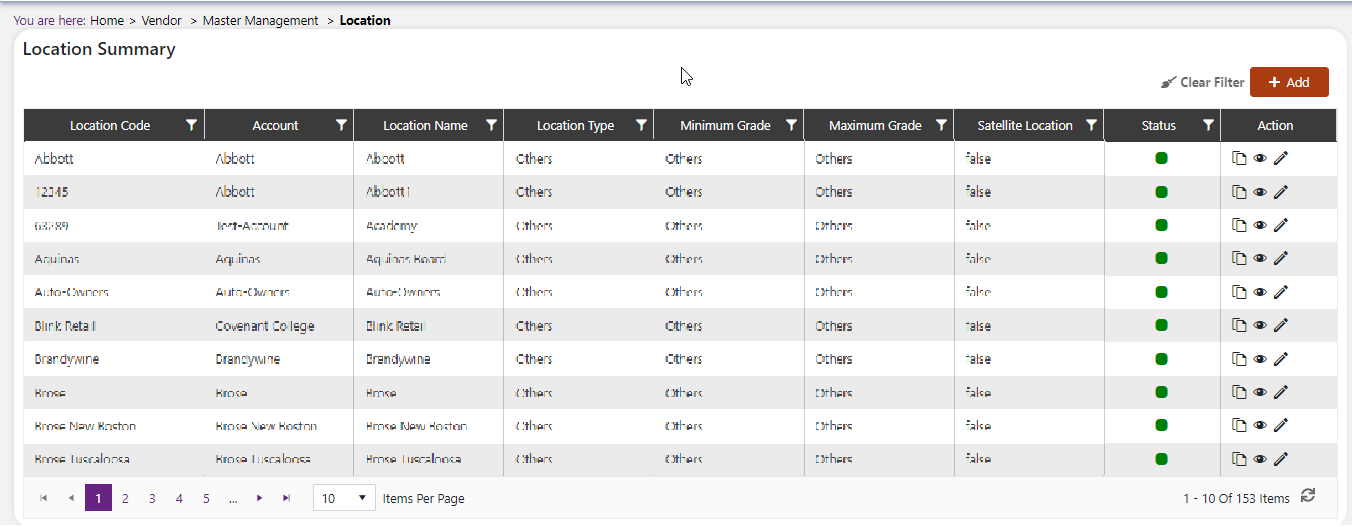
A new screen appears which shows the list of all the core master tables. Locate the one which says Location and click on it.

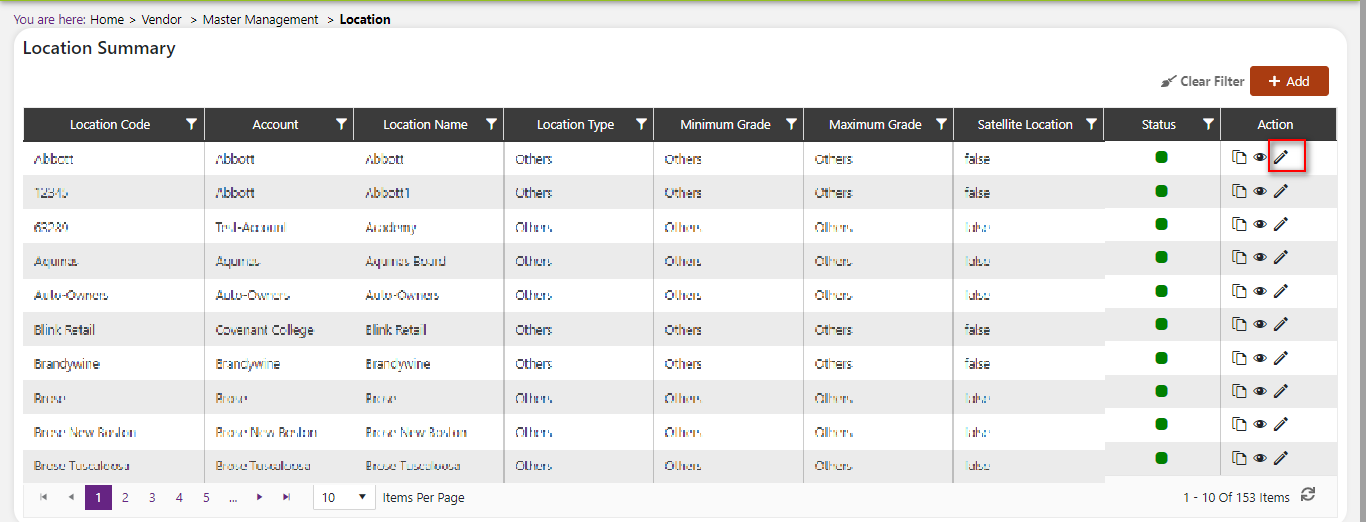
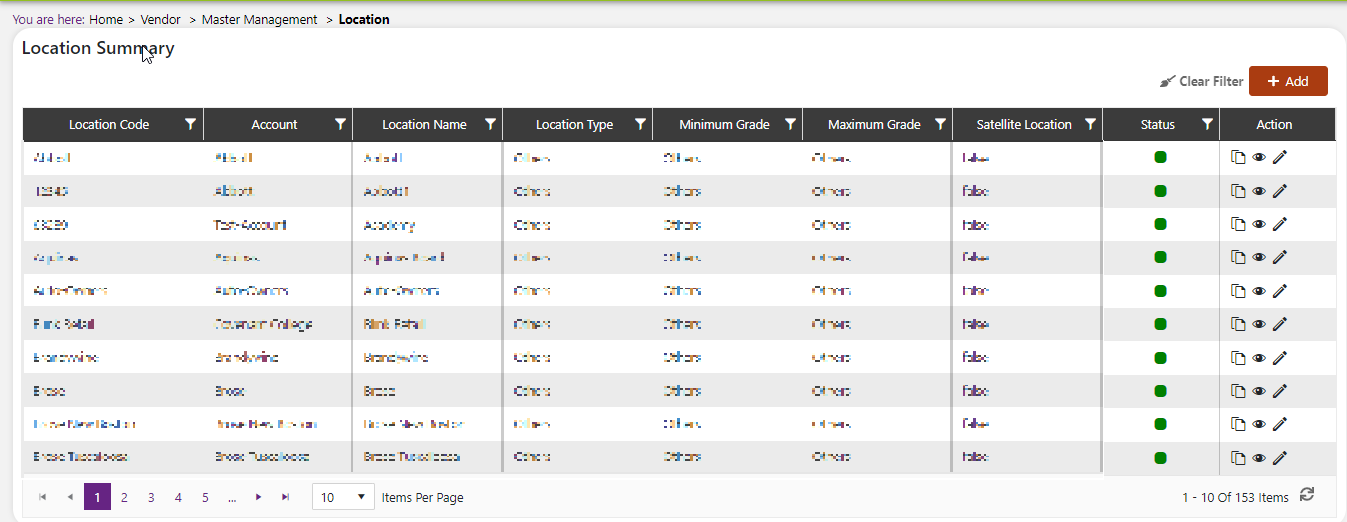
This will open a screen where you can see all of the active and inactive Locations which are setup for your company.

Add a new Location
Click the Add button on the top right side of the screen.

The system will open a popup screen in which you can fill in the following fields
NoteMandatory fields are indicated by the * next to the name
- Account*: Choose an account from the dropdown menu.
- Location code*: Provide the Location code for this Location here.
- Location name*: Provide the name of the Location here.
- Is planner Location: Check the box if the Location is available to be put on fd mealplanner. (fd mealplanner is another product by fulcrum digital)
- Address*: Provide the address for this Location here.
- Zip*: Provide the zip code here.
- Can be inventoried: Check the box if the Location can be inventoried, ignore if it cannot.
- Personal cell phone: Provide a personal cell phone contact for this Location.
- State*: Provide the state of this Location here.
- County*: Provide the county of this Location here.
- City*: Provide the city of this Location here.
- Office phone: Provide the office phone number for this Location here.
- Fax: Provide the fax number for this Location here.
- Location type*: Click within the text box to enable the dropdown menu, from here, click the Location types that best describe this Location. Repeat for multiple Location types.
- Satellite Location: Click the box if this is a satellite Location.
- Primary Location: Click the box if this is a primary Location (note**: You cannot click both a satellite and primary Location).
- Min grade*: Click within the dropdown menu to select the minimum grade level at this Location.
- Max grade*: Click within the dropdown menu to select the maximum grade level at this Location.
- Campus type: Click within the dropdown menu to select the campus type at this Location.
- Grade type: Click within the dropdown menu to select the grade type at this Location.
 : Click this button to add another row of data containing another campus type and grade type.
 : Click this button to delete the campus type and grade type information in that row.
Click the save button. The Location will be active by default.
Add a new Location asset
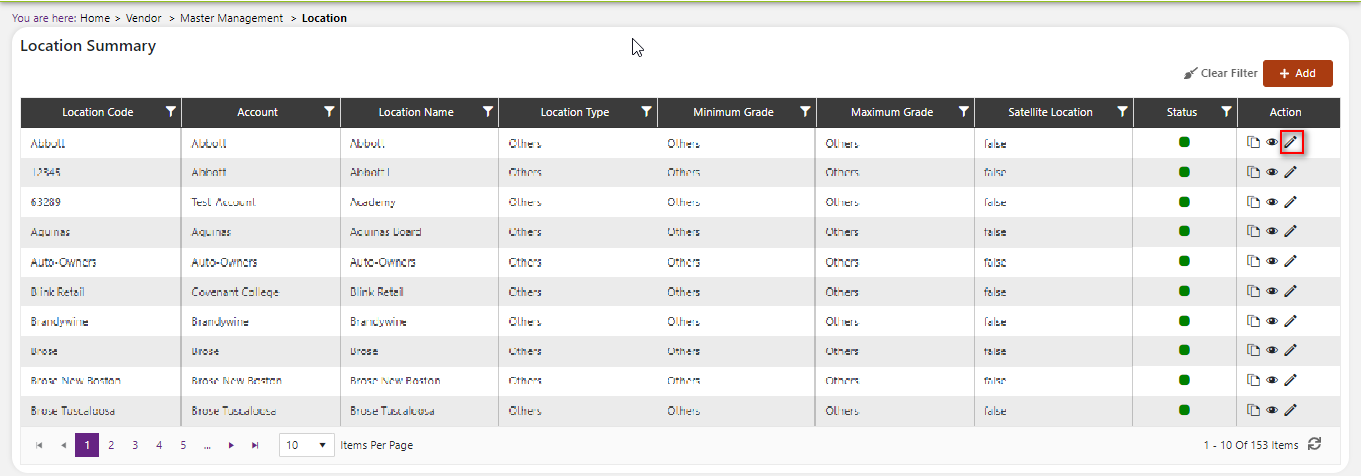
Click on Configuration on the main navigation menu. Locate Master and click on it.
A new screen appears which shows the list of all the core master tables. Locate the one which says Location and click on it.

This will open a screen where you can see all of the active and inactive Locations which are setup for your company.
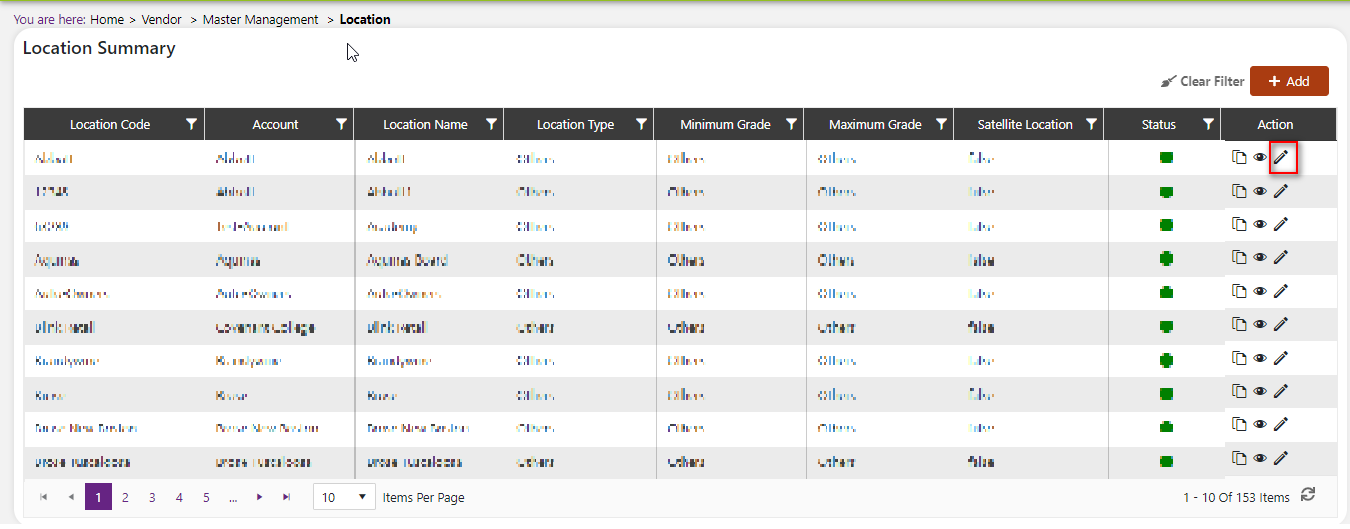
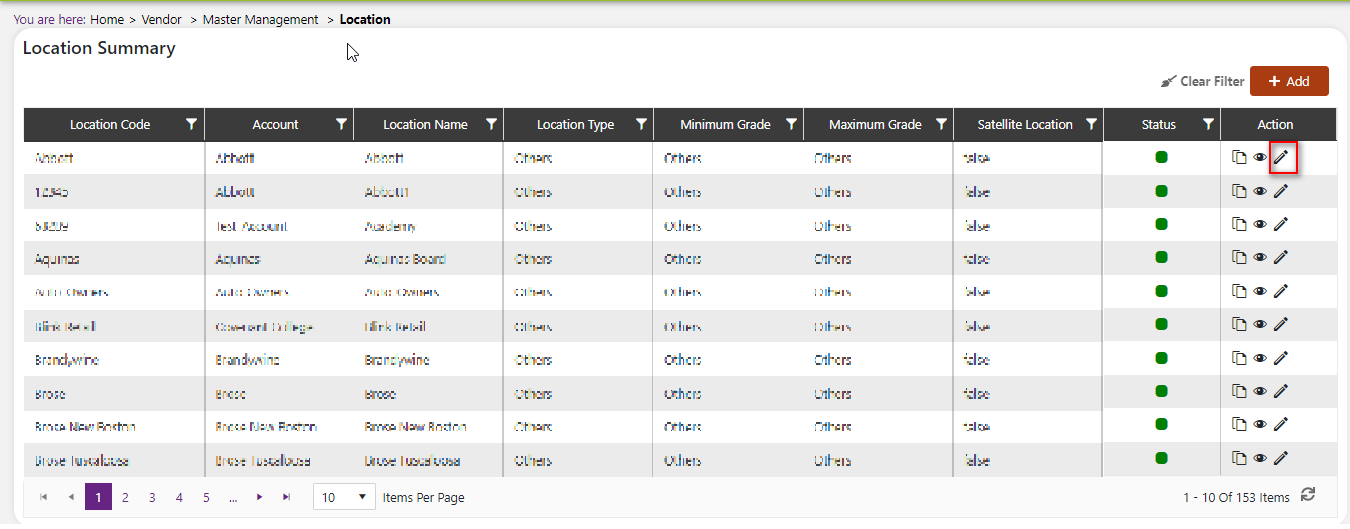
Click on the pencil icon next to the Location that you would like to modify.

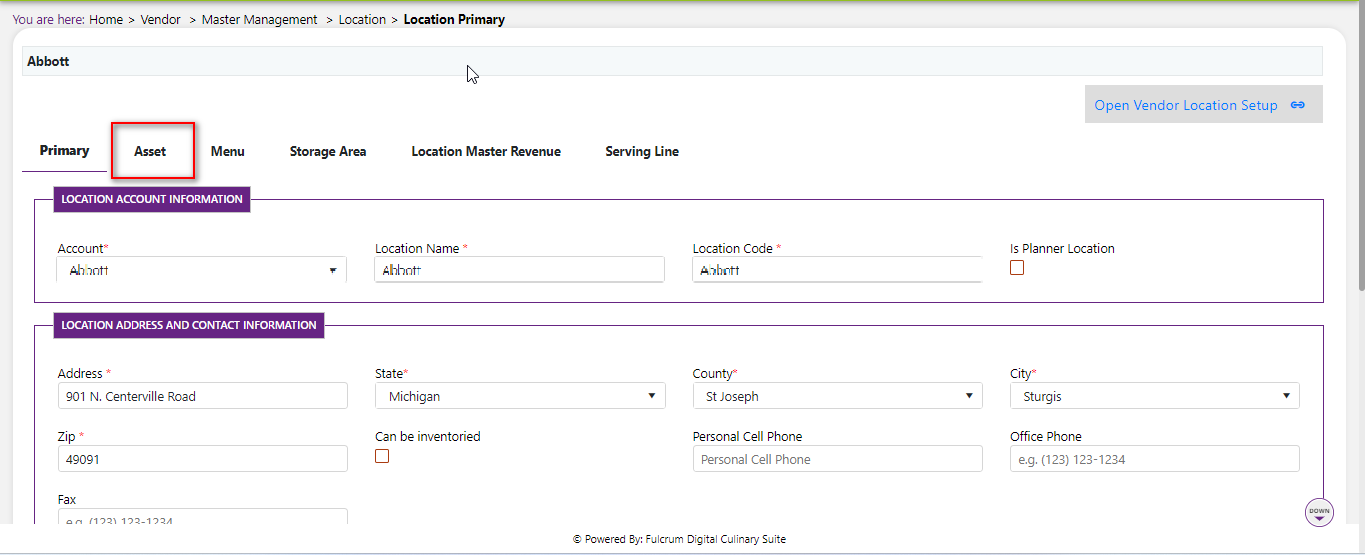
Click the asset tab on the top of left of the screen.
Click the add button on the top right side of the screen.
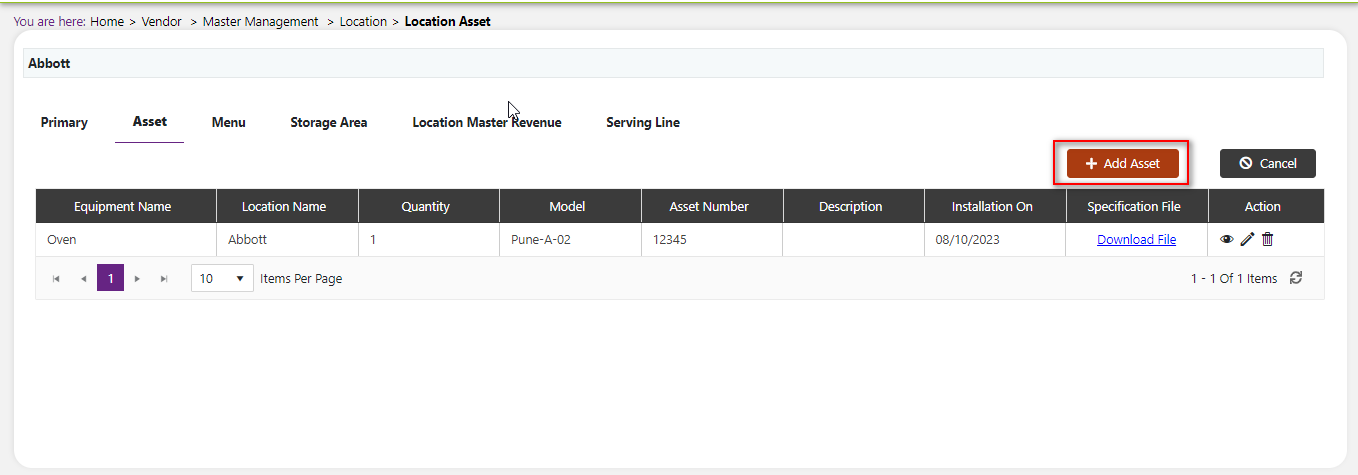
The system will open a popup screen in which you can fill in the following fields
NoteMandatory fields are indicated by the * next to the name
- Equipment name*: Click the dropdown arrow to choose an equipment piece from the generated list.
- Quantity*: Type in a number or click the arrows up or down to increase or decrease the quantity size.
- Asset number*: Provide the asset number for this Location here.
- Description: Provide the description of the asset here.
- Status*: Click the dropdown arrow to choose either “inactive” Or “active” For this Location asset.
- Model*: Provide the model of this equipment here. The model number must be at least 5 characters.
- Installed on: Provide a date by either typing in a long date or clicking the calendar icon.
- Specification: Click within the “upload file” Icon to look up a supporting file on your machine. Please note:- only files with extension .jpg, bmp, png, gif, doc, docx, pdf, xls, xlsx, pub, ppt, pptx are allowed.

Click the save button.
Add a new Location menu
The Location menu subfield sets up the ability for Locations to be put on menus. Note: This is simply setting up the ability for this Location to be menued and not actually creating a menu for this Location.
Click on Configuration on the main navigation menu. Locate Master and click on it.
A new screen appears which shows the list of all the core master tables. Locate the one which says Location and click on it.

This will open a screen where you can see all of the active and inactive Locations which are setup for your company.

Click on the pencil icon next to the Location that you would like to modify.
Click the Location menu tab on the top of left of the screen.
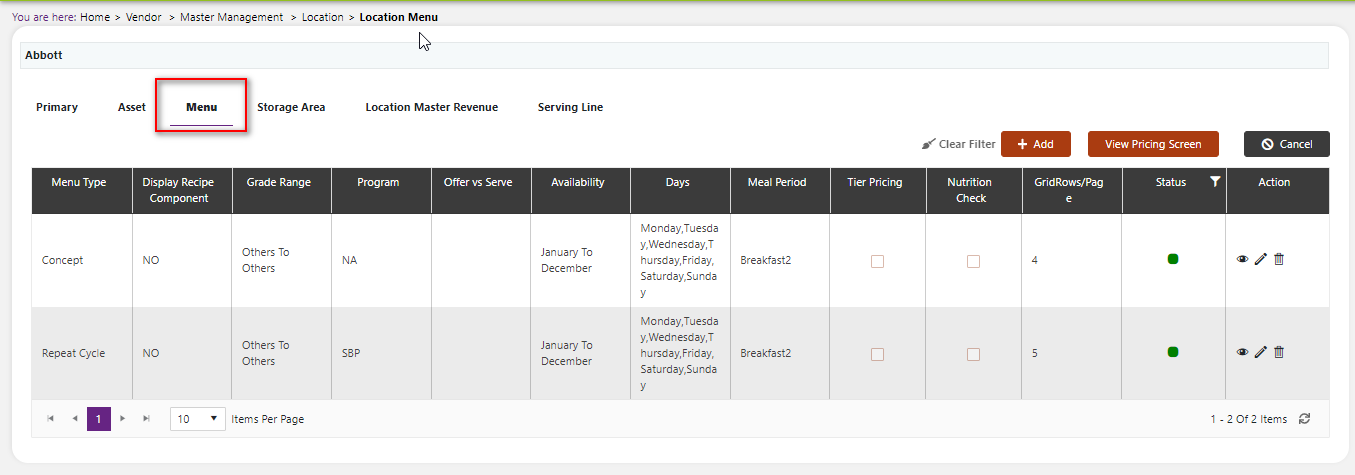
Click the add button on the top right side of the screen.
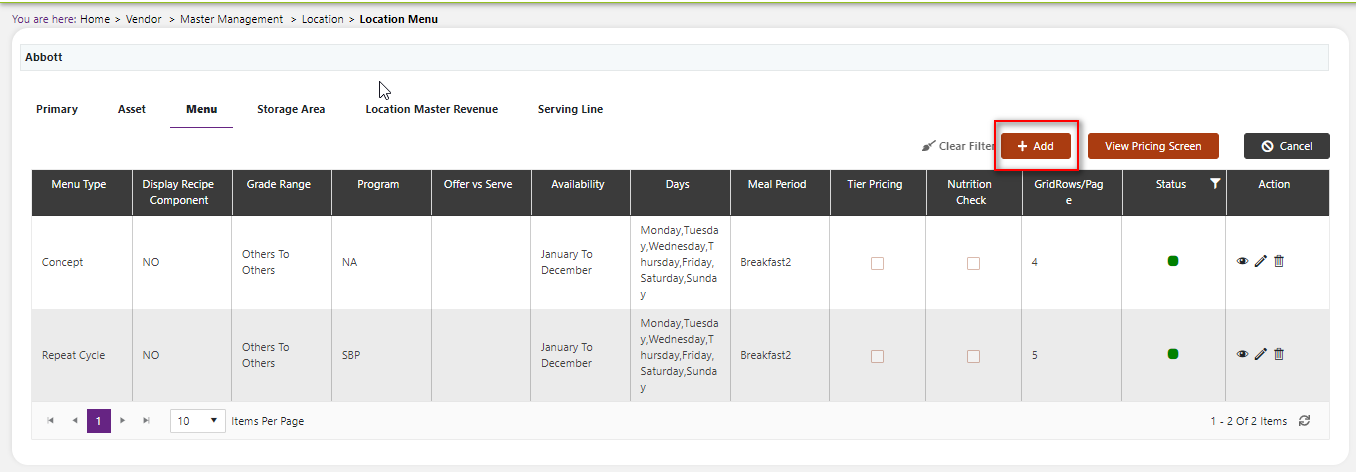
The system will open a popup screen in which you can fill in the following fields
NoteMandatory fields are indicated by the * next to the name
- Alt menu name: Provide the alternative menu name here.
- Menu type*: Click the dropdown arrow to choose a menu type**: Repeat cycle, concept, monthly
- Display recipe component: Click the dropdown arrow to choose either “yes” Or “no” For whether you would like to display the recipe content when a recipe is added to the menu for this Location on a menu.
- Program*: Click the dropdown arrow to choose from a list of program types in your software.
- Offer vs. Serve: Click the dropdown arrow to choose whether the food is either offered or served.
- Grade range*: Click on the dropdown arrow in the left textbox to choose the minimum grade. Click on the dropdown arrow in the right textbox to choose the maximum grade.
- Availability*: Click on the dropdown arrow in the left textbox to choose the starting month this menu will be available at this Location. Click on the dropdown arrow in the right textbox to choose the month this menu will be available until at this Location.
- Gridrows/page*: Type in a number or click the arrows up or down to increase or decrease the gridrows per page your menu will have.
- Meal period*: Click on the dropdown arrow in the textbox to choose one of the meal periods from the list provided.
- Days*: Click on the textbox to see a dropdown menu and choose from a list of days. Repeat for the amount of days you would like to see this Location menu.
- Nutrition check: Click within this box to confirm the nutrition check.
- Can be used for suggested menu: Click within this box to confirm that this menu can be used as a suggested menu.
Click the save button.
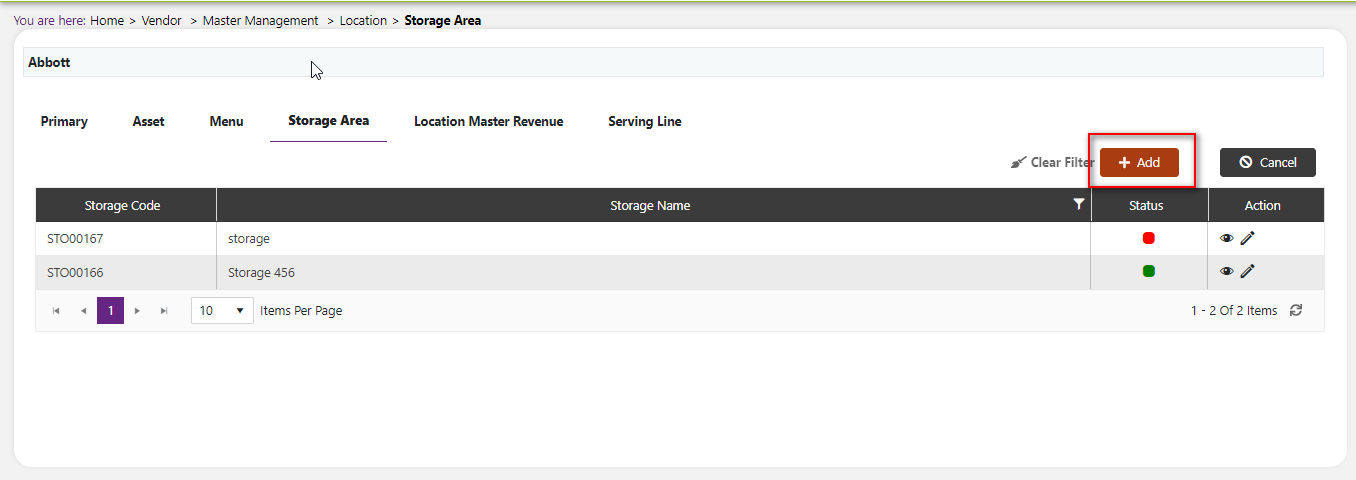
Add a new Location storage area
Our system has the ability to capture inventory in real-time. In order to get the best out of our software if you are using the inventory module, we recommend setting up storage areas to keep track of where each item is within your facilities. Storage areas can be created in this section and are managed by Location.
Click on Configuration on the main navigation menu. Locate Master and click on it.

A new screen appears which shows the list of all the core master tables. Locate the one which says Location and click on it.
This will open a screen where you can see all of the active and inactive Locations which are setup for your company.
Click on the pencil icon next to the Location that you would like to modify.
Click the storage area tab on the top of left of the screen.

Click the add button on the top right side of the screen.
The system will open a popup screen in which you can fill in the following fields
NoteMandatory fields are indicated by the * next to the name
- Storage name*: Provide a name for this storage area.
- Storage code: (note**: This code is automatically generated. You cannot input your own code).
Click the save button.
Add a new Location master revenue
Click on Configuration on the main navigation menu. Locate Master and click on it.

A new screen appears which shows the list of all the core master tables. Locate the one which says Location and click on it.

This will open a screen where you can see all of the active and inactive Locations which are setup for your company.

Click on the pencil icon next to the Location that you would like to modify.
Click the master revenue tab on the top of left of the screen.
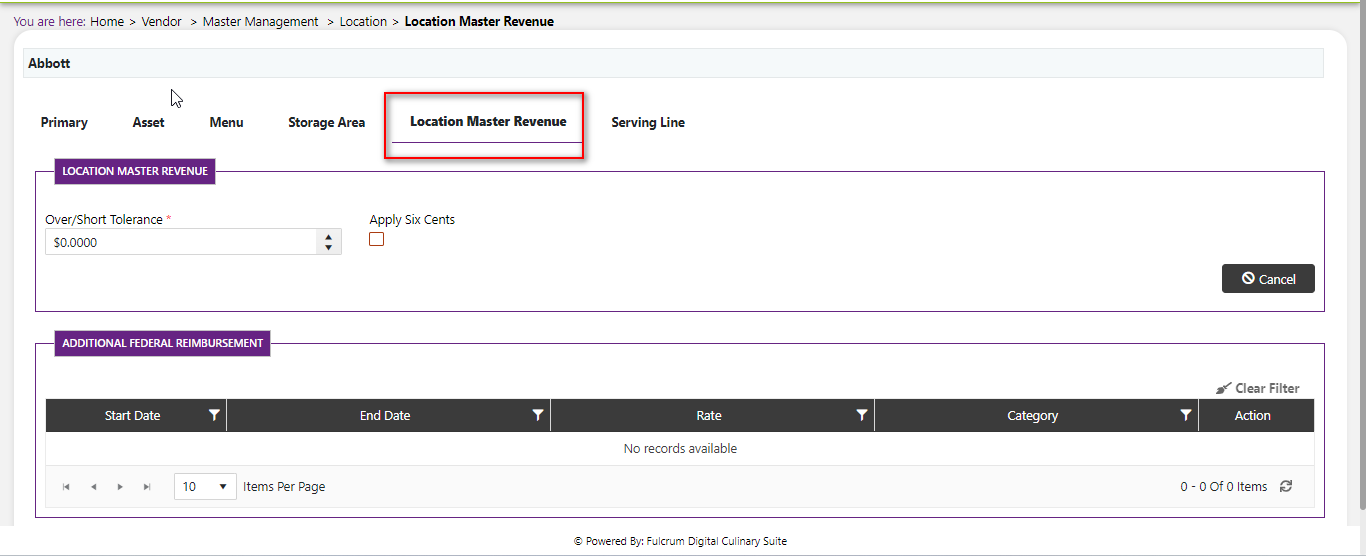
After clicking on this tab, you will see a field that says “over/short tolerance”. Click within the textbox to input a number or click on the up or down arrow to increase or decrease the numeric value. Click the “apply six cents” Checkbox to allow you to tolerate an additional six cents on this particular Location’s revenue over/short tolerance.
To keep track of and add additional federal reimbursement, click the add button on the right side of the screen.
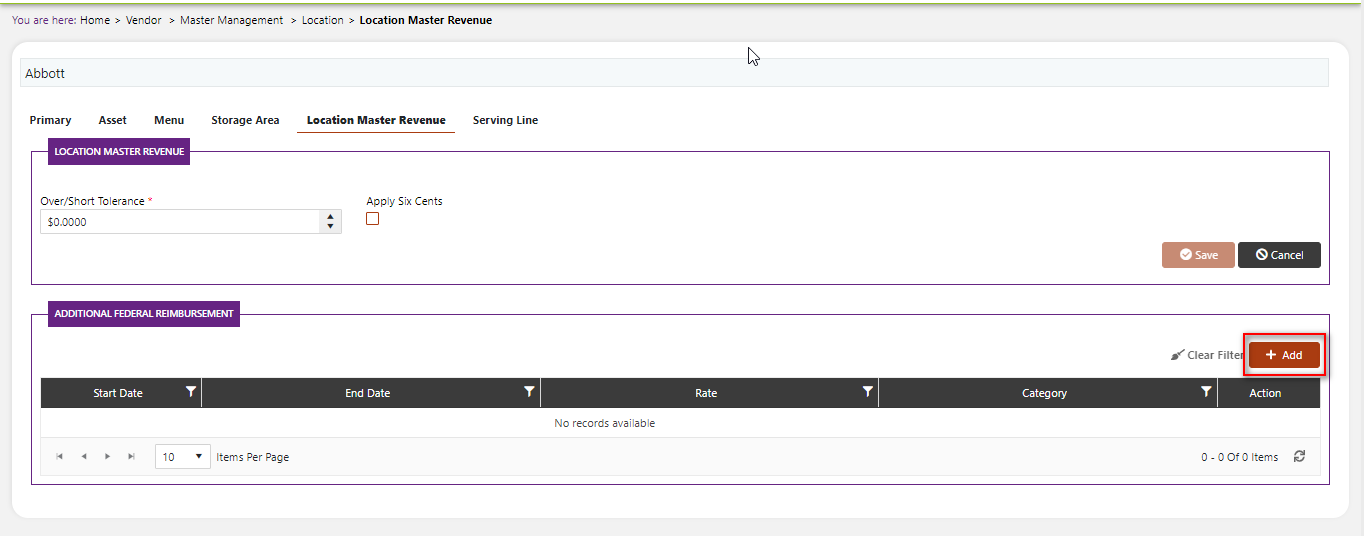
The system will open a popup screen in which you can fill in the following fields
NoteMandatory fields are indicated by the * next to the name
- Start date*: Click within the text box to type in a date in the long date form or click the calendar to select a date from the popup calendar.
- End date*: Click within the text box to type in a date in the long date form or click the calendar to select a date from the popup calendar.
- Rate*: Click within the textbox to type in a numeric value or click the up or down arrow to increase or decrease the value.
- Category-charge type*: Please select from the dropdown menu the category-charge type that you inputted in the “school programs and prices” Page.
Click the save button.
Add a new Location server line
Click on Configuration on the main navigation menu. Locate Master and click on it.
A new screen appears which shows the list of all the core master tables. Locate the one which says Location and click on it.

This will open a screen where you can see all of the active and inactive Locations which are setup for your company.
Click on the pencil icon next to the Location that you would like to modify.
Click on the serving line tab in the middle of the screen.
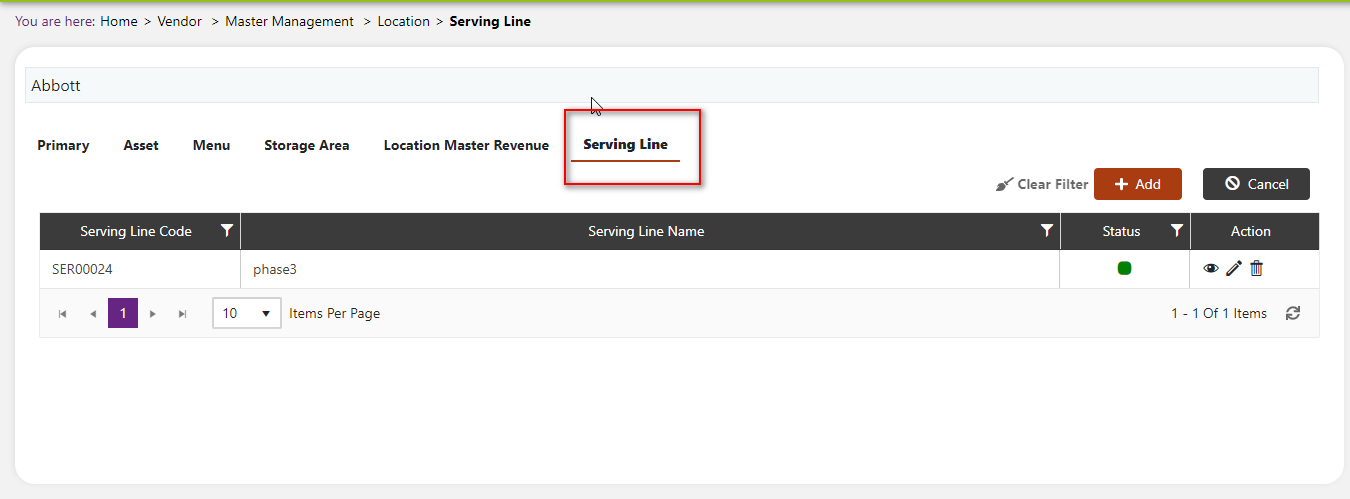
Click the add button on the right side of the screen.

The system will open a popup screen in which you can fill in the following fields
NoteMandatory fields are indicated by the * next to the name
- Serving line name*: Provide the name of the serving line at this Location.
- Serving line code: (note**: This number is automatically generated and cannot be changed).
Click the save button.
Modify or change status of Location (and Location subfields)
Modify Location (and subfields)
Click on the pencil icon next to the field or subfield that you would like to modify.
You can only make some changes to the Location data if it is currently referenced in the system. If there is a modification that is needed you may need to reach out to technical services to discuss the situation and they can direct you further.
Change status of Location (and subfields)
If you would like to change the status of an existing Location or Location subfield to active or inactive, you will first need to look at the “change status” Column where you will find either a grey or green shaded circle.

Click on the circle to either activate or deactivate the Location or Location subfield.
NoteIf the Location or Location subfield is already mapped in the system, you cannot deactivate the Location or Location subfield until you unmap it everywhere in your system. If this kind of modification is needed you may need to reach out to technical services to discuss the situation and they can direct you further
You will be presented with a menu where you will be asked if you want to activate or deactivate the specified Location or Location subfield.


Click yes to save your changes.