Account
What is Account?
Account is used to capture key information about businesses that your company runs. By setting up account information, you can then setup locations, associate vendors, and manage account assets and revenue information.
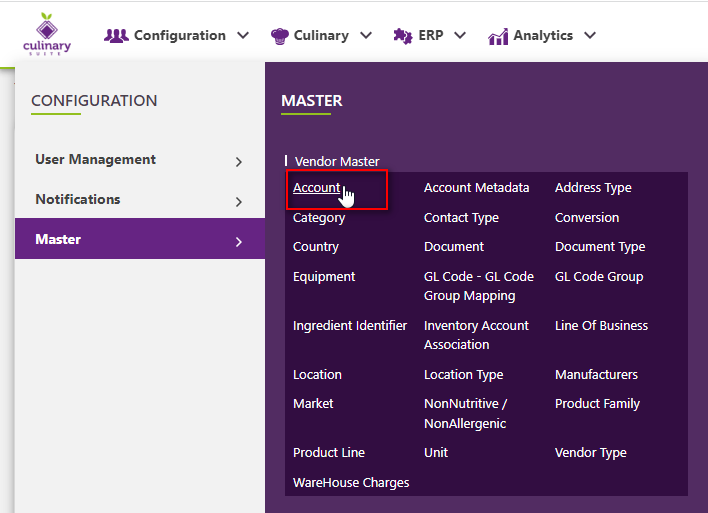
Navigate to Account
Click on Configuration on the main navigation menu. Locate Master and click on it.

A new screen appears which shows the list of all the core master tables. Locate the one which says account and click on it.
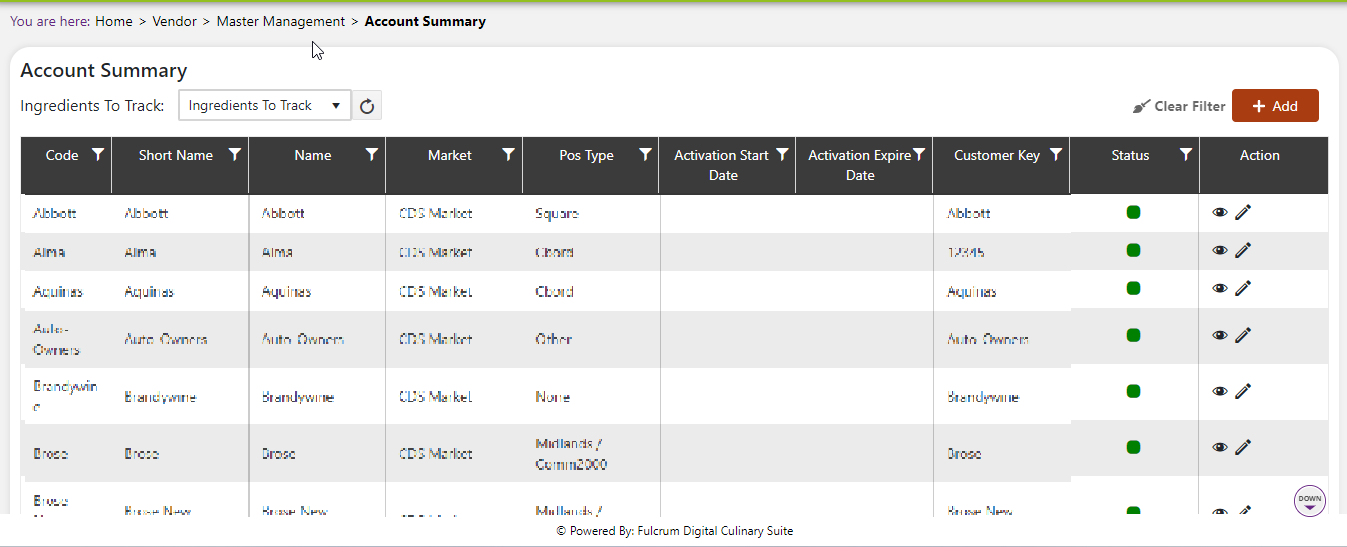
This will open a screen where you can see all of the active and inactive accounts which are setup for your company.
Add a new Acoount
Click the Add button on the top right side of the screen.
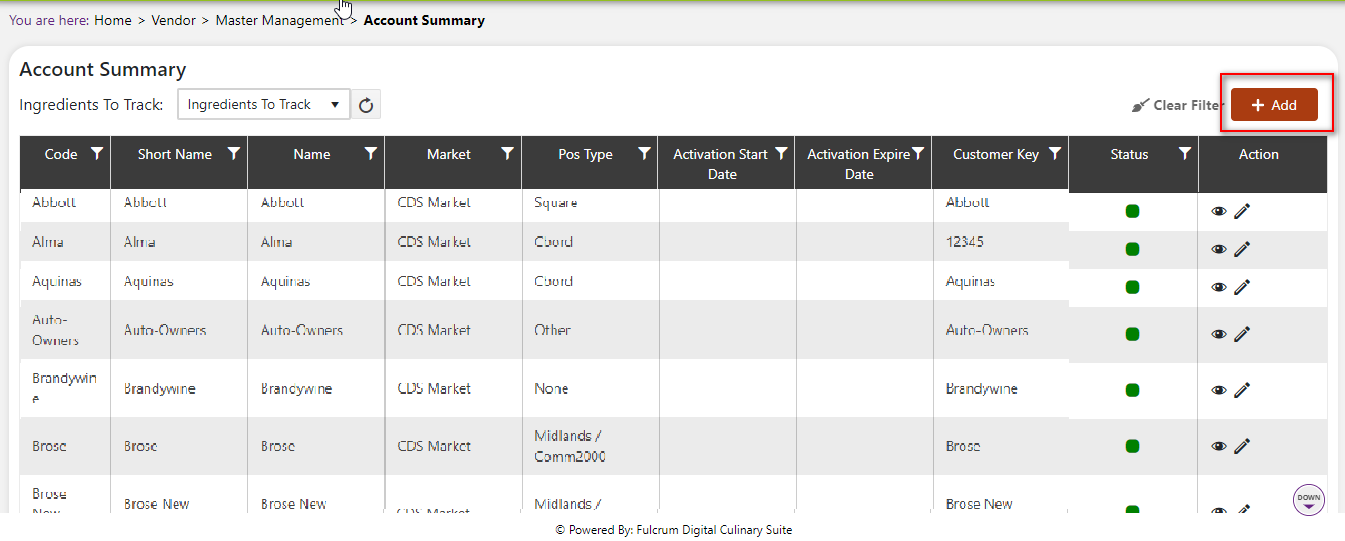
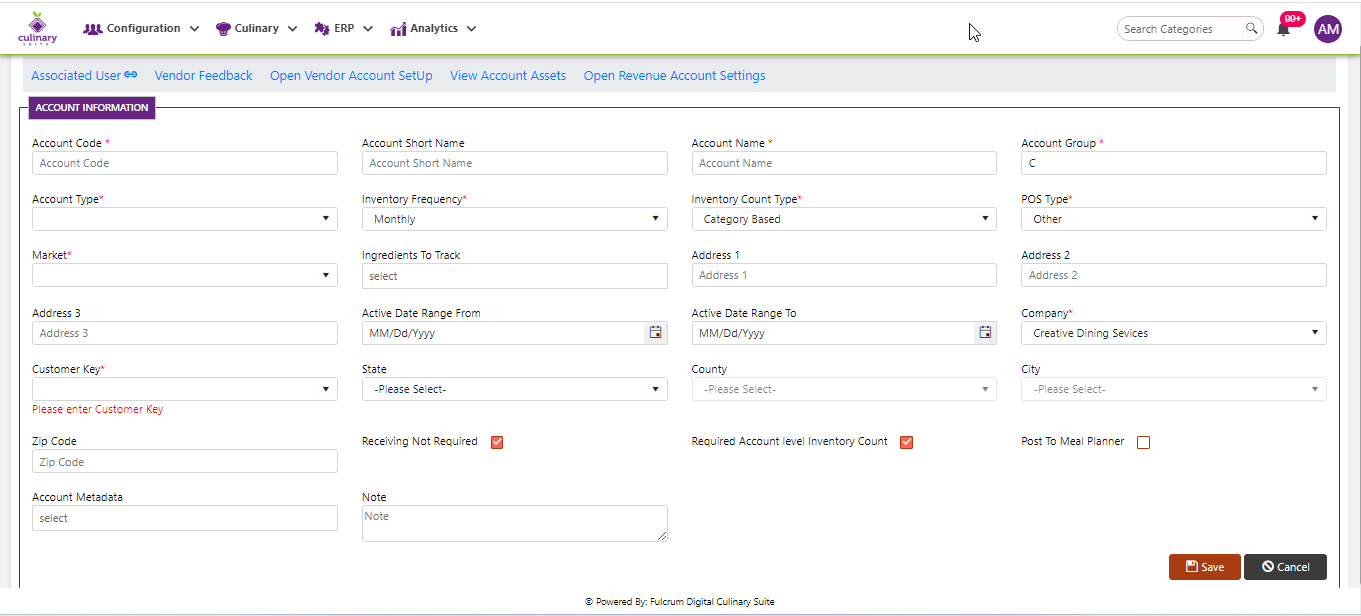
The system will open a popup screen in which you can fill in the following fields
NoteMandatory fields are indicated by the * next to the name
- Account code*: Provide the account code here.
- Account name*: Provide the name of the account here.
- Account group*: Provide the account group here.
- Account short name: Provide a nickname for the account.
- Account type*: Choose an account type from the dropdown menu.
- Inventory frequency*: Choose a frequency from the dropdown menu.
- Pos type*: Choose a pos type from the dropdown menu.
- Market*: Choose a market from the dropdown menu.
- Ingredients to track: Choose an ingredient from the dropdown menu. Click within the same textbox to choose another ingredient.
- Active date range: Provide a date range by either typing in a long date or clicking the calendar icon.
- Company*: Choose a company from the dropdown menu.
- Customer key*: Provide a customer key here.
- Required level of inventory count: Check the box if you have a required level of inventory. Ignore if you do not have a required level of inventory.
- Address: Provide the street address for the account here. If there are multiple addresses, use address 2 and address 3.
- State: Indicate the state where the account is located.
- County: Indicate the county where the account is located.
- City: Indicate the city where the account is located.
- Zip code: Indicate the zip code where the account is located.
- Receiving not required: Check the box if receiving is not required.
- Post to meal planner: Check the box if you would like this information to be posted on meal planner.
- Account metadata: If you have any account metadata, please enter it here.
- Note: Provide any notes on the account here.
Click the save button. The account will be active by default.
Modify or change status of Account
Modify Account
Click on the pencil icon next to the account that you would like to modify.

You can only make some changes to the account data if it is currently referenced in the system. If there is a modification that is needed you may need to reach out to technical services to discuss the situation and they can direct you further.
Change status of Account
If you would like to change the status of an existing account to active or inactive, you will first need to look at the “change status” Column where you will find either a grey or green shaded circle.

Click on the circle to either activate or deactivate the account.
NoteIf the account is already mapped in the system, you cannot deactivate the account until you unmap it everywhere in your system. If this kind of modification is needed you may need to reach out to technical services to discuss the situation and they can direct you further
You will be presented with a menu where you will be asked if you want to activate or deactivate the specified account.


Click yes to save your changes.