Production Records
Printing Production Records
You can print production records anytime (prior to service, during or after completing entry). When a menu is created production records are generated automatically through a scheduled job that runs each night (frequency of this job is configurable). If the production record for a specific day exists already, and changes are made to the menu for that day, the data on the production records will automatically be updated (you do not need to wait for the job to run). The exceptions to this are if a new day is added to the menu (which did not previously contain items) or a new concept is added to a menu (which did not previously exist). In these two cases, the scheduled job will have to run in order for you to view the production records. Please note: You can generate a production record manually (without running a job) by accessing them through the Production Record Entry screen.
There are two types of production records that the system will generate depending on the type of menu that you are using. If you are using a Monthly menu, the system will generate one page per location/meal period/day (with a separate page for food bars – if applicable). Concept menus will generate one page per concept/location/meal period/day (food bars items will be displayed on the same page as the concept that they are associated to).
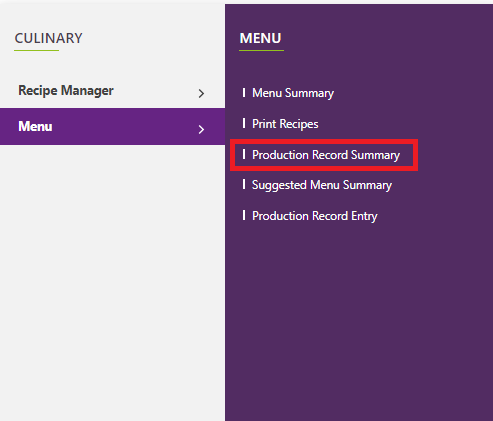
- Hover over Menu icon on the navigation menu on the main screen. Select Menu > Production Record Summary
Choose the date range for which you would like to produce production records and click Search. Use the filter options on the screen to find the location(s) to print production records for.
Click the checkbox next to the individual production records that you want to print or click the Select checkbox on the top of the column to select all of the displayed production records.
Click the Print button below the grid to generate the file.
A Zip file will download which will contain a PDF of the selected production records. Please note: One PDF file will be generated containing pages with all of the selected data.
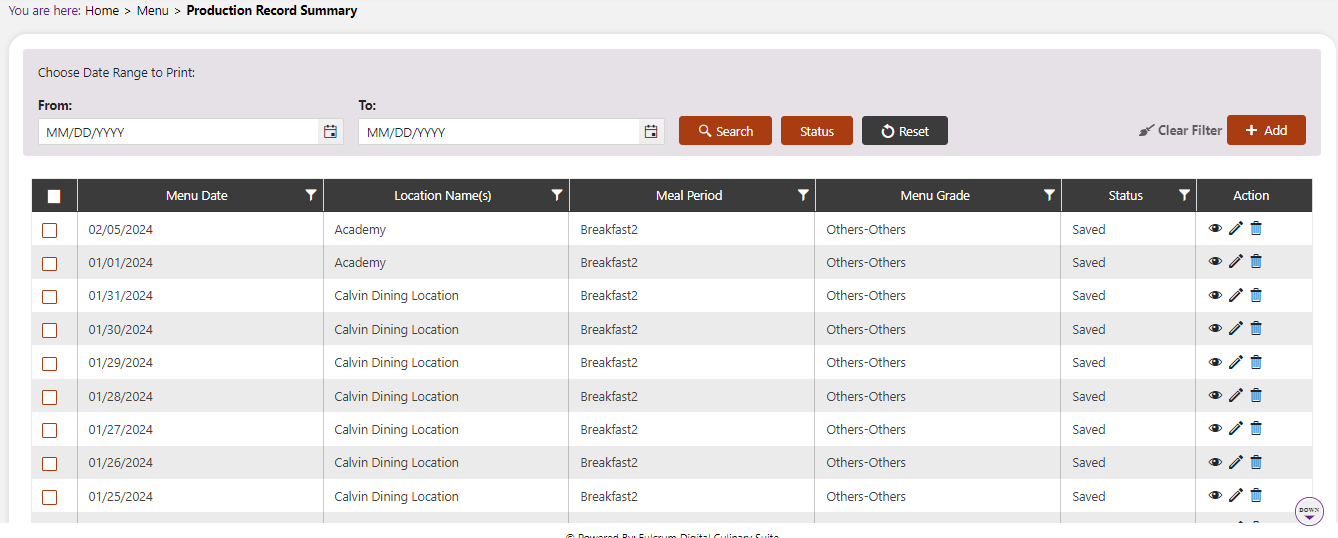
You have the ability to enter data for production records from this screen (by clicking on the pencil icon next to the record).
You can add a new production record by clicking on the Add button on the top right side of the screen.
Setup Serving Line
Use this function to set up names of the serving lines for each location accessed on the mobile device (or through the web) for which you want to enter data by serving line.
Please note this is not mandatory. You will still be able to enter production records without setting this up.
You can name service lines by equipment (e.g. Steam Table, Cold Station, etc.)
Hover over Vendor icon on the navigation menu on the main screen. Select Master Management > Location
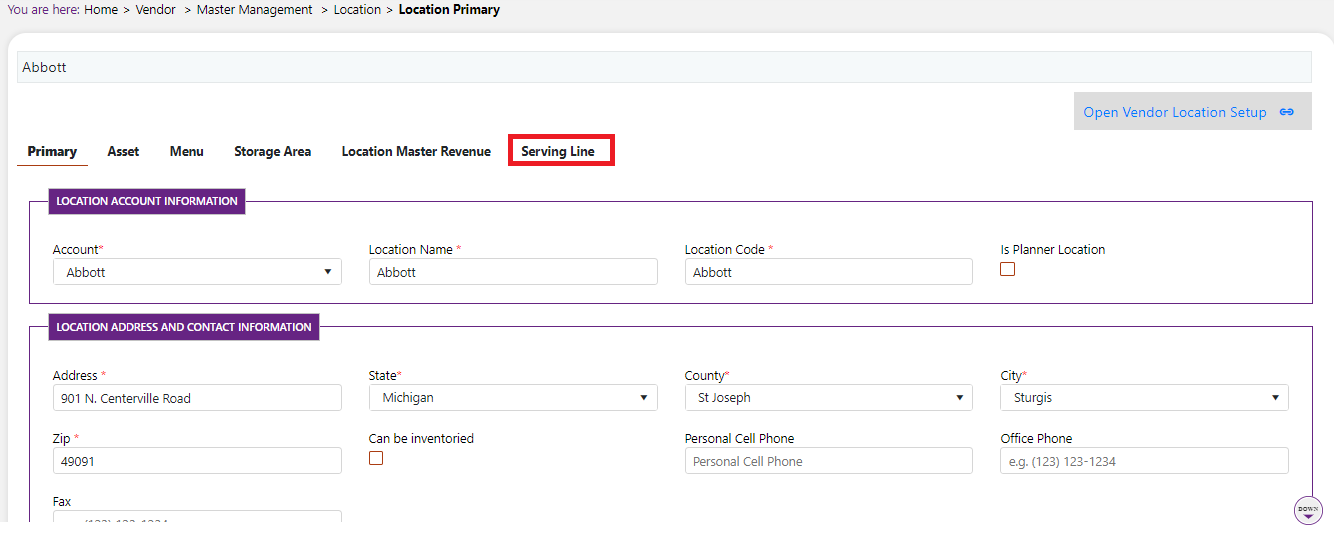
On the Location Summary screen, click the Pencil icon next to the location to edit.
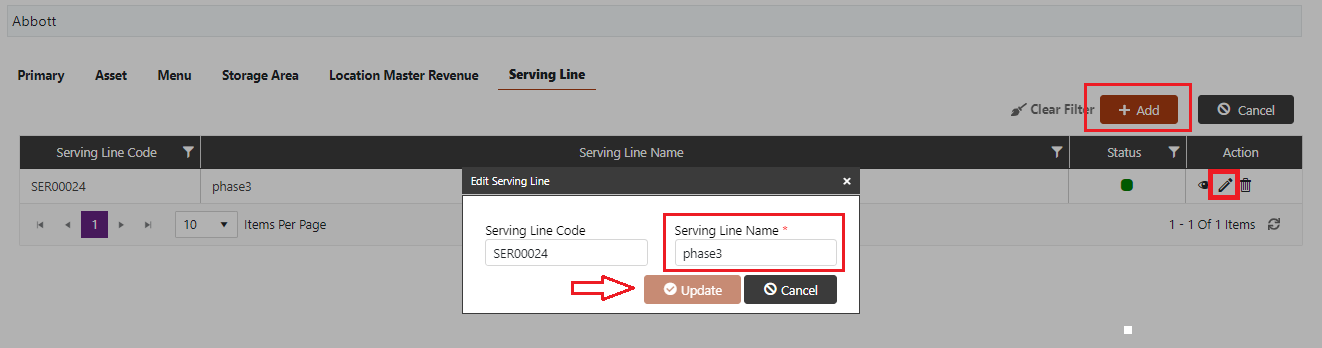
The Location Primary screen appears. Click on the Serving Line tab.
- On the Serving Line popup screen, click the Add button.
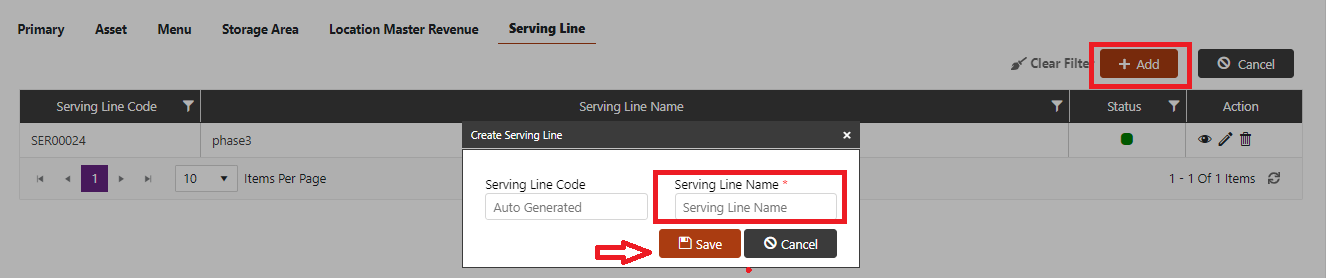
In the popup window, enter the desired serving line name and click Save
Repeat this process until serving lines are entered
You can edit serving line names, by clicking on the pencil and typing a new name over the old one. Click Update.
Enter Production Records: Web Version
You can enter Production Records for the current day or any prior day as long as the production record for that day has not been completed.
Once a record is completed, authorized users may edit the record for up to four days. After the fourth day, the record cannot be edited.
The menu must be created before you can enter production records.
This task can also be completed on the mobile device.
You can also perform this task from the Production Record Summary screen by locating the appropriate record and clicking the pencil icon next to it to edit.
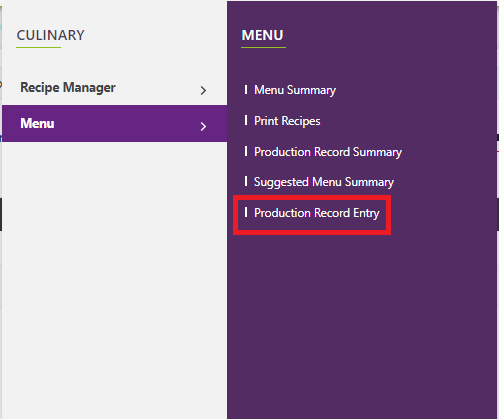
- On the CS homepage, hover over the Menu icon and click on Production Record Entry option from the drop down menu
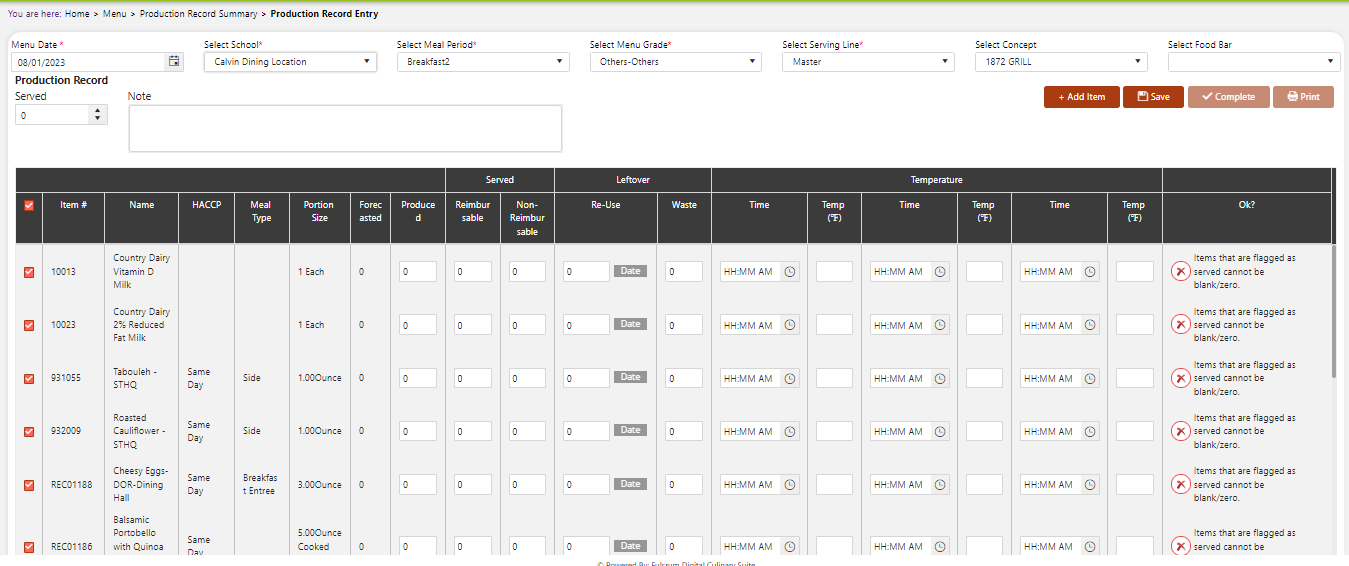
On the Production Record Entry screen:
Select Menu Date
Select School
Select Meal Period
Select Menu Grade
Select a Serving Line
Note“Master” is all serving lines combined

Entering Production Records: Overview
Data can be entered directly on the Master for all serving lines, or entered by serving line. The values entered here will be displayed on the printout.
Select the serving line if you want to enter data for a particular serving line, and be sure to save your data before switching to another serving line. Data entered on multiple serving lines and will add together and roll up to the master record.
You can also filter the production record by food bar (if there is a food bar on the menu) and enter the data for the items that are specific to the food bar.
About the Master Record
The Master record will contain all of the menu items and totals entered (either from serving lines or entered directly in the master record).
At the top of the screen, you will see the total meals served for students and adults. To get this number, CS is adding together the Reimbursable Served Quantity entered for all entrees on the menu PLUS the total student meals from the food bar. You can change this number if desired.
- To get the number of total meals served for adults (i.e. non-reimbursable meals), the system is adding together the Non-Reimbursable Served quantity entered for all of the entrees on the menu PLUS the total adult meals from the food bar. You can change this number if desired.
About Entering Production Records For Menus
Multiple Serving Lines at the Same School
You can enter production information for each serving line. The system will add the produced, served, leftover, and waste quantities together and display them (with the times and temperatures) on the master.
Time and Temp data will be imported from each serving line and displayed on the master.
SAVE entered data before switching to a different serving line.
Correcting Entries
Select the serving line and make the correction. The change will roll up into the master.
You can also make the change directly on the master record—but once you change the master record, the system will no longer respond to changes made on any individual serving line.
Food Bars
Select the food bar from the food bar drop-down menu to see a display of all of the items associated to the food bar.
Enter the total number of meals served from the food bar. This will be added to the total served calculation in the master record.
Enter production information on the items and the system will roll them up into the master.
If you are offering a food bar on multiple serving lines:
Choose the serving line from the serving line drop-down menu
Choose the food bar from the food bar drop-down menu
Enter production data

To COMPLETE the production record for the Food Bar:
Navigate to the Master serving line (make sure that the food bar drop down is blank so you are viewing all of the info on the production record).
If there are no errors on the production record, you will see the Complete button at the top of the screen. Clicking the Complete button will close the record and deduct the items from inventory. THIS IS CRITICAL (otherwise the suggested quantities will be out of sync).
If the Complete button is not enabled, you have errors on the production record which need to be fixed. Scroll down the list of records and look for lines with an error message in the Ok column.
About Entering Production Records For Concept Menus
If you are NOT managing concepts on multiple serving lines at the school, leave the serving line selection as “Master” and select the concept from the Concept drop down. This will filter the list of items that are associated to the selected concept. You can enter the production data for each concept and the information will roll up to the master.
If you have a food bar on the Concept menu, you can select the food bar from the food bar drop-down and enter the production information accordingly.
Please note: at the top of the food bar screen there are fields for the number of student meals and the number of adult (i.e. non-reimbursable) meals served from the food bar. You must fill this in so that the total served number of the production record is correct.
To correct an error in the quantities entered for an item on a concept or food bar, click the concept or food bar drop down to edit the quantity; clicking Save will update the master. You can also choose to edit the quantity on the master record directly. If you edit the master, the system takes this as the master change and will no longer be updated by changes made to that item on the concept or food bar (it can only be overwritten on the master).
Once everything is entered, make sure that your concept and food bar drop downs are blank to go to the master record. On this screen, you will see a list of all the items on the menu with the total quantities entered. At the top of the screen the system will display the total served quantity for students and the total served quantity for adults. To get the number of the total meals served for students, the system is adding together the Reimbursable Served quantity entered for all the entrees on the menu PLUS the total student meals from the food bar). You can change this number if desired. To get the number of total meals served for adults (i.e. non-reimbursable meals), the system is adding together the Non-Reimbursable Served quantity entered for all entrees on the menu PLUS the total adult meals from the food bar. You can change this number if desired.
To COMPLETE the production record: Navigate to the Master serving line (make sure that the food bar drop down is blank so that you are viewing all the info on the production record).
- If there are no errors on the production record, you will see the Complete button at the top of the screen. Clicking this button will close the record and deduct the items from inventory. THIS IS CRITICAL (otherwise the suggested quantities will be out of sync). If the Complete button is not enabled, you have errors on the production record which need to be fixed, scroll down the list of records and look for lines with an error message in the Ok column.
Managing Concepts on Multiple Serving Lines
If you ARE managing concepts on multiple serving lines at the school, you can select the serving line that you want to enter for from the Serving Line drop down and then select the concept or food bar that you want to enter information for. The system will sum up the quantities entered in each serving line/concept and display the total in the Master (i.e. final) production record. For Time and Temp the system will take the records with the latest time in each of the Time/Temp fields from all the serving lines and display them on the master.
Other steps are the same as above.
Production Record Entry Screen
Enter data directly on the master or select the serving line, food bar, or concept. Data entered will roll up to the master record. Enter the following information:
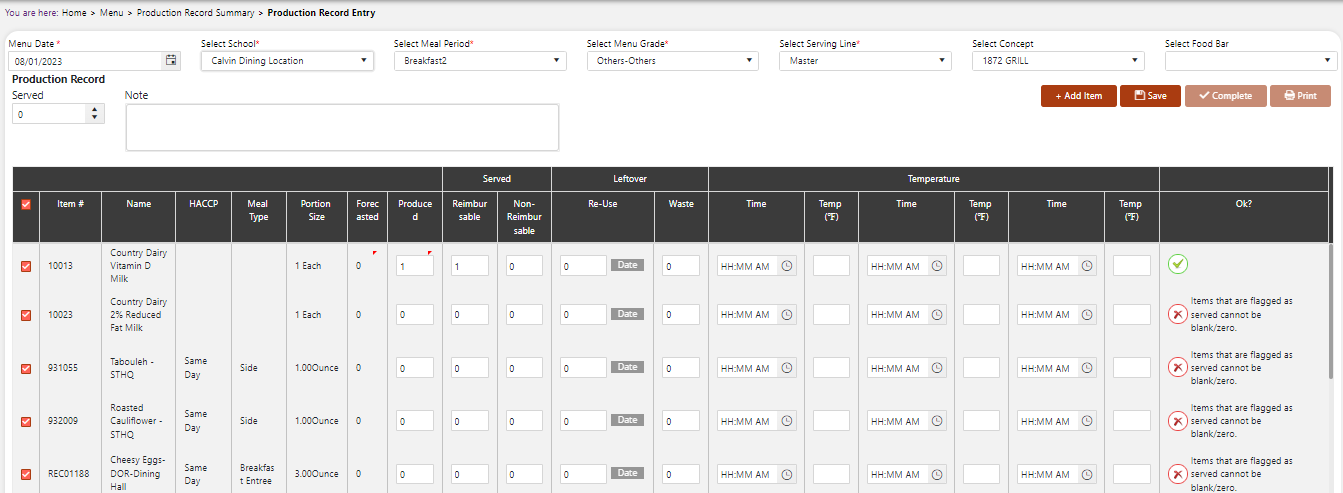
Enter Quantity produced in the Produced column
Tab to the next field
Enter Reimbursable Quantity served in the Reimbursable Quantity Served column
Enter the Non-reimbursable quantity served in the Non Reimbursable Quantity Served column
Enter Quantity that is leftover which will be reused on a future date
Click on the Change Date button to move this item to the production record of a future day
Enter the Quantity of waste which was thrown away
Select the time that the temperatures were taken in the time field
Enter the temperature
If an item is not being served, uncheck the Served checkbox, otherwise the system will return an error that the item is flagged as served but no quantity has been produced.
Repeat the process
Check the OK field
If an item is not being served, uncheck the Served checkbox. This will show the item as "crossed out" on the printout of the production record.
Click the Save button to save your work. You will receive a confirmation message.
When all Production Records are entered correctly, select the Complete button to complete the transaction The system will reduce the inventory at the location based on the quantities of ingredients used (as defined in the production records).
NoteErrors and Resolution
If there is an error, you will see the message, “Quantity served + Leftover cannot be less than the quantity produced.”
Ensure that the total quantity of all values is equal to the quantity entered in the Quantity Produced column
You can add an item by clicking on the add item button. A pop up menu will give you the option to search for product or recipe.
If you wish, select the Print button to print out the production record.
The printout will display the quantities, times and temps as they are displayed on the Master record. Items that do not have the Served checkbox selected will appear with a line through them to indicate that they were planned but not served.
You can print multiple production records by going to the Production Record Summary screen, select the date range that you want to view production records for (and/or use the filter options on the columns), click the checkbox next to those records which you want to print and click on the Print button.
Note4 Days for Edits to Production Records
For ALL types of production records, users have 4 days from the date that the record was “completed” to edit the record. After the 4 day period the completed production record can only be modified by users with appropriate access.