Add Menu Items Using Advanced Search
Use Advanced Search to find specific ingredients when you need to use, avoid specific allergens, etc.
Select an "empty" menu day on the monthly calendar. Click Advanced Search on the Menu Summary Screen.
The Advanced Search popup window appears. In this example, we are searching by main ingredient(s) and Items that do not have the selected allergen.
Scroll down and click search. Available items are listed alphabetically. Select the checkbox next to the items that you want to add. There are two add options (“Add Items to Main Grid” or “Add Items to Top Box”) which will be covered later in this section.
Advanced Search Options: Contains Component
Use the Contains Component section to select one or more ingredients that are contained within a recipe.
Clicking on the ADD button will open a list of all the Non-Government (items which are not flagged as government commodities on the product master) purchased ingredients that are on your order guide. You can select one or more of the ingredients from the popup screen.
Once you have selected the ingredients you can:
Search for recipes that contain ALL the selected ingredients OR
Search for recipes that contain at least ONE of the selected ingredients.
Advanced Search Options: Government
Clicking on the Government button will display a list the Government commodities that are on your order guide which you can use in combination with other ingredients and functions the same way as stated above.
Advanced Search Options: Exclude Ingredients to Track
Exclude Ingredients To Track refers to a special list of ingredients that you may want to avoid using (i.e. High Fructose Corn Syrup, MSG, etc.)
Advanced Search Options: Non-Nutritive/Non-Allergenic
Non-Nutritive/Non-Allergenic attribute refers to attributes of items that are not based on their nutritional or allergen content (i.e. Vegetarian, Non GMO, etc.)
Advanced Search Options: Recipes
Click the Select button next to Recipes to choose the variants you want to use.
Advanced Search Options: Cost Per Portion
Click on the Cost button to see the cost for all variations of the recipe that you can create. This will show the cost per portion for each combination of variants that are available to you so you can choose the most cost effective combination. Ingredients highlighted in yellow are missing a price and therefore not included in the cost per portion calculation. Items highlighted in red are also missing a price (because there is no vendor assigned to the account which has a price for this product). These will also not be included in the cost per portion calculation.
Click on the checkbox next to one or more items and can choose to either Add Items to Main Grid (which is the main menu details screen) OR
Associate Items to Entrée by clicking the box at the top of the menu details screen. Note: This is used for sides/condiments/beverages only.
Advanced Search Options: Other
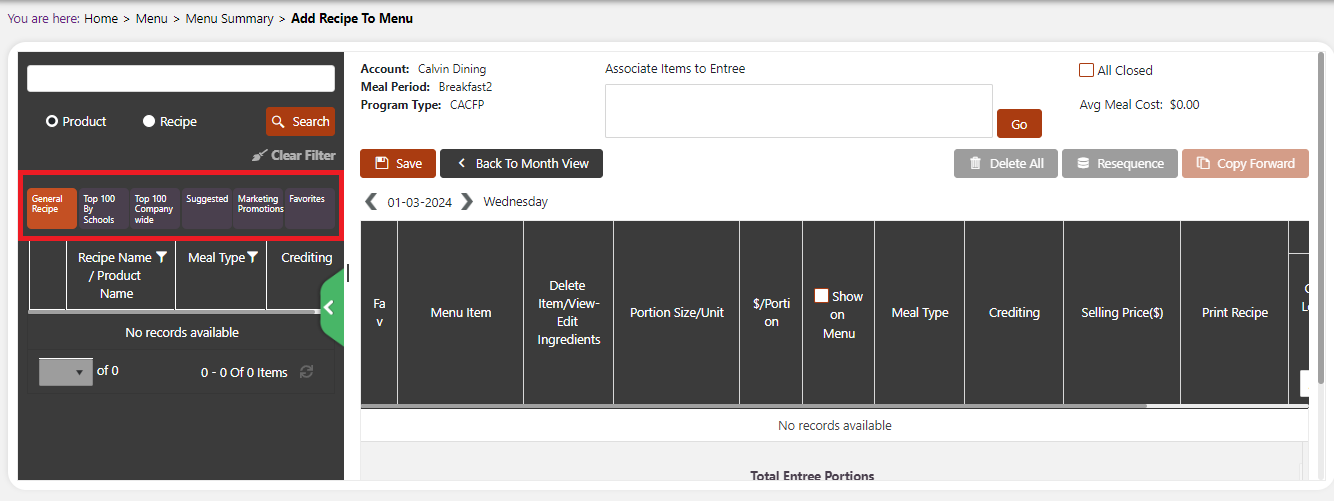
Other Advanced Searches are available on the left side of the menu summary screen:
General Recipe: Search all items or use key words.
Top 100 By schools: shows the top 100 items by frequency or sales for the specific locations on the menu. Frequency refers to the number of times an item is menued for the location(s). Sales refers to the items with the highest quantity served based on the production record data (for the selected location(s)).
Top 100 Company wide: shows the top 100 items by frequency, menued or sales throughout the entire line of business Frequency refers to the number of times an item is menued for locations in the entire company. Sales refers to the items with the highest quantity served based on the production record data (for the entire company).
Suggested: shows popular menu items that utilize commodities or other commitments assigned to the account
Marketing Promotion: shows items associated to promotions that are available on the selected date
Favorites: you can add items to your favorites by clicking on the star next to the item on the Menu Details screen. You can quickly access those favorite items by clicking on Favorites on the left side of the screen.
Group & Copy Menu Items
Associate Sides to Entrée
Use this transaction when the side/condiment/beverage is being offered ONLY with the associated entrée. This will impact how the traffic light & production record sees these items. (Items that are not associated to a specific entrée are creditable and considered available with every entrée.)
When associating sides, condiments or beverages with entrees, the forecast for the associated item will be automatically adjusted to be the same as the entrée it is associated to.
Search for a side to associate with the selected entree. Drag and drop the selected side into the box at the top of the screen. Click Go.
In the popup, select the entrée you would like to associate with the side. Click Apply. You will receive a confirmation message. The user also has the option of applying the association to the entrée for the entire menu.
Copy Specific Menu Items
You can copy specific menu items to specific calendar days, or all calendar days. You can select to include the copied items in the Forecast, but be sure to click the Save button on the Menu Details screen first so CS copies the correct information.
Click on Copy Forward at the top of the Menu detail screen.
Choose one or more items to copy to other days. Click on the item (check mark appears).
Select frequency.
If you would like to copy the forecast for these items, select the box. Leave blank if you do not want to copy the forecast.
Click Copy.
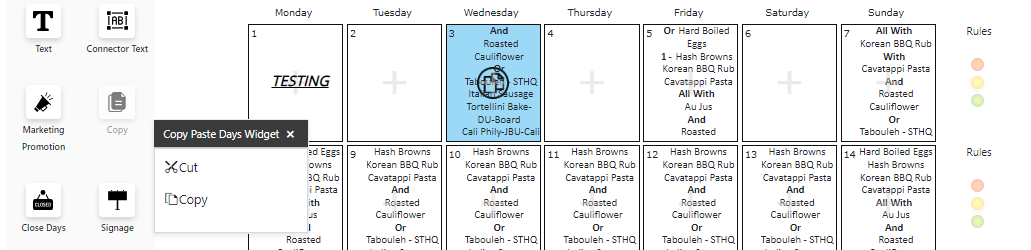
Cut/Copy/Paste Entire Menu Days
On the Menu screen, Click Copy on the left panel
Click on menu day or days you would like to copy. The selected days will be blue.
Choose "Copy" or "Cut" from the pop-out menu
Click the days you would like to select and click PASTE.
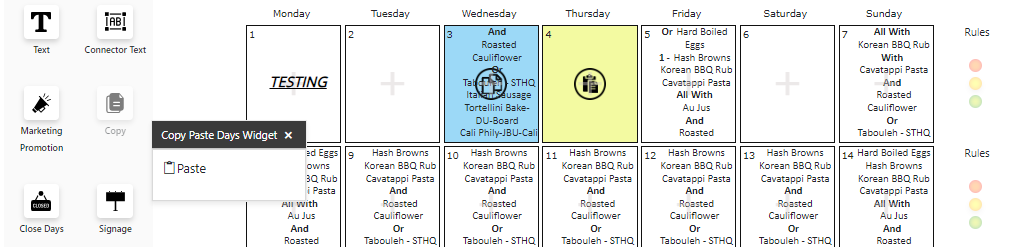
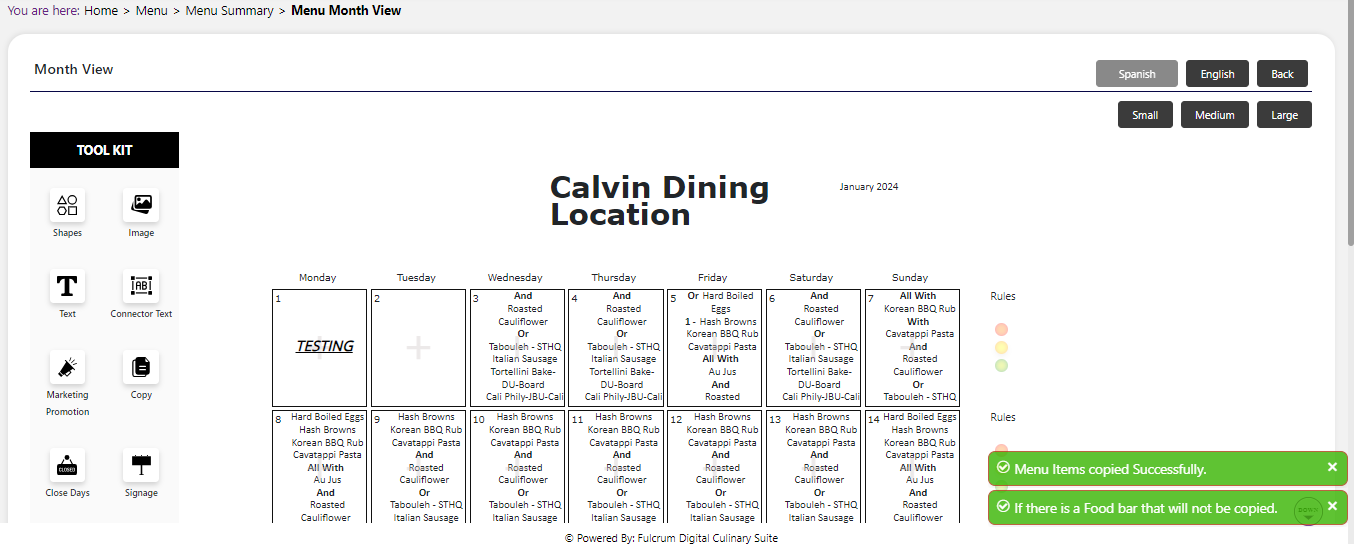
You will receive a confirmation message. Click on the menu for the pasted day to view the menu details.
Follow the same steps for Cut and Paste
Copy will leave the items on the original day and put them on the day to which they are pasted.
Cut will remove the items from the original day and paste them to the selected day.
All items (regardless of whether you have them selected to show on the menu) will be copied when copying/cutting and pasting.
If you have clicked the Copy option on the menu options pane by mistake, you can refresh the screen to exit the copy/paste mode.