Create a Food Bar
Food bars are made to order entrees. For example, a made-to-order sandwich can be made with any assortment of ingredients that are available, however the output is a sandwich entrée. Essentially these are entrees that can be built from a selection of individual ingredients. You will be able to utilize any of the products or recipes that are associated to the food bar (if they are available to your account).
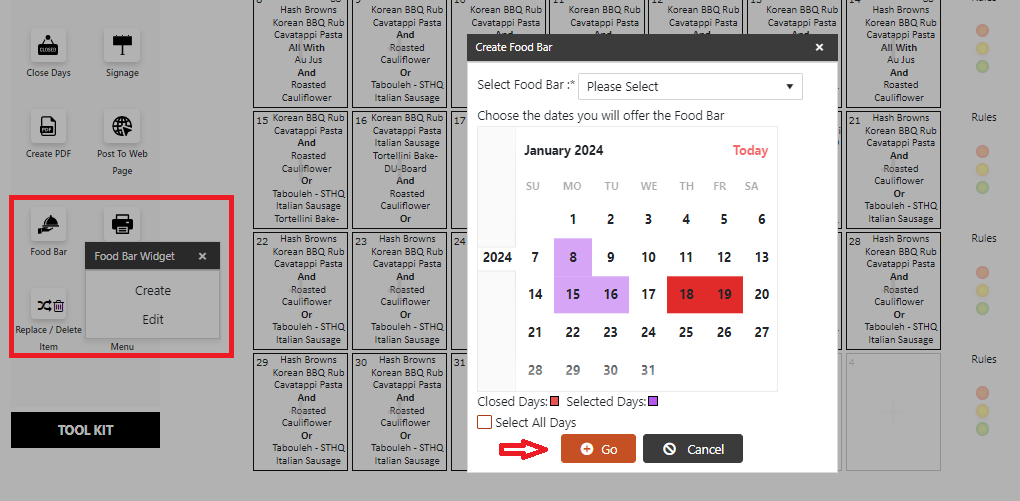
From the Main Menu screen, select the Food Bar button on the left panel. In the popup window:
Click the Create button to add a food bar menu for the first time.
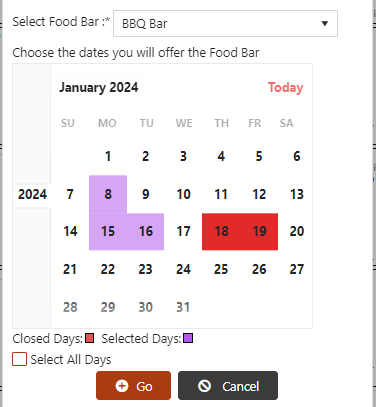
Select the food bar you want to add from the drop down menu
Choose the dates you will offer the Food Bar. Selected dates will be highlighted. You can also Select All Days by clicking on the box below the calendar.
Click Go.
On the Menu Details screen, click Search. Select and drag items over to the right side of the menu. If there is more than one ingredient, a pop-up window will appear. Select the desired item.
Add the Forecast and portions.
NoteThe ADP box at the top of the screen MUST be filled in for the number of entrees you expect to serve from the food bar for each location on the menu.
The portion forecasts are the number of portions that will be served of each item in the food bar.
CulinarySuite will assess the forecast entered for the Grain & Meat/Meat Alternate to the number of entrees forecasted for the food bar (all except for Salad Bar). The traffic lights reflect the assessment.
If you want the Food Bar to show on the menu, check the Show on Menu box in the upper right corner. Click the Save button. You will receive a confirmation message.
The items added, deleted, forecasted and variants selected, when all the days are selected (or when initially created) update all the days the food bar is offered.
Edit the Food Bar
You can edit the Food Bar to:
Add, edit, or delete items, forecasts and variants on a specific food bar day (applicable only to the selected day)
Assign the food bar to a new day
Change the show on the menu for one or more days
Edit the food bar data for all the days simultaneously
Adjust the forecast or ADP or both
To edit the food bar, go to the Month View and select the Food Bar button/Edit.
On the popup window, select the day you wish to edit and click Edit or Delete. You can edit all the days by clicking on the Edit All Days button. Note: Editing all days will show the items on the food bar that are common to all the days that the food bar exists on (so if you have added an item to only one specific day on the food bar, that item will not appear when the Edit All Days is selected).

You will return to the Menu Summary Screen.
Delete items by clicking the trash can. A window will pop-up for you to confirm deletion.
To add items, use search function and drag and drop items to the right.
Adjust the ADP or forecasted portions When you are done with the edits, click Save.