Menu Summary
There are multiple ways for which to create menus in CulinarySuite. You can choose from a Concept Menu, Repeat Cycle Menu or Monthly Menu. If you are creating similar menus or you want to upload menu templates, you can utilize our Suggested Menu option to add a preset menu for your locations. This user manual will walk you through how to create, configure, and personalize your menus.
Create a Monthly Menu
A monthly menu is a format that will display the entire calendar month of the menu on one page. If your location was setup to create a monthly menu in the location menu setup screen then you can follow the steps below to create a monthly menu:
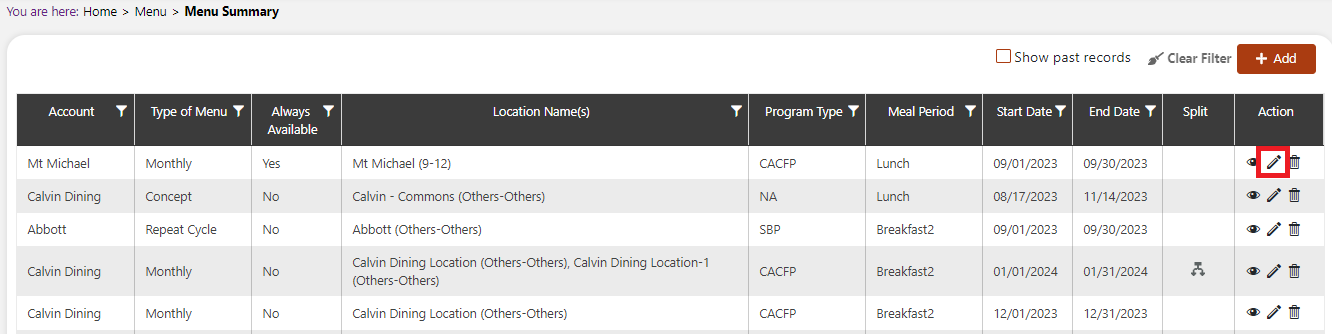
Hover over the Menu icon on the navigation menu. The Menu Icon expands to display subfunction list. Select Menu Summary. This screen will display all the previous menus created for the account.
On the Menu Summary screen, click ADD to add a new menu.

On the Menu Creation screen:
Select Account from the drop down menu. You can only choose from the accounts which you have access to
Select Menu Type from the drop down menu. Menu types that are setup in the Location Menu of all the locations in the selected account will be displayed.
Select a Start Date for the menu. If starting on the first, the end date will populate. Note that you cannot create a menu for the current month or a previous month.
Select Program Type. CS will show the program types that are setup on the Location Menu Setup for the locations in the selected account that have the selected menu time and are applicable to the selected timeframe.
Select Location Types (You can select more than one type). System will display location types that are setup on the Location Menu setup for the selected account, menu type, date range and program type.
Select Meal Period. CS will only display the meal periods that are setup in the location menu setup for the selected account, menu type, date range & location types.
Select Weekdays, one at a time Note: You can type start typing the first letter of the weekday name in the box and it will filter the options for you to make it quicker
Click on Search. CS searches the location menu setup of each location in the account to determine which ones are available to have a menu created.
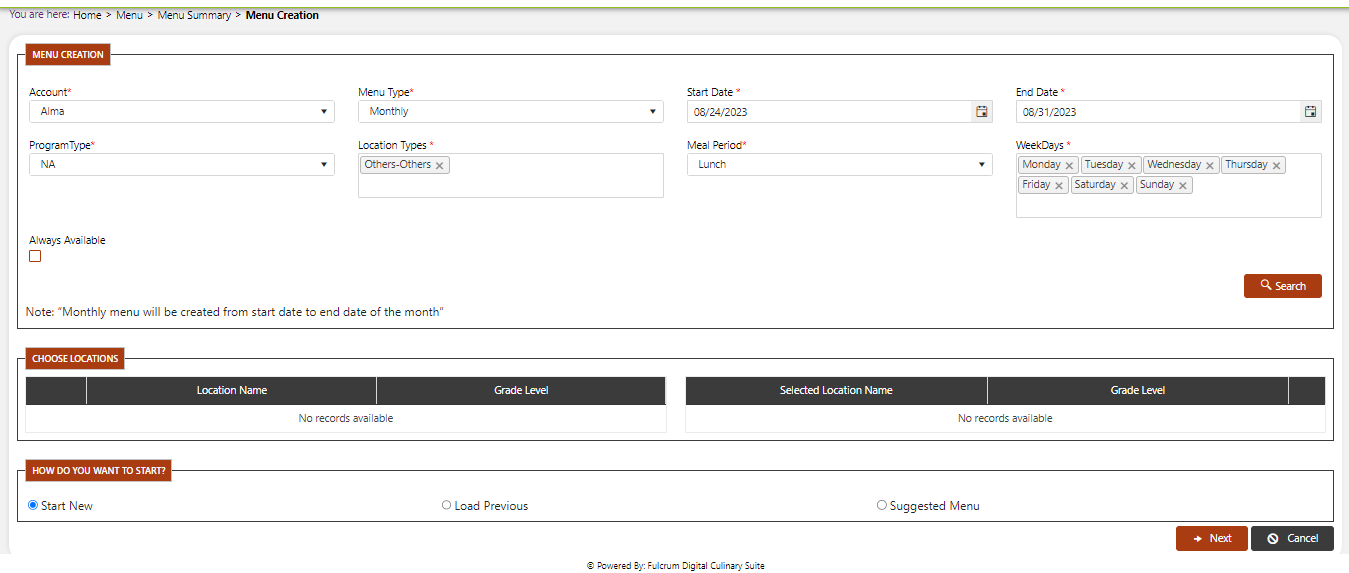
The Menu Summary screen (left) will display matching records in the results grid. To choose one or more locations for your menu, click and drag the location from the left to the right Choose Locations section.
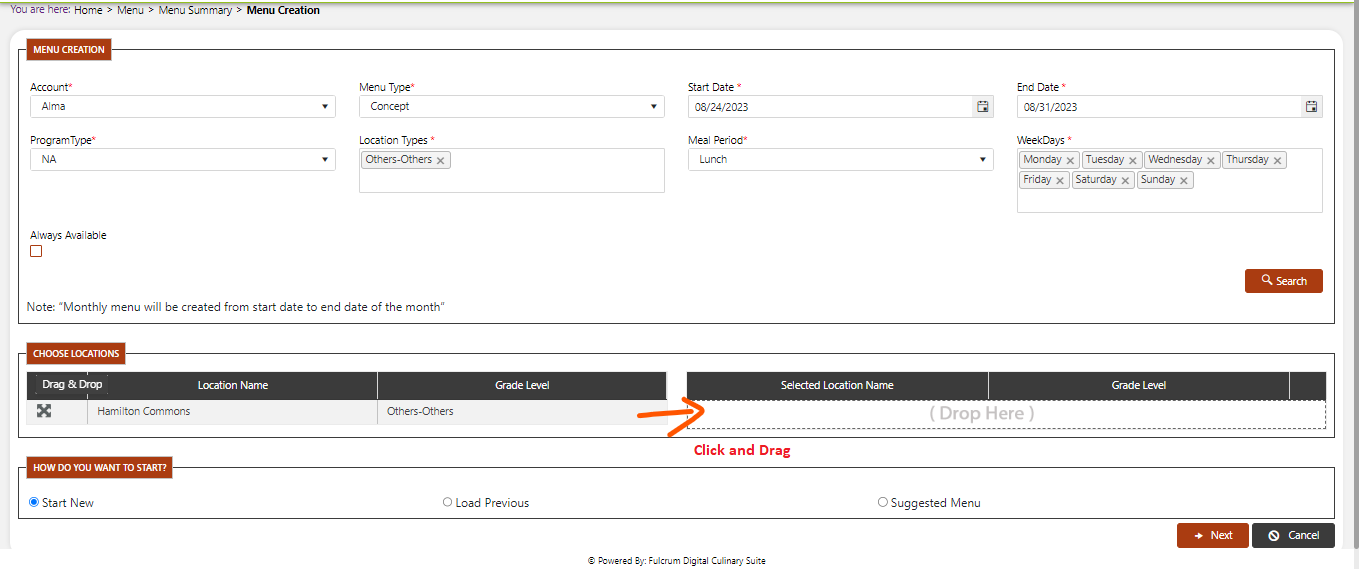
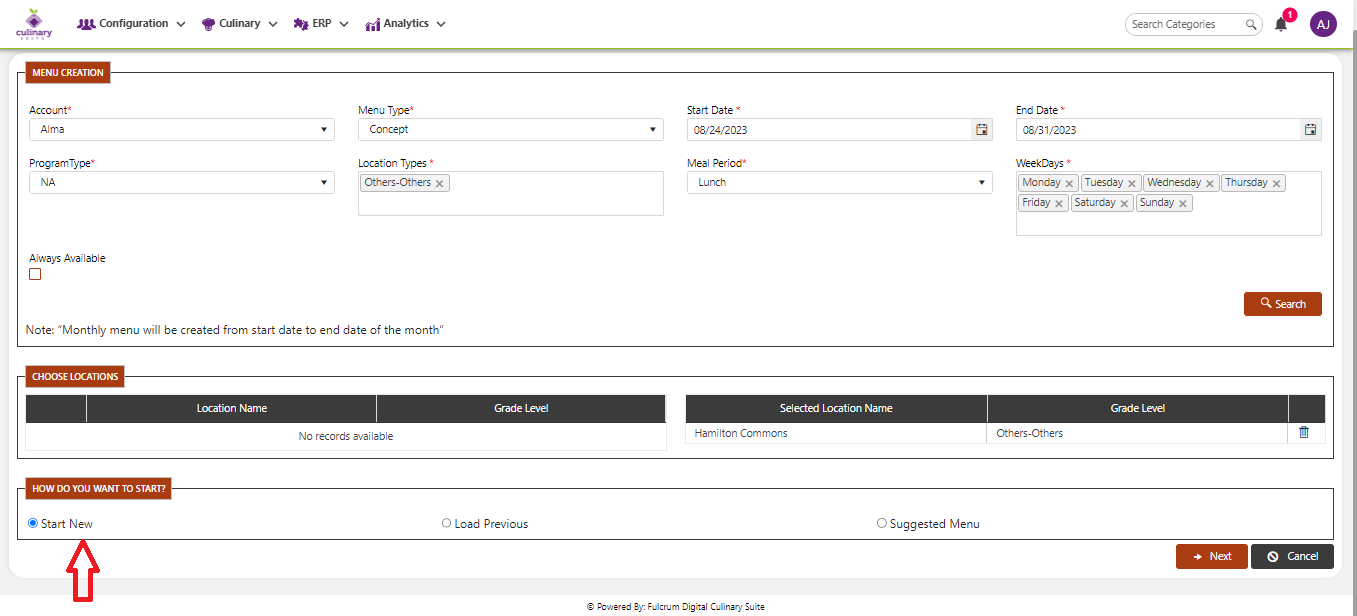
Choose an option in “How Do You Want to Start?” (in our example above we selected “Start New”)
- Start New means that the user will start with a completely blank menu
- Load Previous will allow the user to select an applicable menu that was previously created and will load all of those items into the new menu. Note: recipes on the original menu must have at least one option in each sequence available to the account in order to carry over to the new menu. Purchased products on the original menu must be present on the order guide in order to carry over. If these conditions are not met, the system will create the new menu but will omit these items.
- Suggested Menu will look for an applicable menu (from the suggested menu setup) and load those items in to the menu being created (provided that the items are available to your account). User has the option of modifying everything on the menu no matter how they choose to start.
Click Next. A popup menu will appear asking if you want to continue creating more menus or go the summary screen to edit menus that were created previously. In our example, we are creating a new menu.
On the Menu Summary screen, locate the menu you want to work on and click the Edit button (pencil). Use the filters on the top of each column to find the specific menu that you want to edit.
Add Menu Items
Click on a menu day that is not closed. The Menu Details screen will be displayed. On the left side, - Select Product or Recipe (Product will search for purchased products that can be menued directly [like whole fruit or beverages]; Recipes will search through recipes) - Type one or more words into text box and click Search.
Select Product or Recipe (Product will search for purchased products that can be menued directly [like whole fruit or beverages]; Recipes will search through recipes)
Type one or more words into text box and click Search.
NoteIf you leave the text area blank and click Search, CS will load all of the items. You can use the filters at the top of columns, or scroll through the list.
All of the products and recipes that appear in the results contain items that are in the Order Guide. Items that are not in the Order Guide for your account will not appear.
The less specific you are in the search, the more results you will receive.
Drag and drop the desired product to the Menu Details screen on the right. The product will be listed as a menu item.
Continue to add items.
- Select the Recipe option to search for recipes to add to your menu.
- Drag and drop the desired menu item to the Menu Details on the right.
NoteTo find recipes featuring a specific ingredient, use the Advanced Search function.
Drag and drop the desired recipe to the Menu Details screen on the right. The product will be listed as a menu item and a popup window appears displaying the ingredients.
Drop-down fields contain substitute items (called variants). If a variant is selected, the cost per portion and crediting will reflect the change. CS will suggest that you purchase ingredients that are selected in the recipe.Note- If a recipe as multiple Ingredients, you MUST choose the correct ingredients from the popup window to get the correct nutritional value and purchase selection. Note you can only choose from items in your Order Guide.
- By default, CS will load the first ingredient but if a change is required, you should select a different option from the dropdown menu.
- Remember changes to the ingredients in a recipe also change the meal cost
Click the Update button. You will see the message, “Recipe Components Added Successfully.” The menu item appears on the screen. You can change the variant selection by clicking on the pencil icon next to the recipe.
Enter the ADP for each of the locations on the menu. Type into the empty box below the name of the location.
ADP (Average Daily Participation) determines the number of people who will be getting food from the cafeteria on this date. Once data is collected into CS, CS will start to generate a suggested ADP. This will be calculated by taking the average total based on data entered into the production record by weekday. It will discard days which have a participation 25% above or below the average. For the first menu, you will need to enter the ADP.
Enter the number of portions forecasted for each of the items and each of the locations on the menu. Note the checkbox to close a specific location for the day also appears on this screen.
Repeat this process until the day is complete. To show items on the menu, click the box. Scroll to the bottom and click Save.