Format The Menu
Add Text Boxes
On the Menu screen, click the Text button (left side). A popup screen will appear.
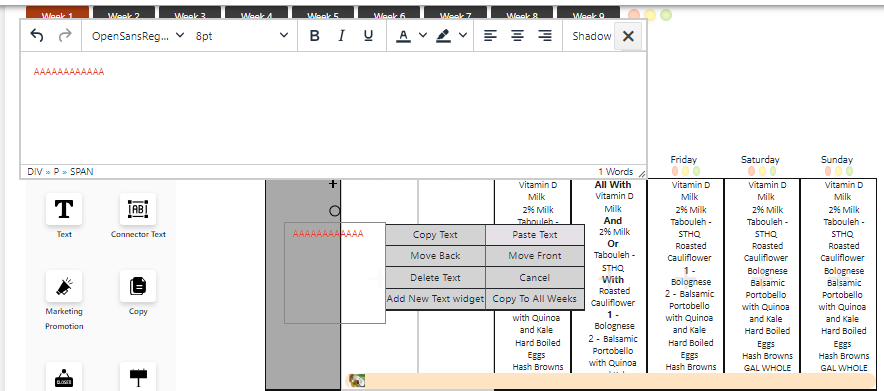
In the popup window:
A side menu will appear with choices to Save, Copy, Delete, Paste and Cancel. For a concept menu, there is an additional choice to copy the text box to future weeks. When copied, it will be placed in the same position on all future weeks of the concept menu.
Type into the text box, highlight the typed text and format the text using the commands on the gray bar (color, bold, italic, center, etc.)
Size the text box by clicking and dragging the handles at the corner. Click on the gray “Drag Me” task to drag the text box into the desired position.
Text box will automatically save.
Add Image
On the Menu screen, click the Image button (left side). A popup screen will appear.
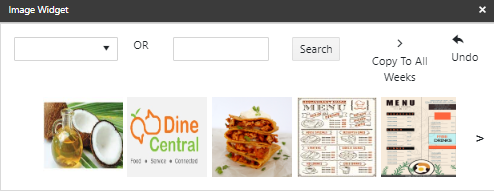
Click on an image displayed or search for image on the drop down menu. You can also search for images by typing into the text box and clicking Search. You can view all of the existing images by using the arrows to navigate.
Select the image. Drag and drop it on the desired location on the Menu Grid. Rotate the image by clicking on the yellow handle.
When you click on the image, a side menu will appear with options to Crop, Copy, Paste, Delete or Cancel. Once on the menu, the system will automatically save the image. A concept menu will have the option of “copy to future weeks.”
NoteThe image can be deleted by clicking on it, and clicking the “delete image” button
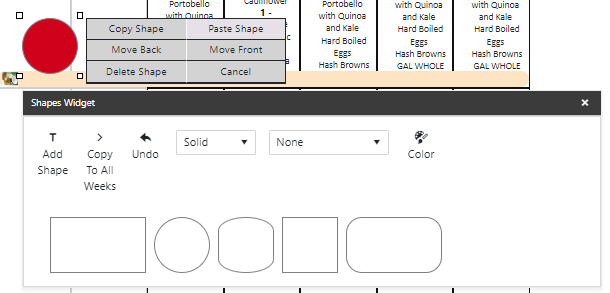
Add Shapes
On the Menu screen, click the Clipart button (left side). A popup screen will appear.
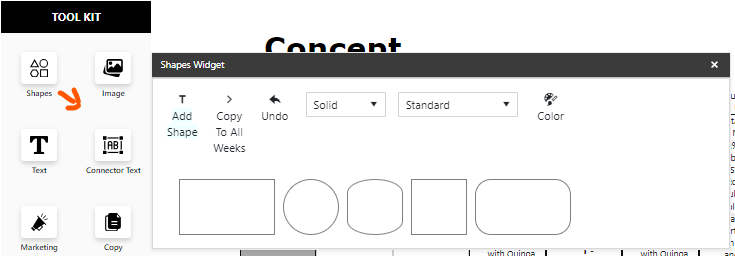
Click on Add Shape. This will display the various shapes that can be added to the menu.
Select the shape. Drag and drop it on the desired location on the Menu Grid. Rotate the image by clicking on the yellow handle. Resize by dragging the handles in the corner (in/out/up/down) until you reach the desired shape. Use the options at the top to provide color, border and perspective to the shape that you have added (NOTE: Be sure to select the shape before applying these settings).
When you click on the image, a side menu will appear with options to Copy, Paste, Delete or Cancel. Once on the menu, the system will automatically save the shape. A concept menu will have the option of “copy to future weeks.”
The image can be deleted by clicking on it, and clicking the “delete image” button.
You can place a text box over the shape to make your text more visible.
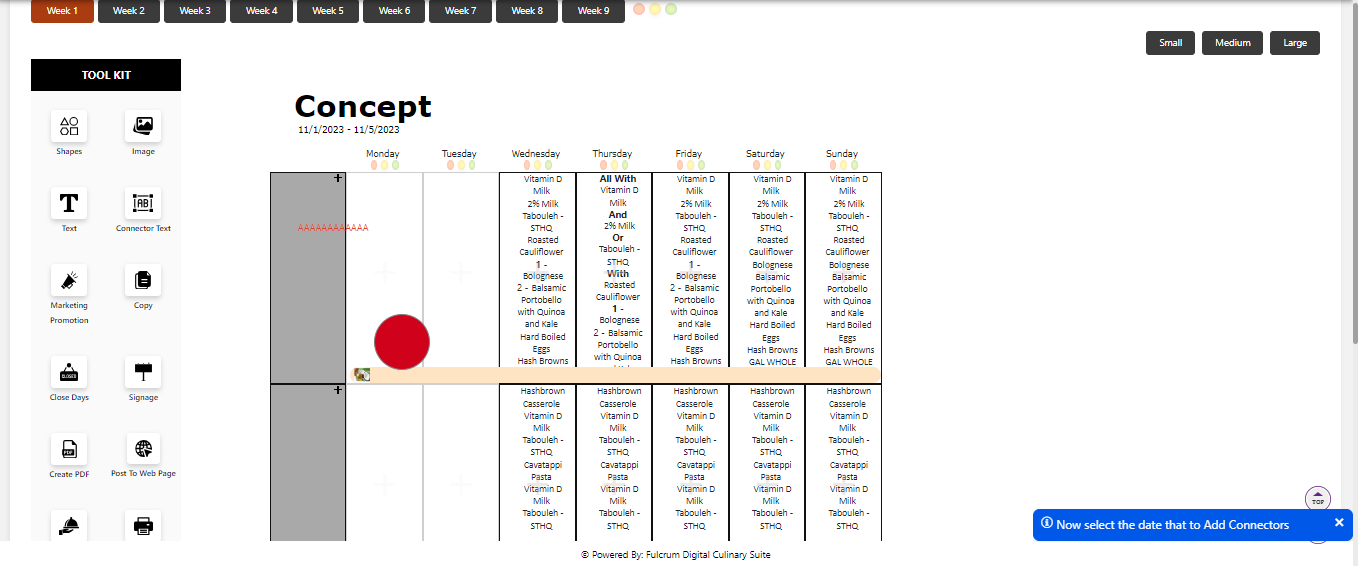
Add Connector Text
On the Menu screen, click the Connector Text (left side). A popup screen will appear.
You will be prompted to select the date to Add Connectors.
Click on a day to add connector text. A popup screen will appear.
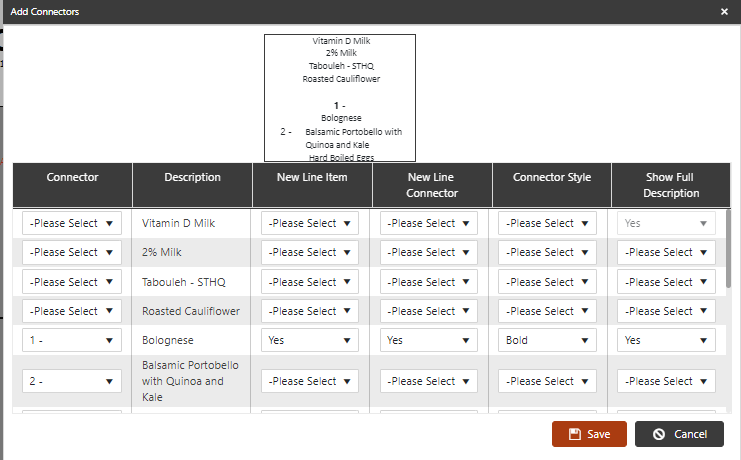
Select Connector text from the pull down menu to the left of each item. This is the text that will appear in front of the menu item it is positioned next to.
Select whether or not to display the connector on its own line by clicking Yes or No on the Connector Line dropdown.
Select a style for the Connector from the dropdown.
Select whether or not to show the full description for the menu item.
Click Preview to see how the selected options will look. Revise as needed and click Preview to view changes.
When you like the connector text, click Save and close the popup screen.
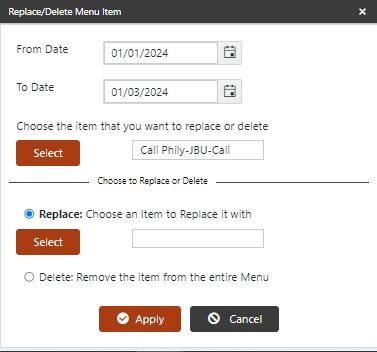
Replace or Delete Menu Items
Use this function to replace or delete a menu item for a period of time on the menu; e.g. if an ingredient was replaced by a vendor or for a new product.
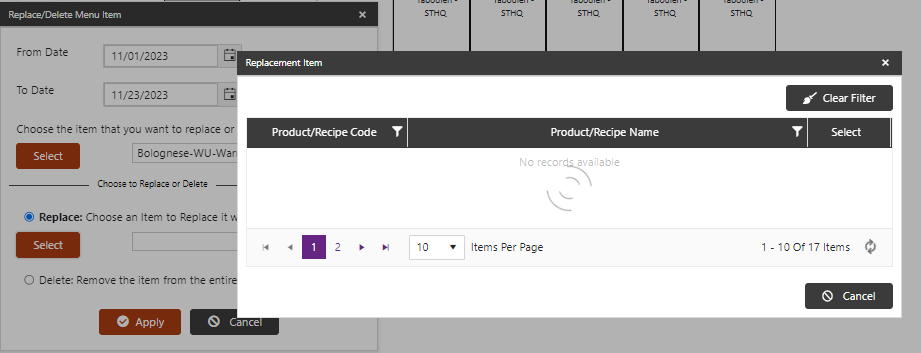
On the Menu screen, click the Replace/Delete (left side). A popup screen will appear.
Select the date range for which you want to replace or delete an item on this menu.
Click on the Select button to choose an item to replace or delete. A popup menu will come up with components that exist on the menu. You can use the filters to search for items, by clicking on the filter icon and by typing in the box.
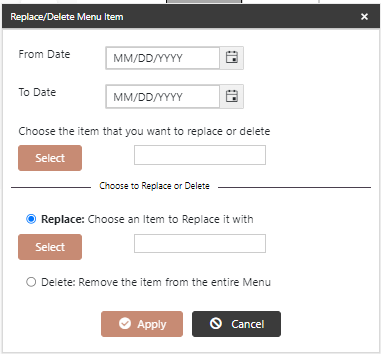

Once you find the item click on Select.
Choose what you want to do: select Replace or Delete
If you select Replace, you will need to select the replacement item. This will replace the original component everywhere it exists on the menu in the selected date range.
To select Delete, just click the button. This will delete the original component everywhere it exists on the menu in the selected date range.
Then when you are done, click the Apply Button, or select Cancel to cancel the transaction.
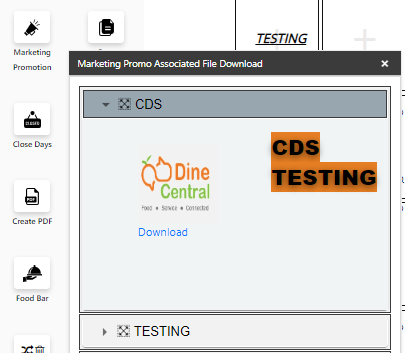
Utilize Marketing Promotions
Use this function to download materials for or utilize promotion text or menu items for your menus.
On the Menu screen, click the Marketing/Promotion button (left side). A popup screen will appear with valid marketing promotions for month (relevant to the location and meal period and date). Inside each selection, Culinary Suite will show you all the files associated with the promotion available for download, as well as the name of the promotion to put on your menu.

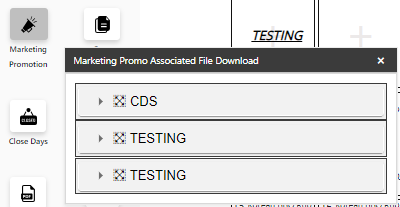
Click on the arrow next to the Promotion to view. You will see the instructions for executing the promotion, associated images or text, and can download documents/materials to highlight the promo in your café.
To put the name of the promotion on your menu, drag and drop it to the desired location on the menu (you cannot modify the text).
Click the Download button for one or more files associated with the promotion.