Entering Production Records for Monthly Menus
Multiple Serving Lines at the Same School
You can enter production information for each serving line. The system will add the produced, served, leftover, and waste quantities together and display them (with the times and temperatures) on the master.
Time and Temp will be data will be imported and displayed on the master.
SAVE entered data before switching to a different serving line.
Correcting Entries
Select the serving line and make the correction. The change will roll up into the master.
You can also make the change directly on the master record---but once you change the master record, the system will no longer respond to changes made on any individual serving line.
Food Bars
Select the food bar from the food bar drop-down menu to see a display of all of the items associated to the food bar.
Enter the total number of meals served from the food bar. This will be added to the total served calculation in the master record.
Enter production information on the items and the system will roll them up into the master.
If you are offering a food bar on multiple serving lines:
Choose the serving line from the serving line drop-down menu
Choose the far bar from the food bar drop-down menu
Enter production data
To COMPLETE the production record for the Food Bar:
Navigate to the Master serving line (make sure that the food bar drop down is blank so you are viewing all of the info on the production record).
If there are no errors on the production record, you will see the Complete button at the top of the screen. Clicking the Complete button will close the record and deduct the items from inventory. THIS IS CRITICAL (otherwise the suggested quantities will be out of sync).
If the Complete button is not enabled, you have errors on the production record which need to be fixed. Scroll down the list of records and look for lines with an error message in the Ok column
Concept Menus
If you are NOT managing concepts on multiple serving lines at the school, leave the serving line selection as "Master" and select the concept from the Concept drop down. This will filter the list of items that are associated to the selected concept. You can enter the production data for each concept and the information will roll up to the master.
If you have a food bar on the Concept menu, you can select the food bar from the food bar drop-down and enter the production information accordingly.
Please note: at the top of the food bar screen there are fields for the number of student meals and the number of adult (i.e. non-reimbursable) meals served from the food bar. You must fill this in so that the total served number of the production record is correct.
To correct an error in the quantities entered for an item on a concept or food bar, click the concept or food bar drop down to edit the quantity; clicking Save will update the master. You can also choose to edit the quantity on the master record directly. If you edit the master, the system takes this as the master change and will no longer be updated by changes made to that item on the concept or food bar (it can only be overwritten on the master).
Once everything is entered, make sure that your concept and food bar drop downs are blank to go to the master record. On this screen, you will see a list of all the items on the menu with the total quantities entered. At the top of the screen the system will display the total served quantity for students and the total served quantity for adults. To get the number of the total meals served for students, the system is adding together the Reimbursable Served quantity entered for all the entrees on the menu PLUS the total student meals from the food bar). You can change this number if desired. To get the number of total meals served for adults (i.e. non-reimbursable meals), the system is adding together the Non-Reimbursable Served quantity entered for all entrees on the menu PLUS the total adult meals from the food bar. You can change this number if desired.
To COMPLETE the production record: Navigate to the Master serving line (make sure that the food bar drop down is blank so that you are viewing all the info on the production record).
- If there are no errors on the production record, you will see the Complete button at the top of the screen. Clicking this button will close the record and deduct the items from inventory. THIS IS CRITICAL (otherwise the suggested quantities will be out of sync). If the Complete button is not enabled, you have errors on the production record which need to be fixed, scroll down the list of records and look for lines with an error message in the Ok column.
Managing Concepts on Multiple Serving Lines
If you ARE managing concepts on multiple serving lines at the school, you can select the serving line that you want to enter for from the Serving Line drop down and then select the concept or food bar that you want to enter information for. The system will sum up the quantities entered in each serving line/concept and display the total in the Master (i.e. final) production record. For Time and Temp the system will take the records with the latest time in each of the Time/Temp fields from all the serving lines and display them on the master.
Other steps are the same as above.
The Production Record Entry screen:
Entering Production Records
Enter data directly on the master or select the serving line, food bar, or concept. If you choose the later, enter data in the popup screen that will appear after selection. Data entered will roll up to the master record. Enter the following information:
Enter Quantity produced in the Produced column
Tab to the next field
Enter Reimbursable Quantity served in the Reimbursable Quantity Served column
Enter the Non-reimbursable quantity served in the Non Reimbursable Quantity Served column
Enter Quantity that is leftover which will be reused on a future date
Click on the Change Date button to move this item to the production record of a future day
Enter the Quantity of waste which was thrown away
Select the time that the temperatures were taken in the time field
Enter the temperature
If an item is not being served, uncheck the Served checkbox, otherwise the system will return an error that the item is flagged as served but no quantity has been produced.
Repeat the process
Check the OK field
If an item is not being served, uncheck the Served checkbox. This will show the item as \"crossed out\" on the printout of the production record.
Click the Save button to save your work. You will receive a confirmation message.
When all Production Records are entered correctly, select the Complete button to complete the transaction
The system will reduce the inventory at the location based on the quantities of ingredients used (as defined in the production records).
NOTE: Errors and Resolution
If there is an error, you will see the message, "Quantity served + Leftover cannot be less than the quantity produced."
Ensure that the total quantity of all values is greater than the quantity entered in the Quantity Produced column
You can add an item by clicking on the add item button. A pop up menu will give you the option to search for product or recipe.
If you wish, select the Print button to print out the production record.
The printout will display the quantities, times and temps as they are displayed on the Master record. Items that do not have the Served checkbox selected will appear with a line through them to indicate that they were planned but not served.
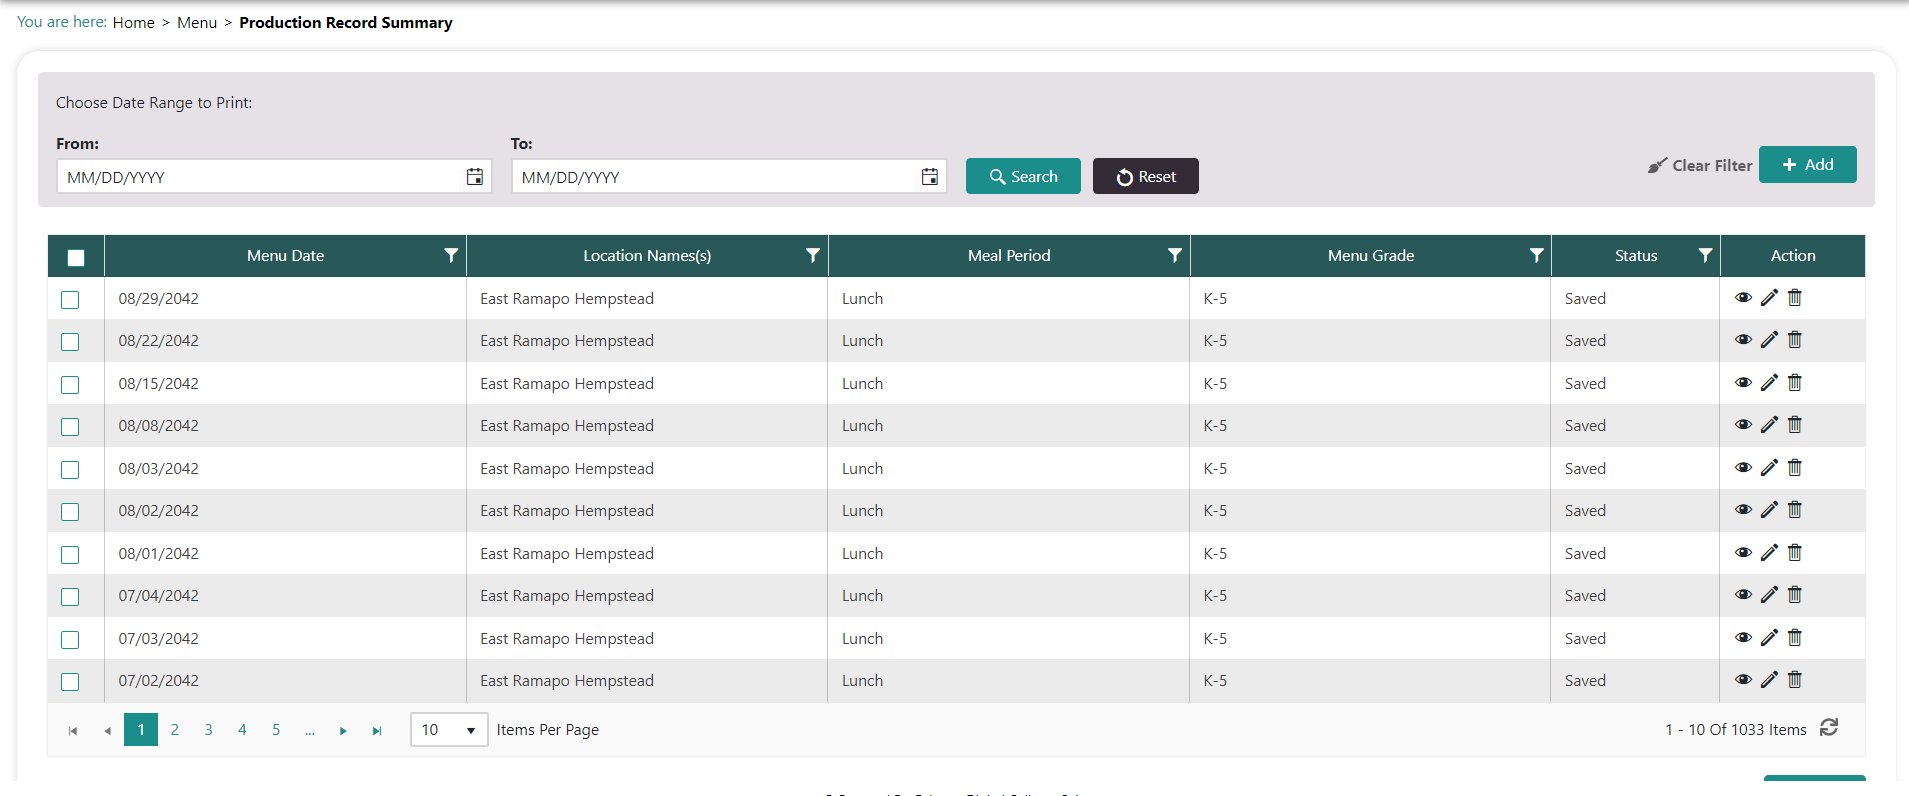
You can print multiple production records by going to the Production Record Summary screen, select the date range that you want to view production records for (and/or use the filter options on the columns), click the checkbox next to those records which you want to print and click on the Print button.
NOTE: 4 Days for Edits to Production Records
For ALL types of production records, users have 4 days from the date that the record was "completed" to edit the record. After the 4 day period the completed production record can only be modified by the Nutrition team