Add Menu Items
The FSD is responsible for creating menus no later than the 15^th^ of 2 months prior.
Products and Recipes in DineCentral can be searched for by using one or more of the following tabs:
General Recipes (Using Advanced Search)
Top 100 by Locations
Top 100 Company Wide
Suggested
Marketing Promotions
Favorites (Click on the star to make it a favorite item for your account)
The menu must be set up for the specific location at the account. In addition, the FSD must know the LOB, program type, location type, meal period and menu type for the respective client/customer.
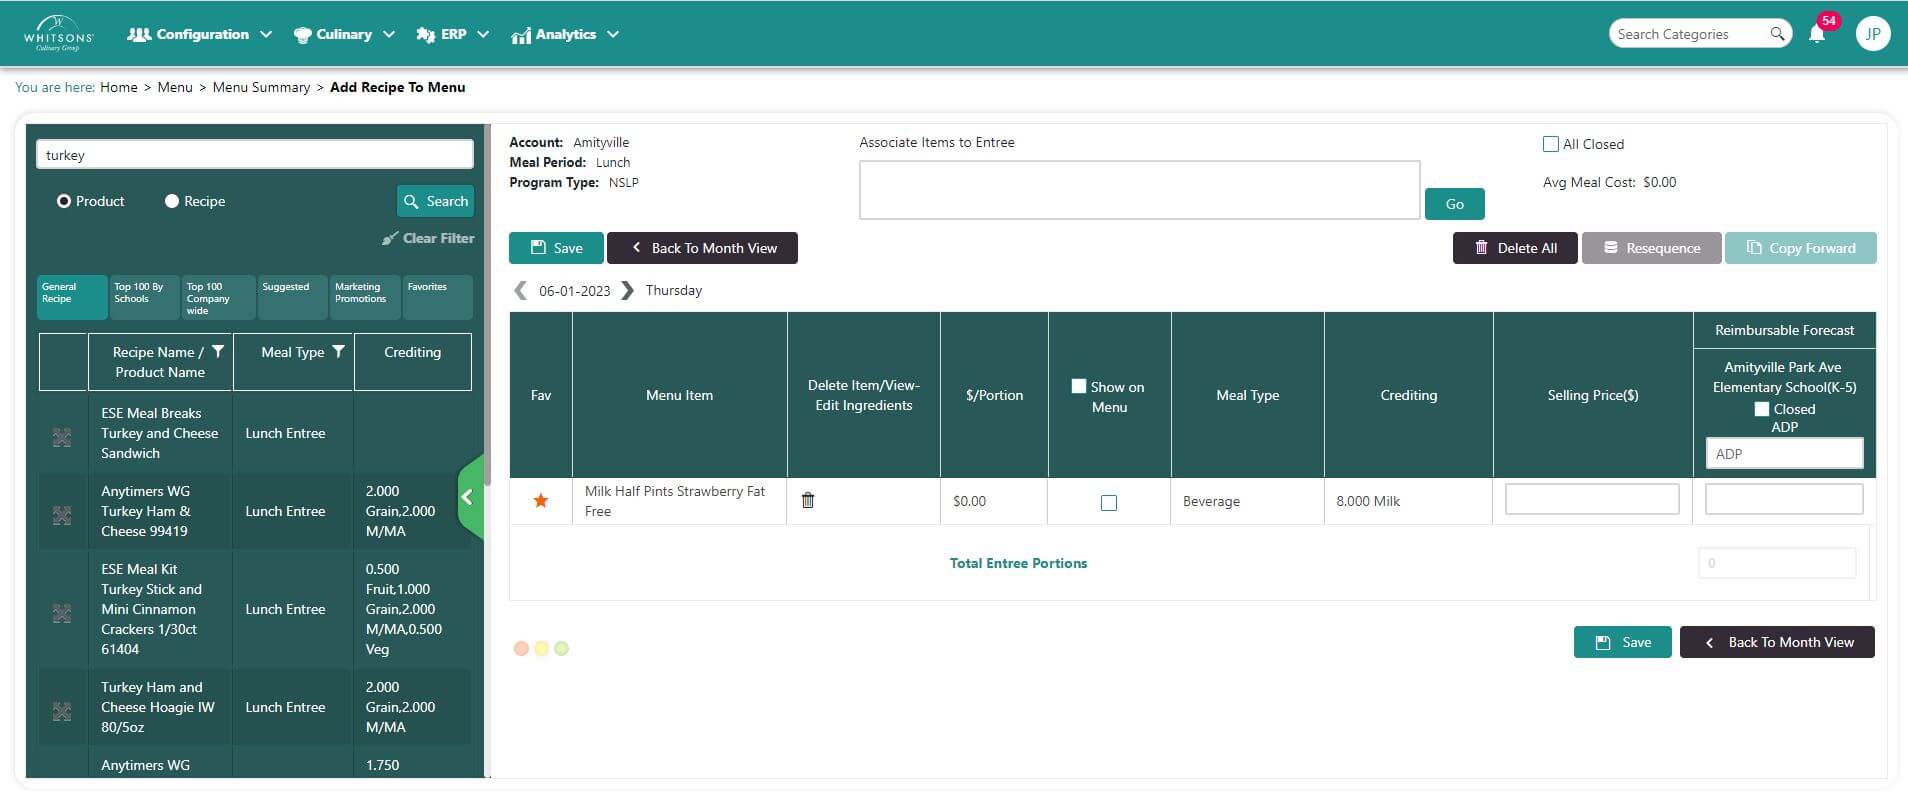
Click on a menu day that is not closed. The Menu Details screen will be displayed.
On the left side, click on General Recipe tab on the left side of the menu details screen and select Product. Note: Product will search purchased products that can be menued directly whereas Recipe will search through recipes.
Type one or more words into text box and click Search.
If you leave the text area blank and click Search, DC will load all of the items. You can use the filters at the top of columns, or scroll through the list.
All of the products and recipes that appear in the results contain items that are in the Order Guide. Items that are not in the Order Guide will not appear.
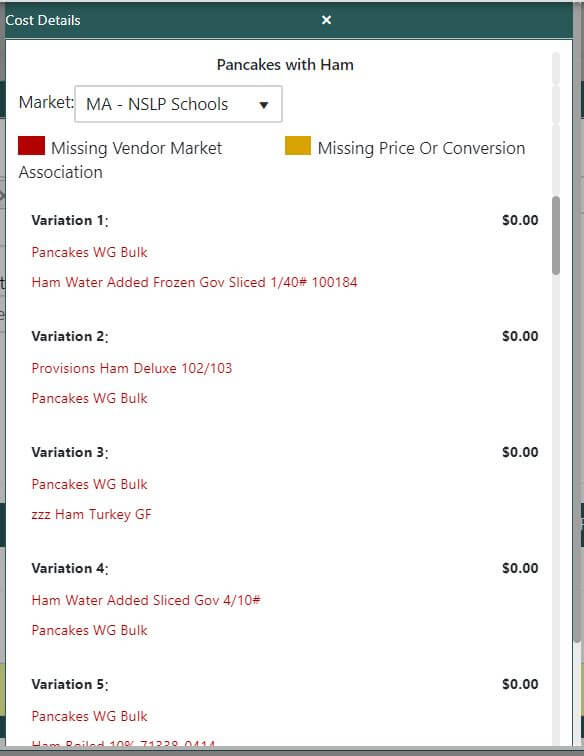
If a recipe has multiple Ingredients, (Window pops up) you MUST choose the correct ingredients to use in the recipe to get the correct nutritional value. Click the drop down to see the selection of ingredients. Remember change the ingredients also changes the meal cost.
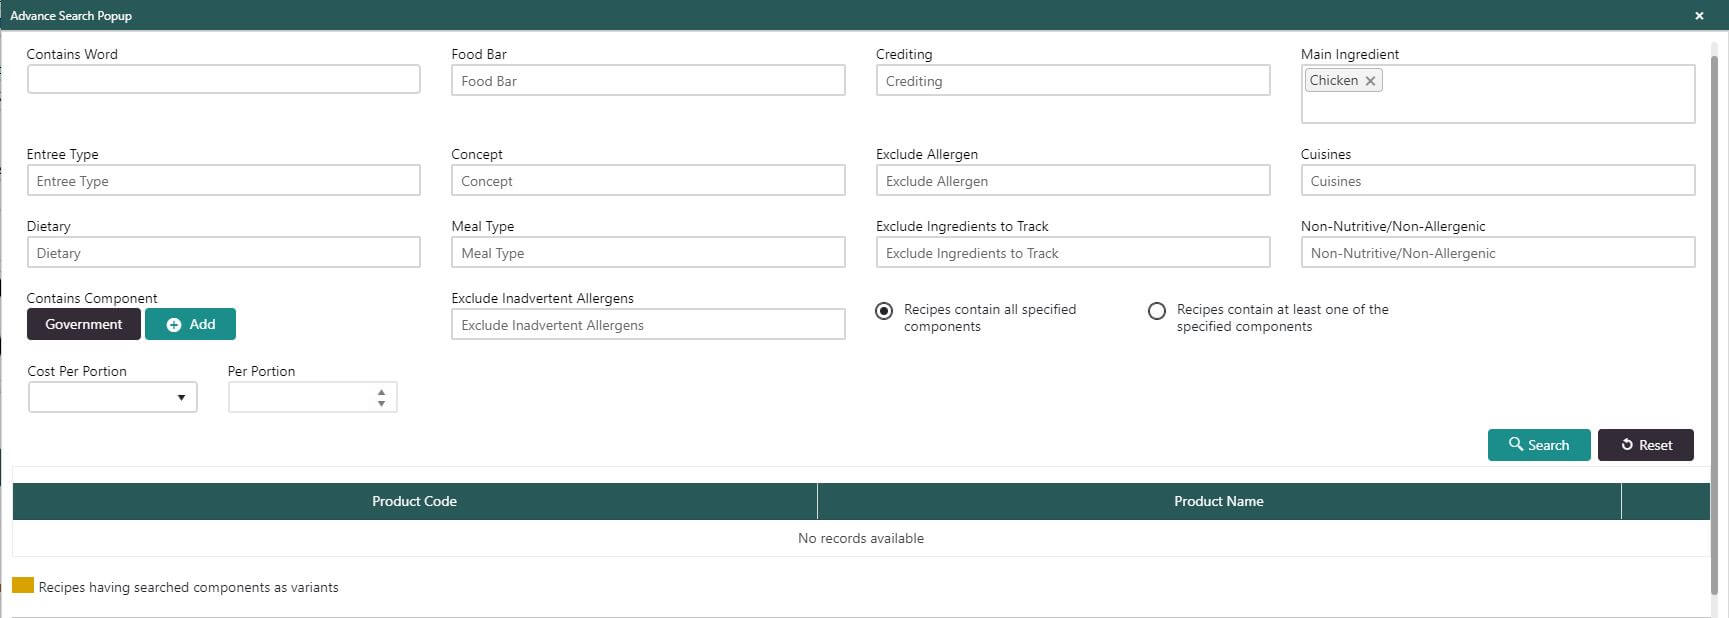
Use the Advanced Search function to find recipes featuring:
specific ingredient
Food Bar
Crediting
Main Ingredient
Entrée type
Concept
Exclude Allergen
Cuisine
Dietary
Meal Type
Exclude Ingredients to Track
Non-Nutritive/Non-Allergenic
Cost per Portion
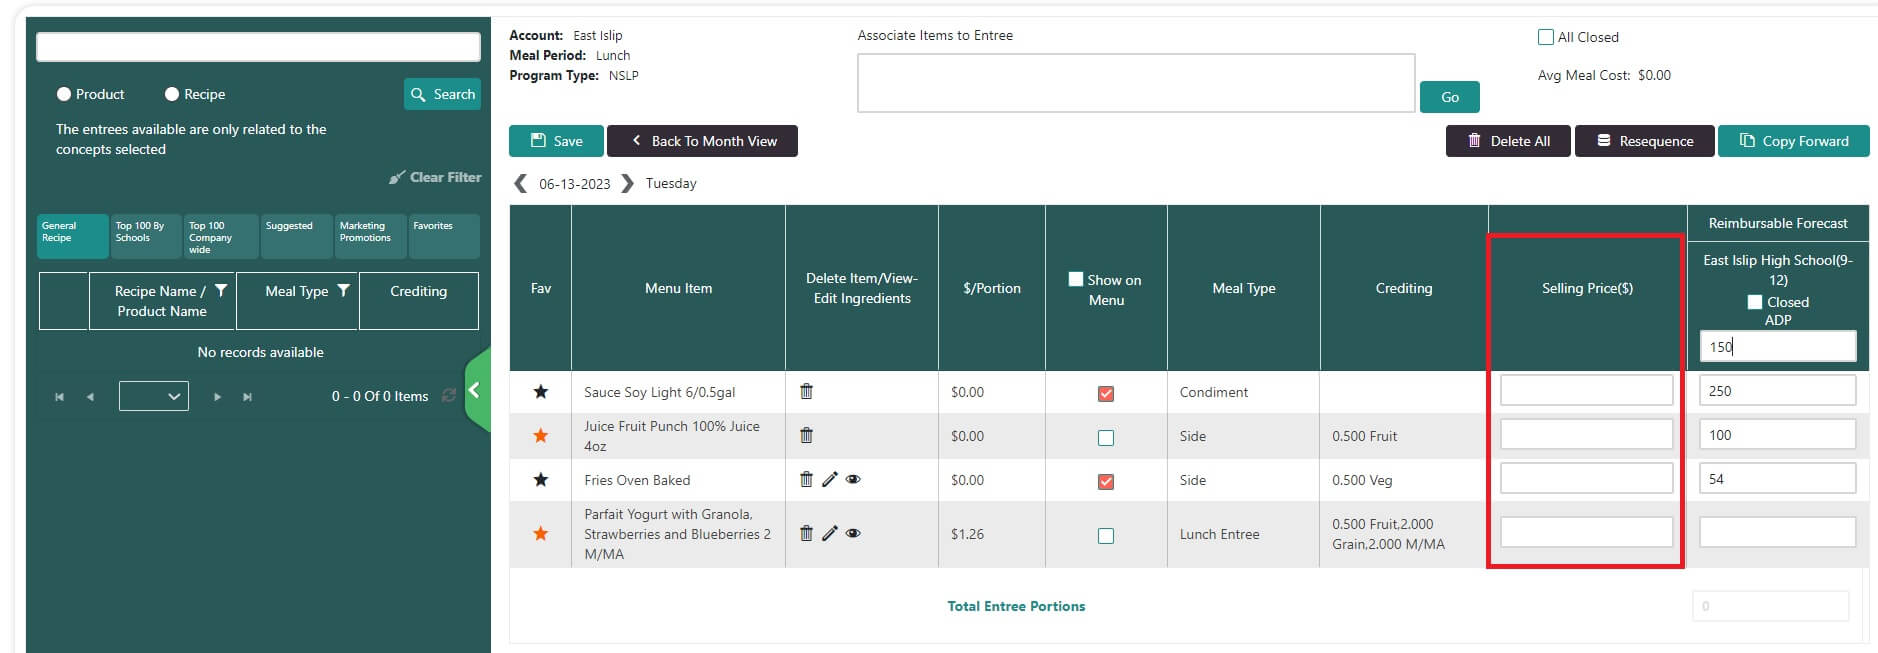
Menu Detail Screen:
The 'Selling Price' column in the DC Menu Details screen is for use with specific non-NSLP/SBP locations only. All K-12 operations should disregard this column as it has no effect on your menus, your menu planning or DC functionality. For those locations approved and set up to use the Sell Price function in DC, the price will populate in the FD meal Planner and FD meal Planner pre-order platforms. To get the sell price to populate, fill in the actual sell price in the menu detail screen of DC when menu planning. You would need to do this for each day service. After entering the prices, click Save. This must be saved each time you enter a sell price. When all sell prices for the day, or month have been entered, post the menu to FD Meal planner by clicking the "Post to Webpage" button.
Drag and drop the desired product to the Menu Details screen on the right. The product will be listed as a menu item.
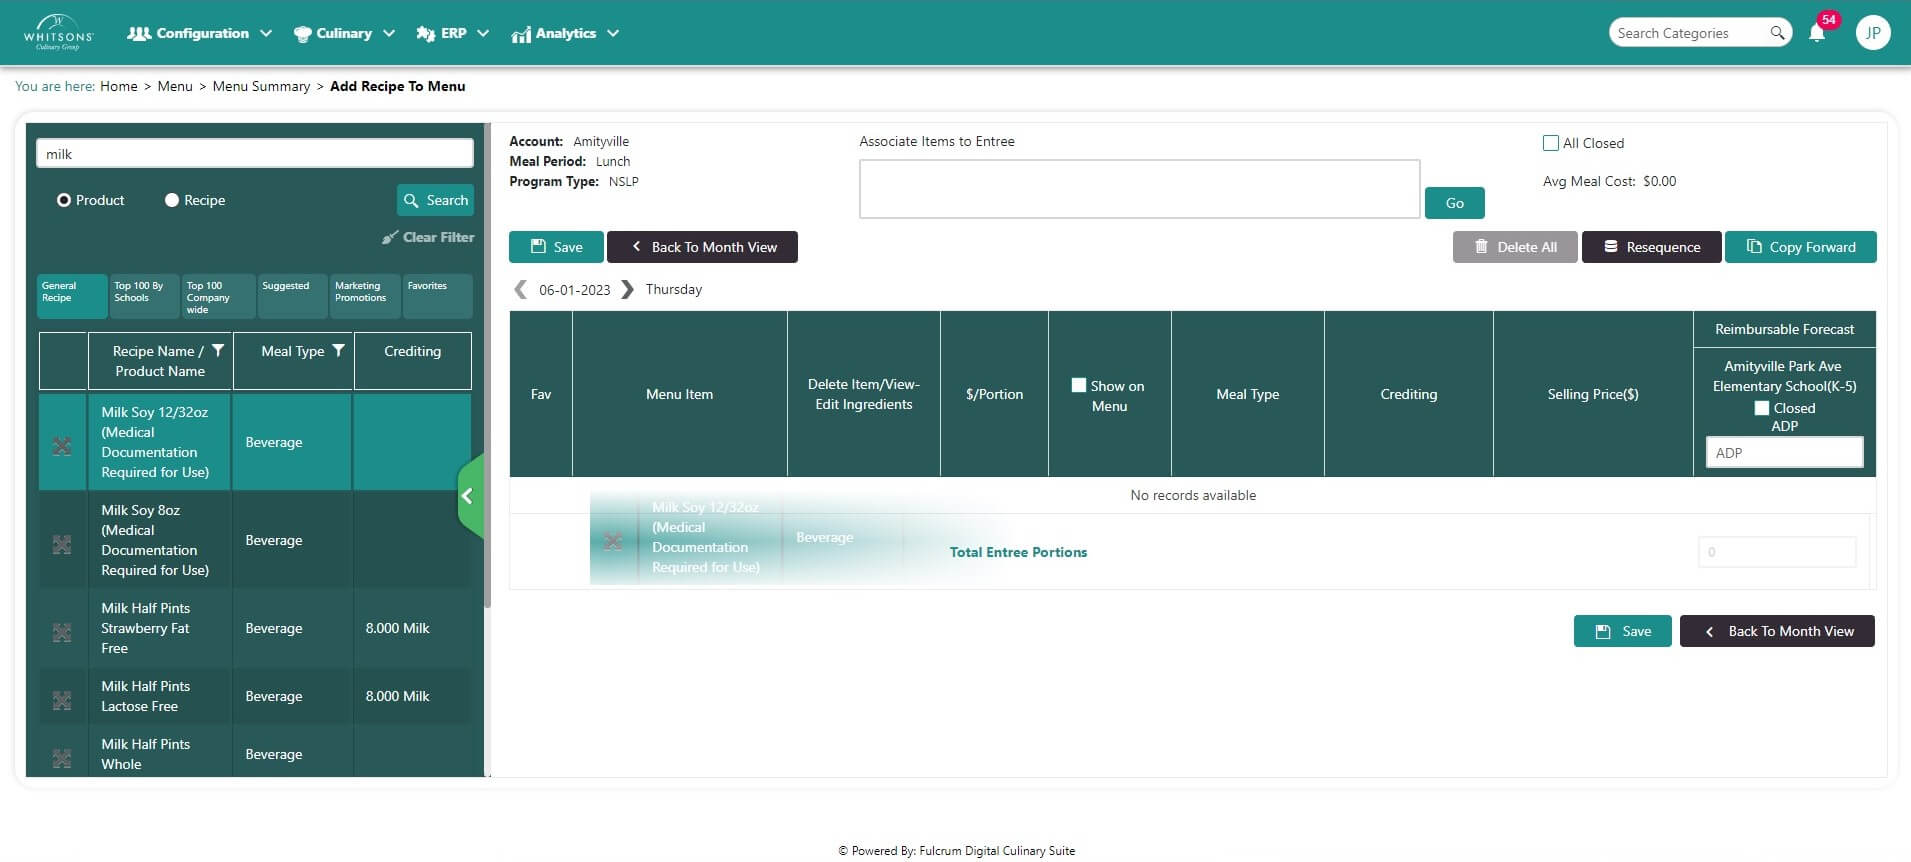
Continue to add items.
Dine Central will return a list of recipes and cost per serving.
Drag and drop the desired menu item to the Menu Details on the right.
Drag and drop the desired recipe to the Menu Details screen on the right. The product will be listed as a menu item and a popup window appears displaying the ingredients.
Drop-down menus contain substitute items/variant options. Please note that ingredients that have variant options (e.g. multiple options for American cheese -- low sodium, low sodium/low fat, etc.) will have an Edit Ingredients window pop after you drag and drop the recipe. Select the ingredient that you wish to use in the recipe.
If a variant is selected, [the cost per portion]{.underline} and [crediting will reflect the change]{.underline}. DC will suggest that you purchase ingredients that are selected in the recipe.
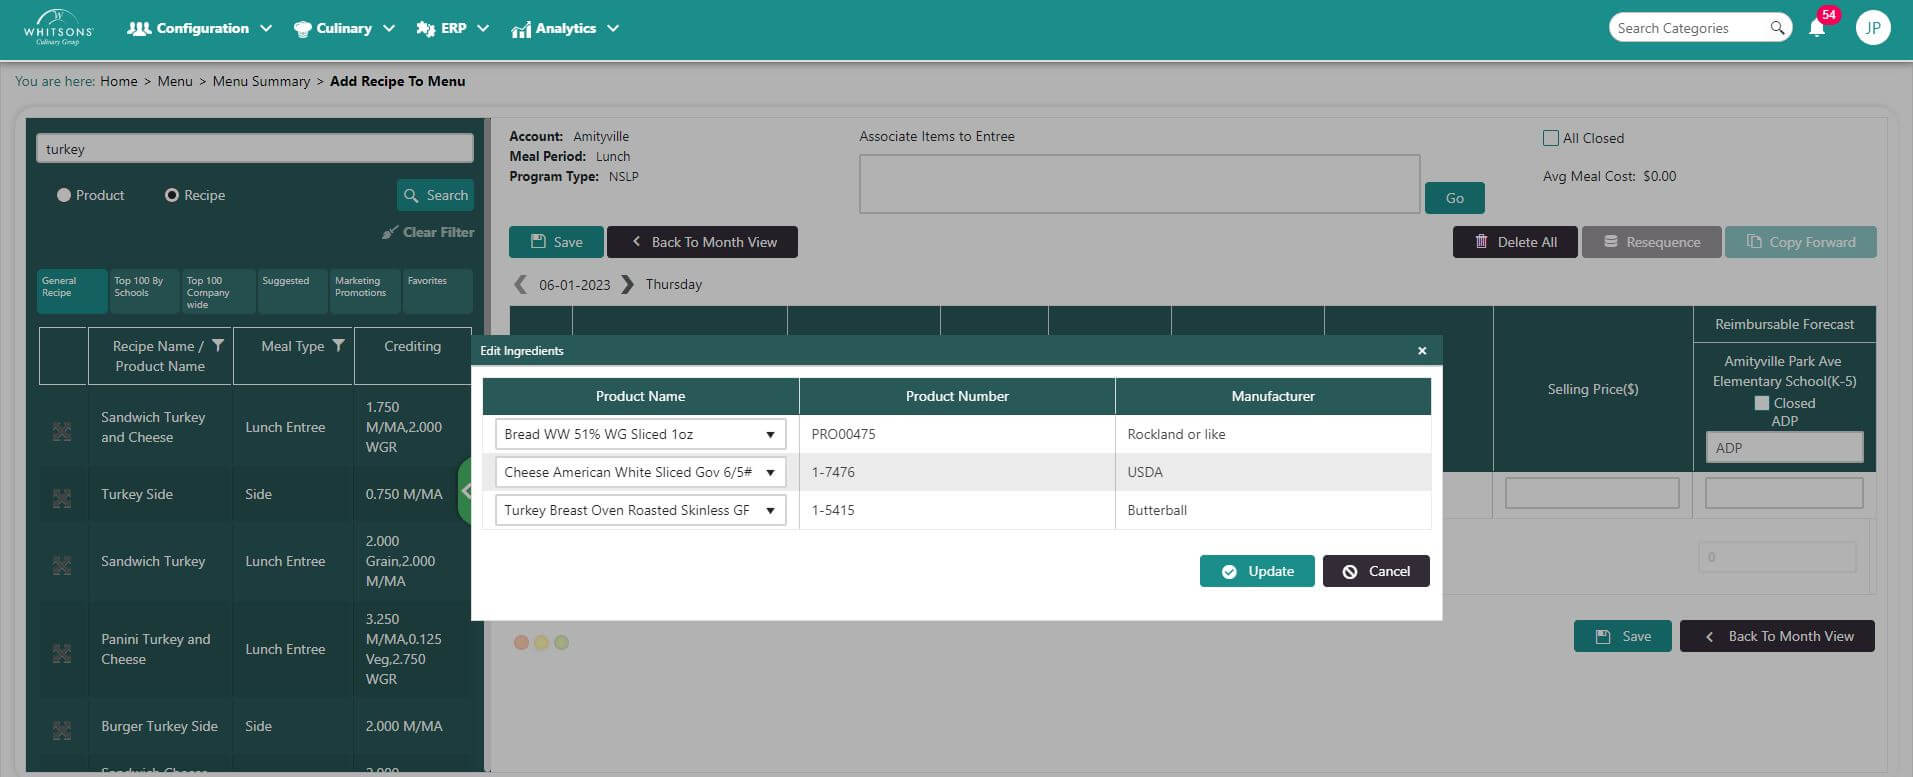
If a recipe as multiple Ingredients, you MUST choose the correct ingredients from the popup window to get the correct nutritional value and purchase selection. Note you can only choose from items in your Order Guide.
By default, DC will load the first ingredient but if a change is required, you should select a different option from the dropdown menu.
Remember changes to the ingredients in a recipe also change the meal cost
Click the Update button. You will see the message, "Recipe Components Added Successfully."\ The menu item appears on the screen. You can change the variant selection by clicking on the pencil icon next to the recipe.
Enter the ADP for each of the locations on the menu. Type into the empty box below the name of the location.
NoteADP (Average Daily Participation) determines the number of people who will be getting food from the cafeteria on this date. Once data is collected into DC, DC will start to generate a suggested ADP. For the first menu, you will need to enter the ADP.
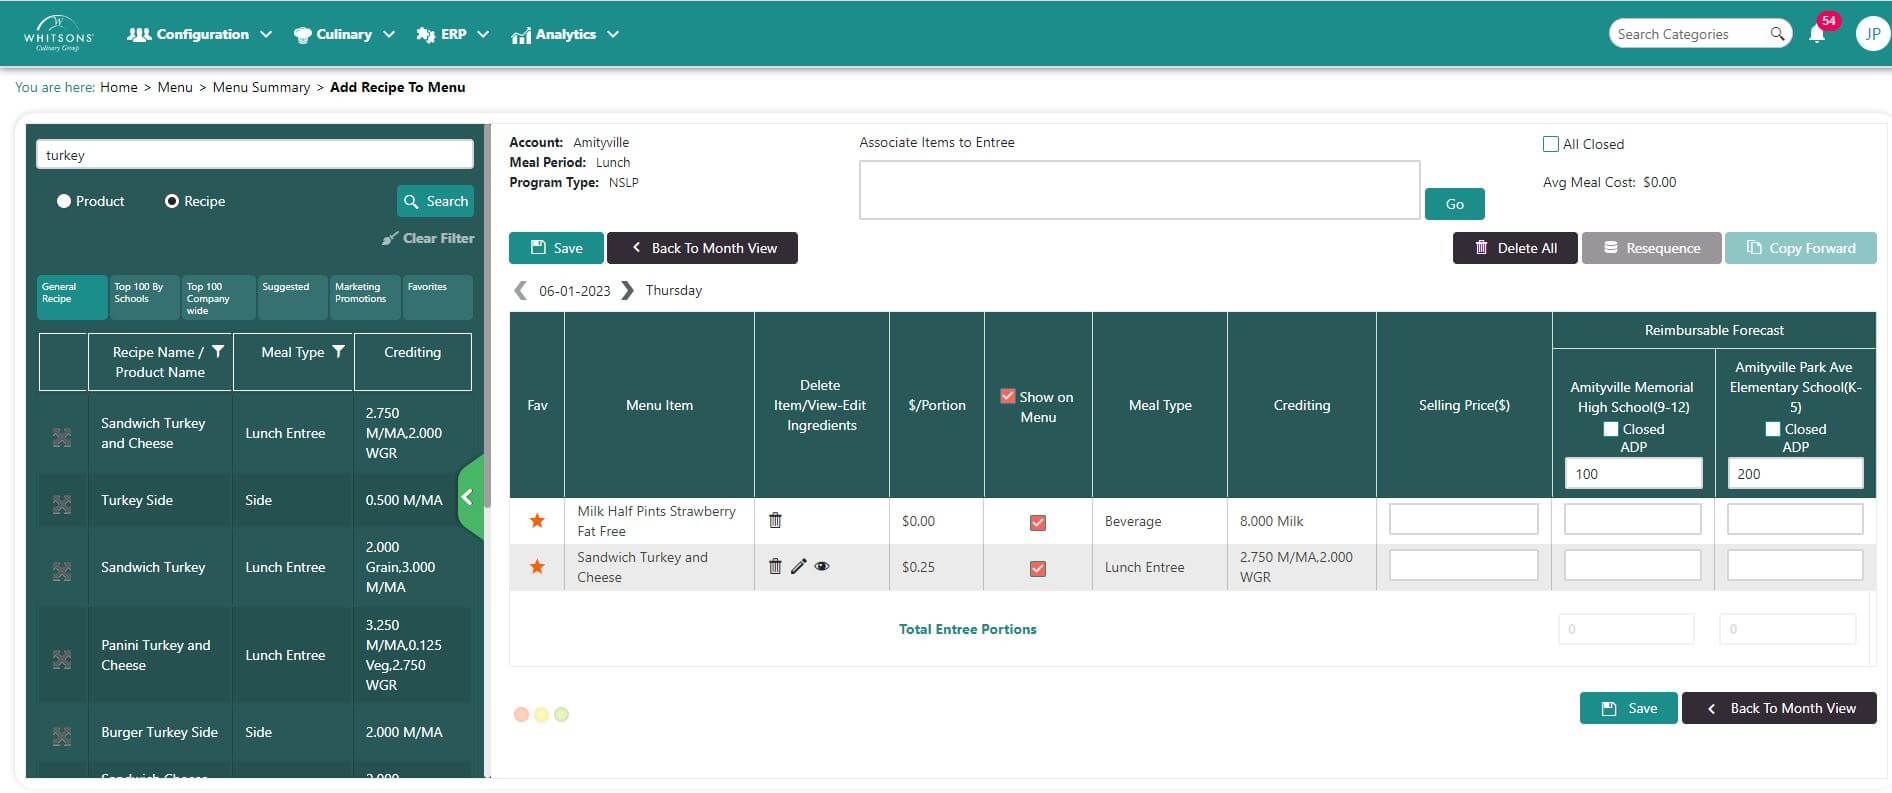
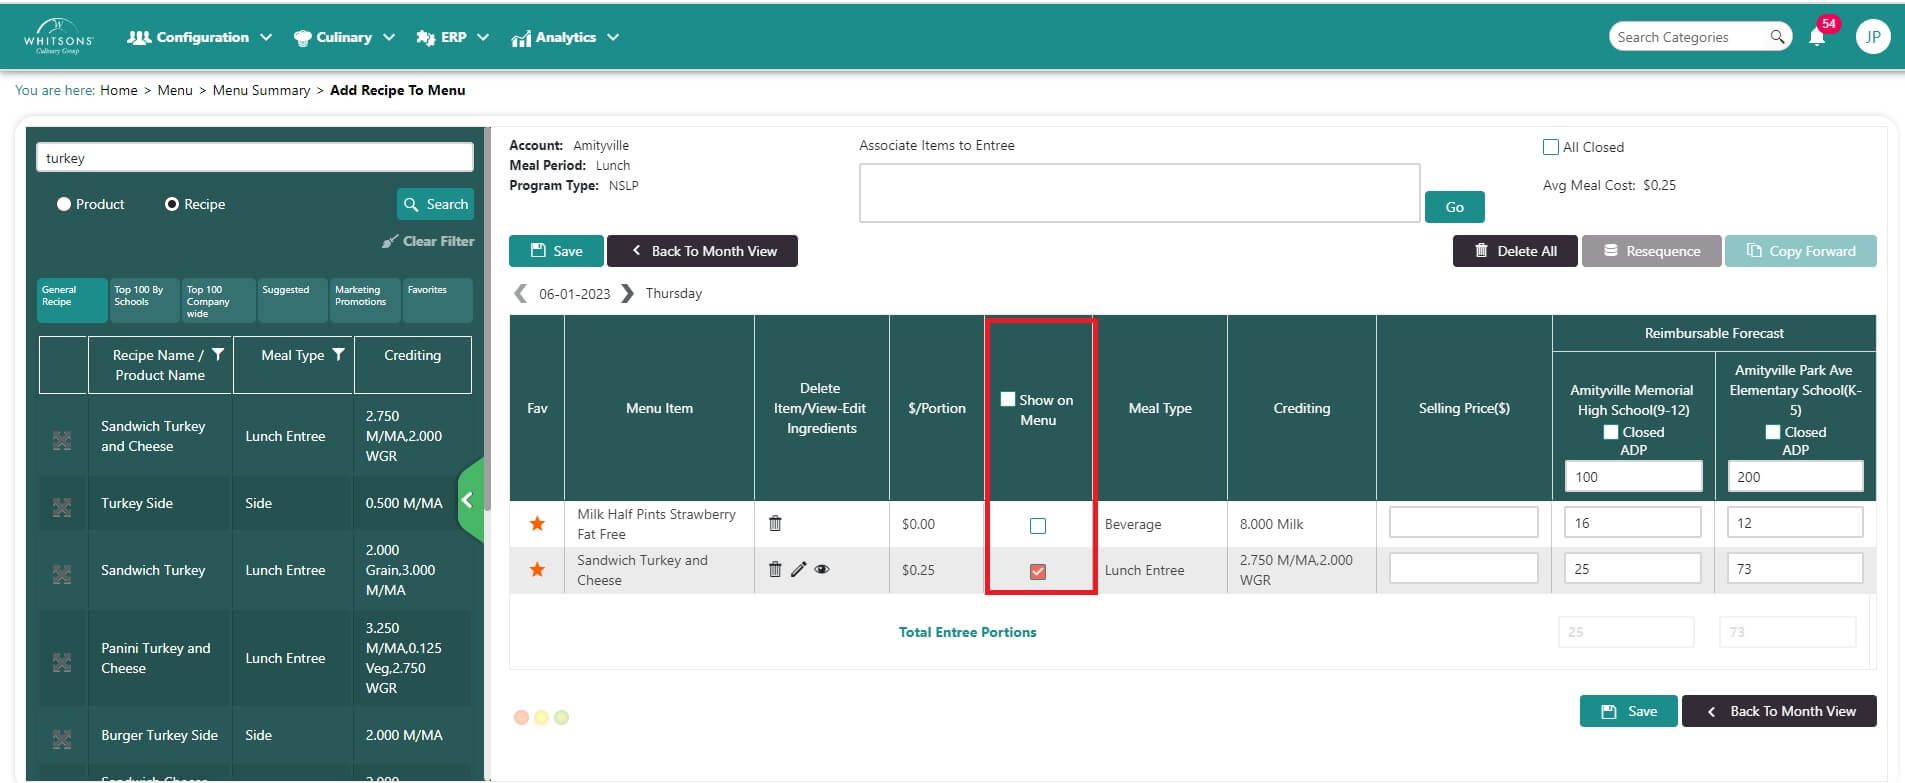
Enter the number of portions forecasted for each of the items and each of the locations on the menu. Note the checkbox to close a specific location for the day also appears on this screen.

Repeat this process until the day is complete. To show items on the menu, click the box. Scroll to the bottom and click Save.
 Note
NoteADP must be entered for the entire month.