Create Monthly Menu
Menus should be created by the FSD no later than the 15th of 2 months prior.
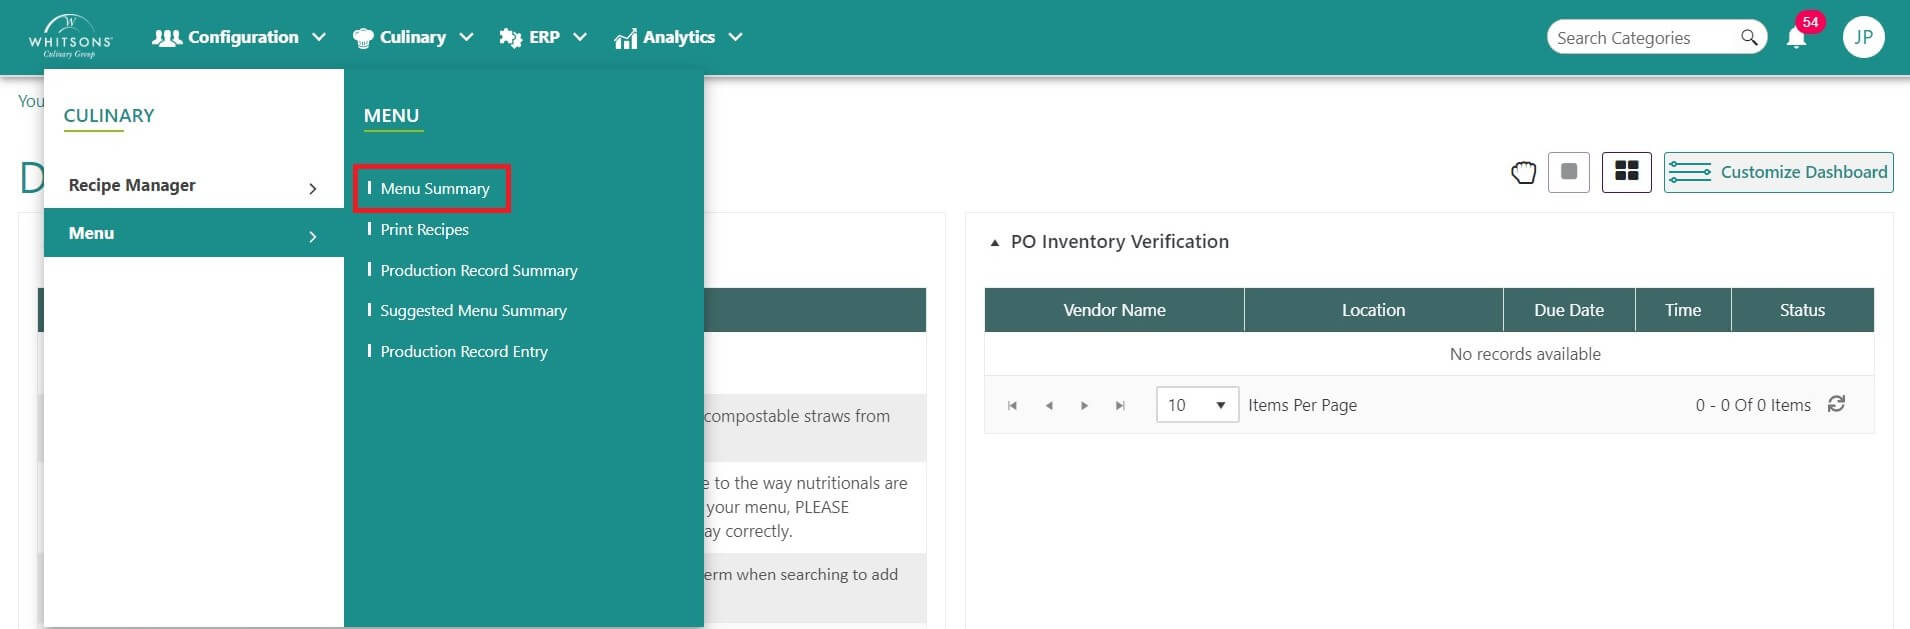
Hover over the Menu icon on the navigation menu. The Menu Icon expands to display subfunction list. Select Menu Summary. This screen will display all the previous menus created for the account.
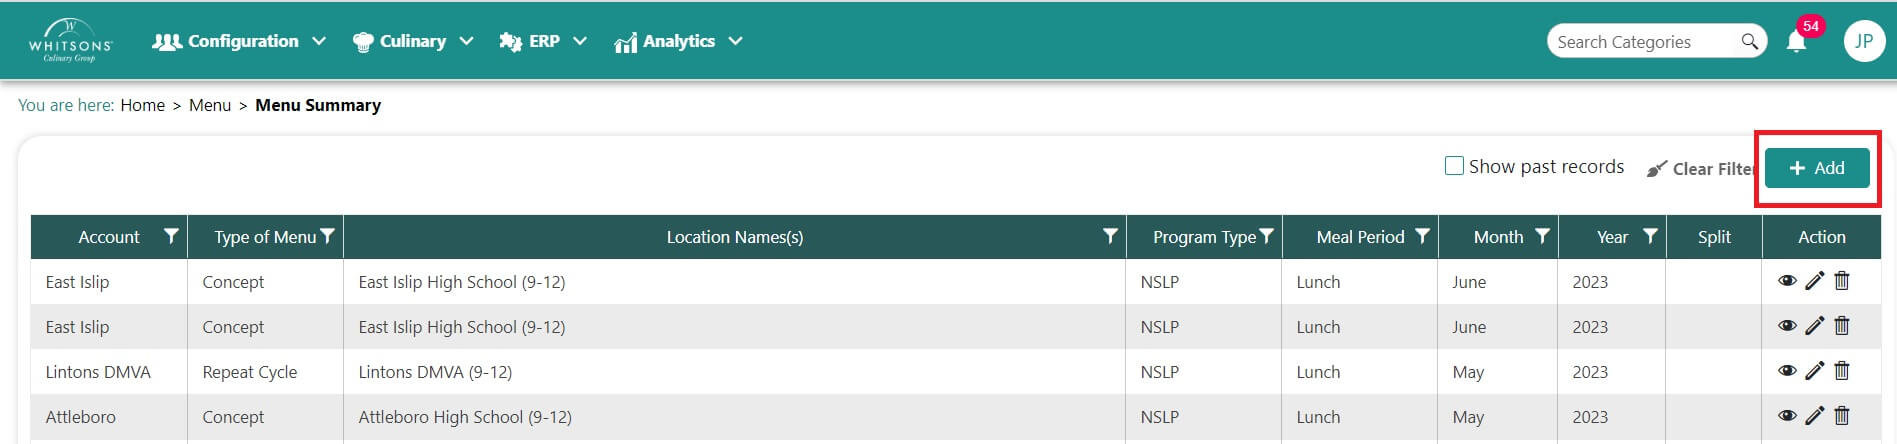
On the Menu Summary screen:
Account -- District that you have access to
Type of Menu -- Monthly, Concept, Cycle, Repeat Cycle
Location Name(s) -- school name (typically indicates elementary, middle or high school)
Program Type - Indicates the type of lunch program (an example would be NSLP)
Meal Period -- Breakfast, Lunch, Dinner
Month -- Month of the menu
Year -- Year of the menu
Split -- TBD
Function -- View, edit, delete

Click +ADD to add a new menu.
NOTE: To improve performance on the menu summary screen we are automatically only going to show current or future menus. You will still be able to view your menus for older periods. If you wish to view them, click on the checkbox labeled "Show past records" on the top right side of the screen. Clicking this checkbox will make all of your older menus visible to you.

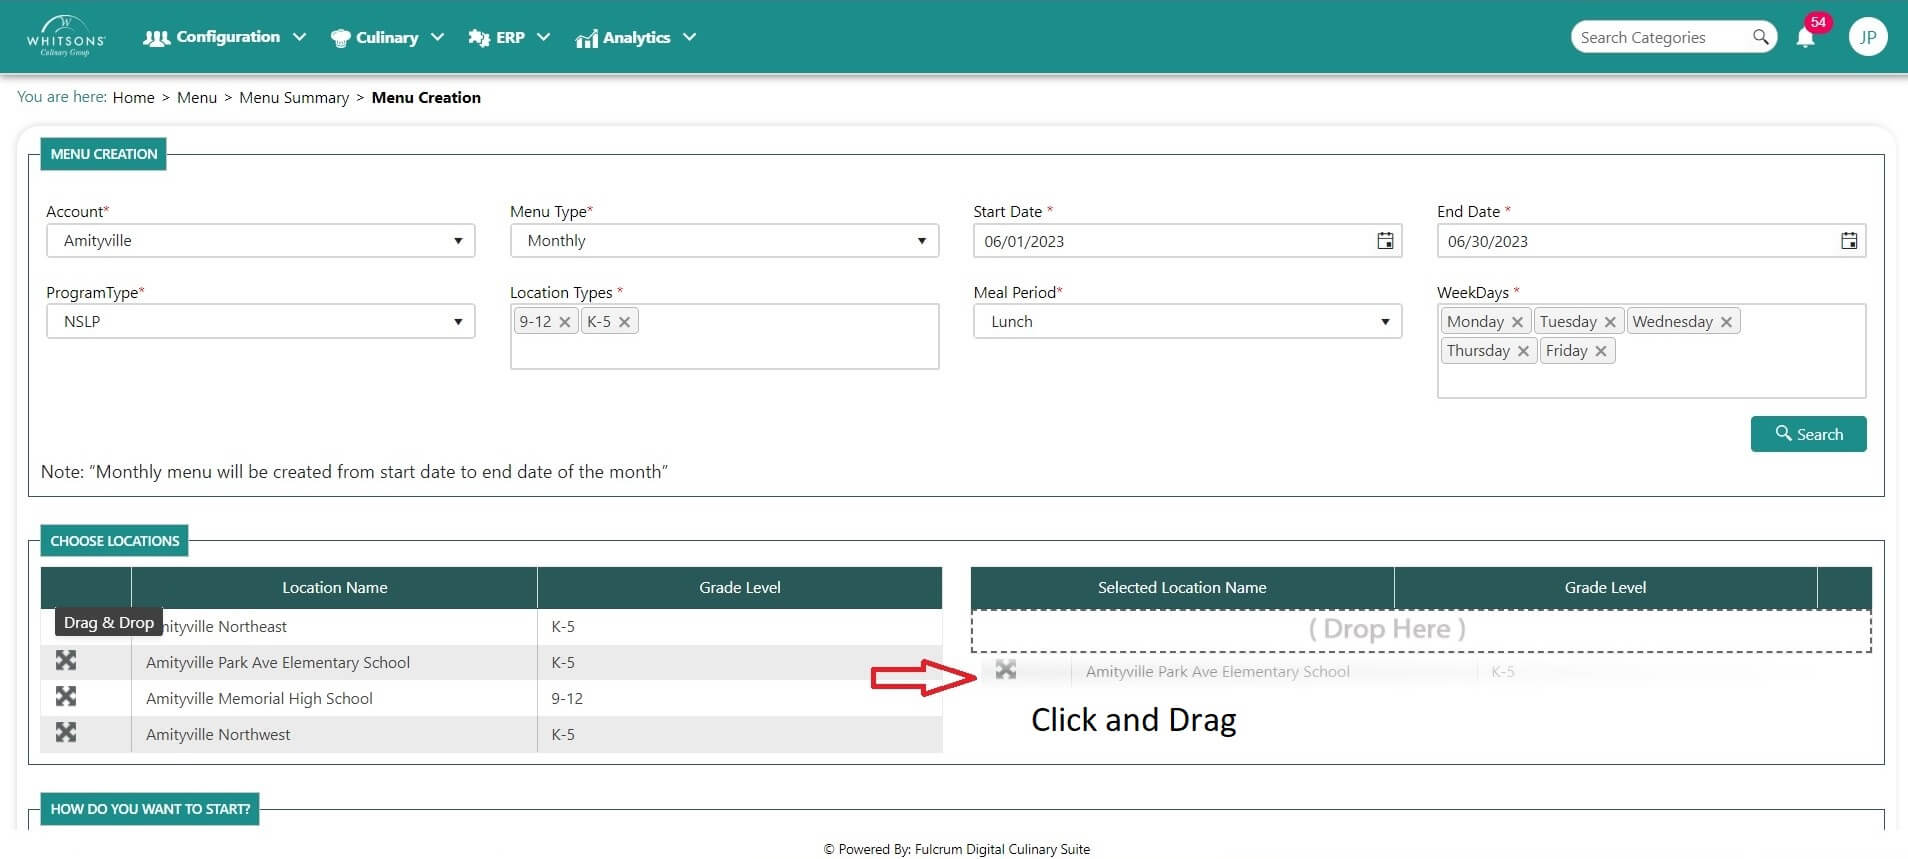
On the Menu Creation screen:
Select Account from the drop down menu. You can only choose from the accounts which you have access
Select Menu Type from the drop down menu. Menu types that are setup in the specific location will be displayed.
Select a Start Date for the menu. If starting on the first, the end date will populate. Note that you cannot create a menu for the current month or a previous month.
Select Program Type. DineCentral will show the program types that are setup for the locations in the selected account.
Select Location Types (You can select more than one type, but Elementary and High School cannot be selected together.) System will display location types that are setup on the Location Menu setup for the selected account, menu type, date range and program type.
If your account has (2) schools (7-12 and K-6):
- For the 7-12, create the menu by selecting both 6-8 and 9-12 in the location type and for K-6, select K-5 and 6-8 together in the dropdown.
Select Meal Period. DineCentral will only display the meal periods that are setup in the location for the selected account, menu type, date range & location types.
Select Weekdays, one at a time. Note: Start typing the first letter of the weekday name in the box and the weekday will fill.
Click on Search. DineCentral searches the location menu setup of each location in the account to determine which ones are available to have a menu created.

The Menu Summary screen will display matching records in the results grid. To choose one or more locations for your menu, click and drag the location from the left Location Name to the Selected Location Name section.
NoteIf you have a summer program, open a help desk ticket to have a summer menu created for your account.
Choose an option in "How Do You Want to Start?" (in our example above we selected "Start New")
Start New means that the user will start with a completely blank menu
Load Previous will allow the user to select an applicable menu that was previously created and will load all of those items into the new menu.
Suggested Menu will look for an applicable menu (setup by nutrition) and load those items in to the menu being created.
Note: The FSD has the option of modifying everything on the menu no matter how they choose to start.
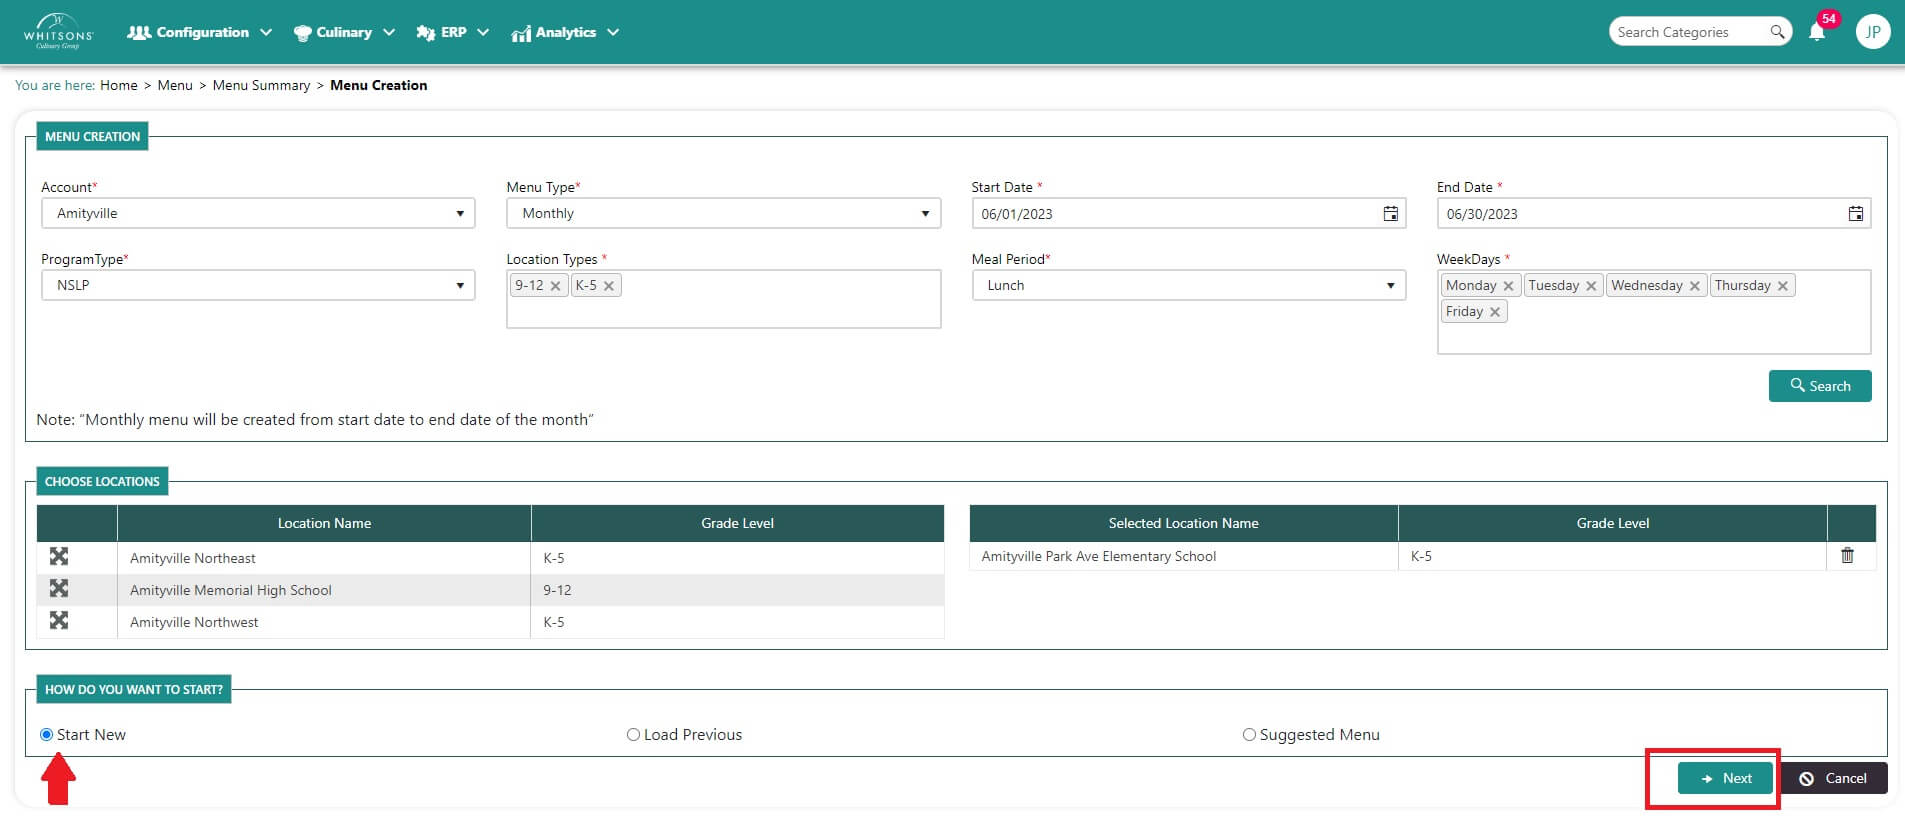
Click Next.
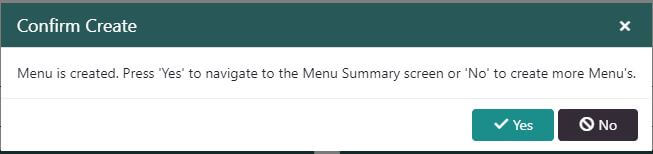
A popup menu will appear asking if you want to continue creating more menus or go the summary screen to edit menus that were created previously. In our example, we are creating a new menu.
On the Menu Summary screen, locate the menu you want to work on and click the Edit button (pencil). Use the filters on the top of each column to find the specific menu that you want to edit.

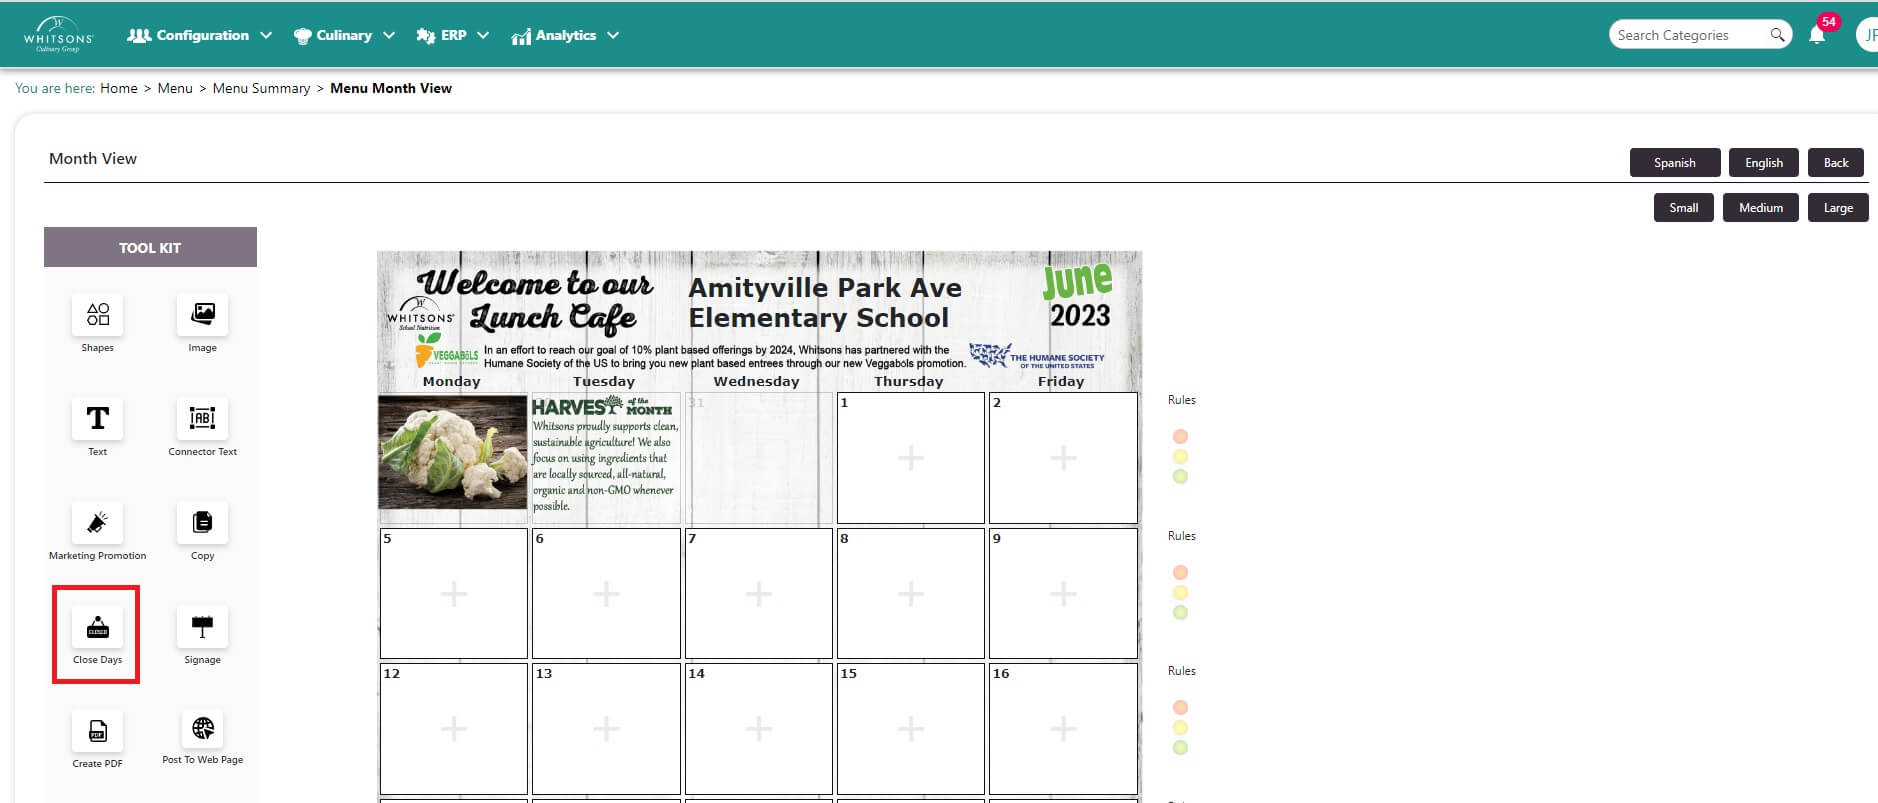
- The Menu Template appears. Select Closed Days:
Click on the Close Day icon on the left
Click on the day or days to be closed. The day will change color. If you selected the wrong day, just click on it again to unlock it.
When all closed days are correctly selected, click the Close button.
NoteThis will close the day for all of the schools using this menu. If only one of the schools will be closed, you can flag one school as closed by selecting the “closed” flag in the menu details screen for the desired location. You will be able to add text later using the Text icon (e.g. Half Day – No lunch” or “Spring Recess”).