Vendor Relationship: Product
What Is Vendor Relationship: Product?
This section will allow you to visually see what products your vendor is supplying to your company and how much you should have stored in your inventory. This makes it easier to visually see when you should buy more of a product by indicating the inventory quantity that you should purchase. In addition, this section sorts out products by active and all products allowing you to manage your products better.
Navigate To Vendor Relationship: Product
Click on ERP on the main navigation menu and hover on Vendor.
A new screen appears which shows the list of all of the core vendor tables. Locate the one which says Vendor Relationship and hover over it to see a pop out menu that shows Product and click on it.
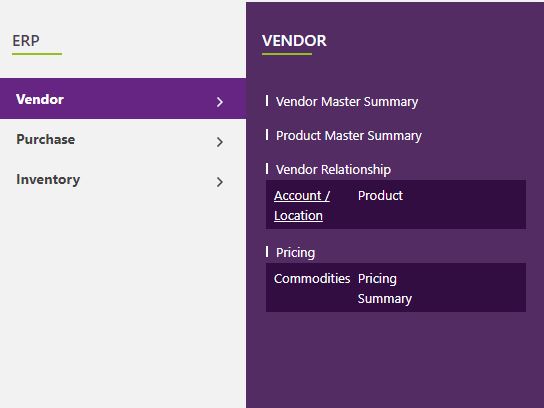
This will open up a screen where you see a search bar titled Vendor Name.

Search For Vendor Relationship: Product
Click the dropdown arrow under Vendor Name or type the vendor name in the search bar to see all of your vendors listed, or click Show All to display all vendors without filtering.
When you choose from the list, a table will generate all the products that are supplied by this vendor.
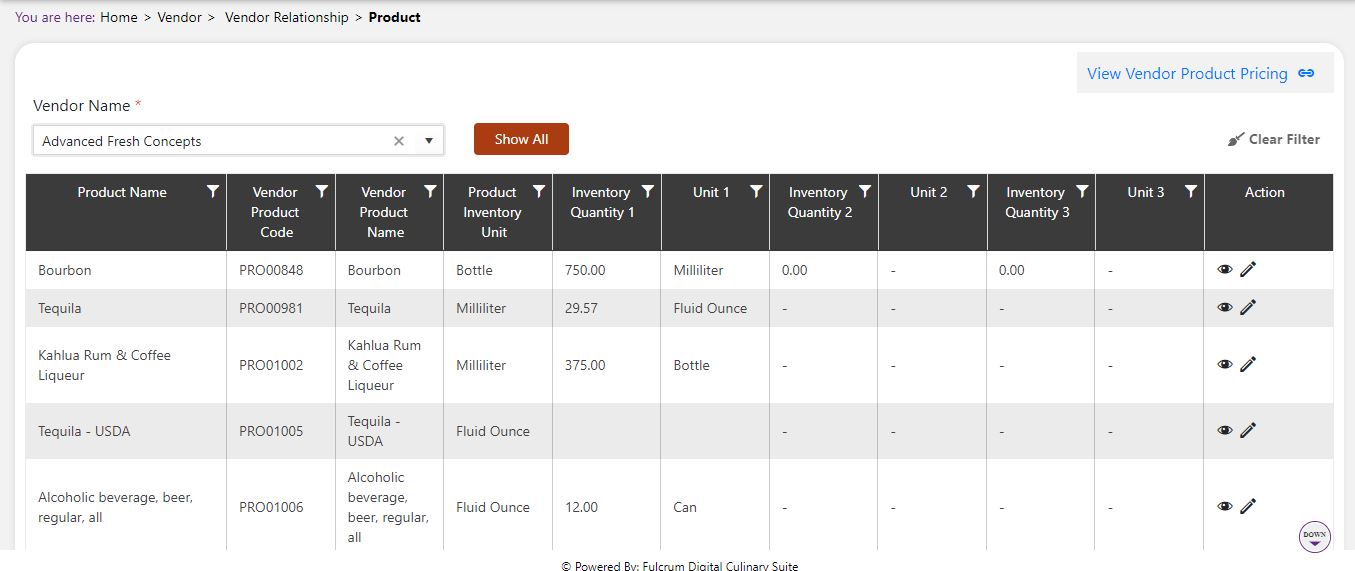
- To see all of the active products in this vendor relationship, click the "Show Active" button. To return to seeing all of the products, click the "Show All" button.
Modify Vendor Relationship: Product
Click on the Edit (pencil) icon next to the product that you would like to modify. A popup named Edit Vendor Product Relationship will open.
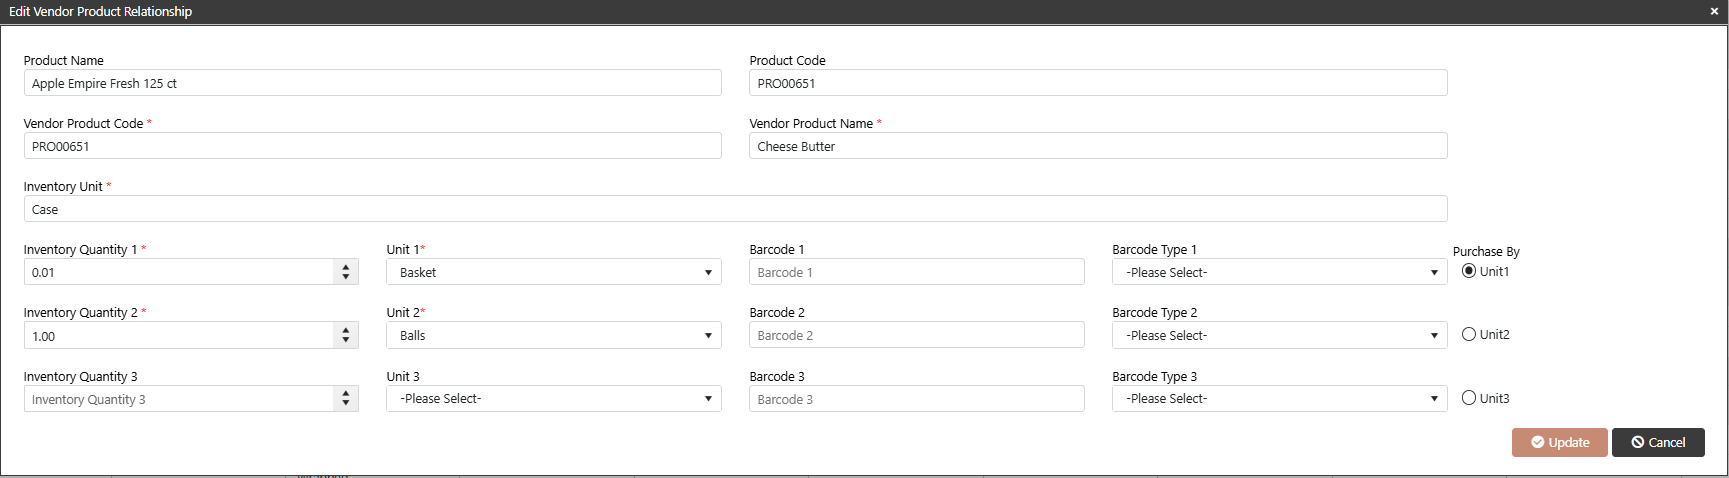
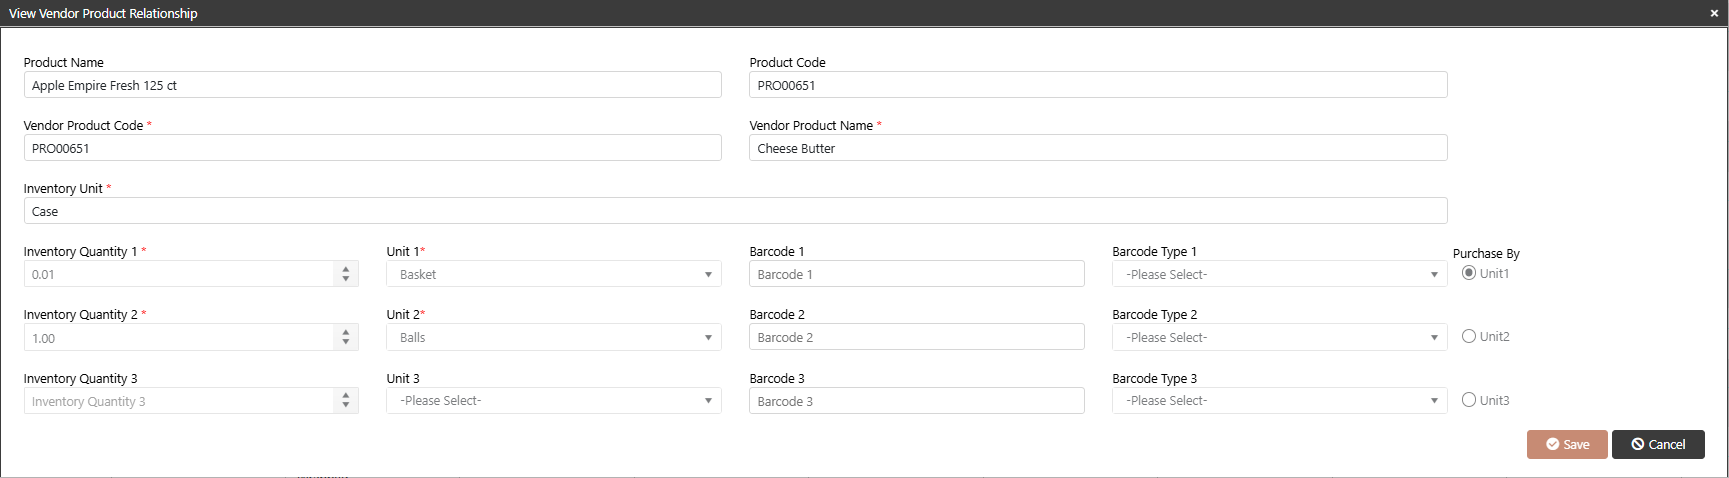
On the Edit Vendor Product Relationship popup, the following fields are static (read-only): Product Name, Product Code, Vendor Product Code, Vendor Product Name, Inventory Unit. The following fields are editable:
Inventory Quantity 1 / 2 / 3: Numeric Stepper
Unit 1 / 2 / 3: Dropdown — shows all available units
Barcode 1 / 2 / 3: Free text
Barcode Type 1 / 2 / 3: Dropdown
Purchased By: Radio button — select one of three options
Click Update to save changes or Cancel to discard.
You may make changes to any of the fields regardless of whether the Product is currently referenced throughout the system.
Click the View (eye) icon to open the View Vendor Product Relationship popup in read-only mode. The Save button is disabled; only Cancel is available.
View Vendor Product Pricing
On the Vendor Relationship - Product screen, click the View Vendor Product Pricing link in the top-right corner to open the Pricing Summary window.
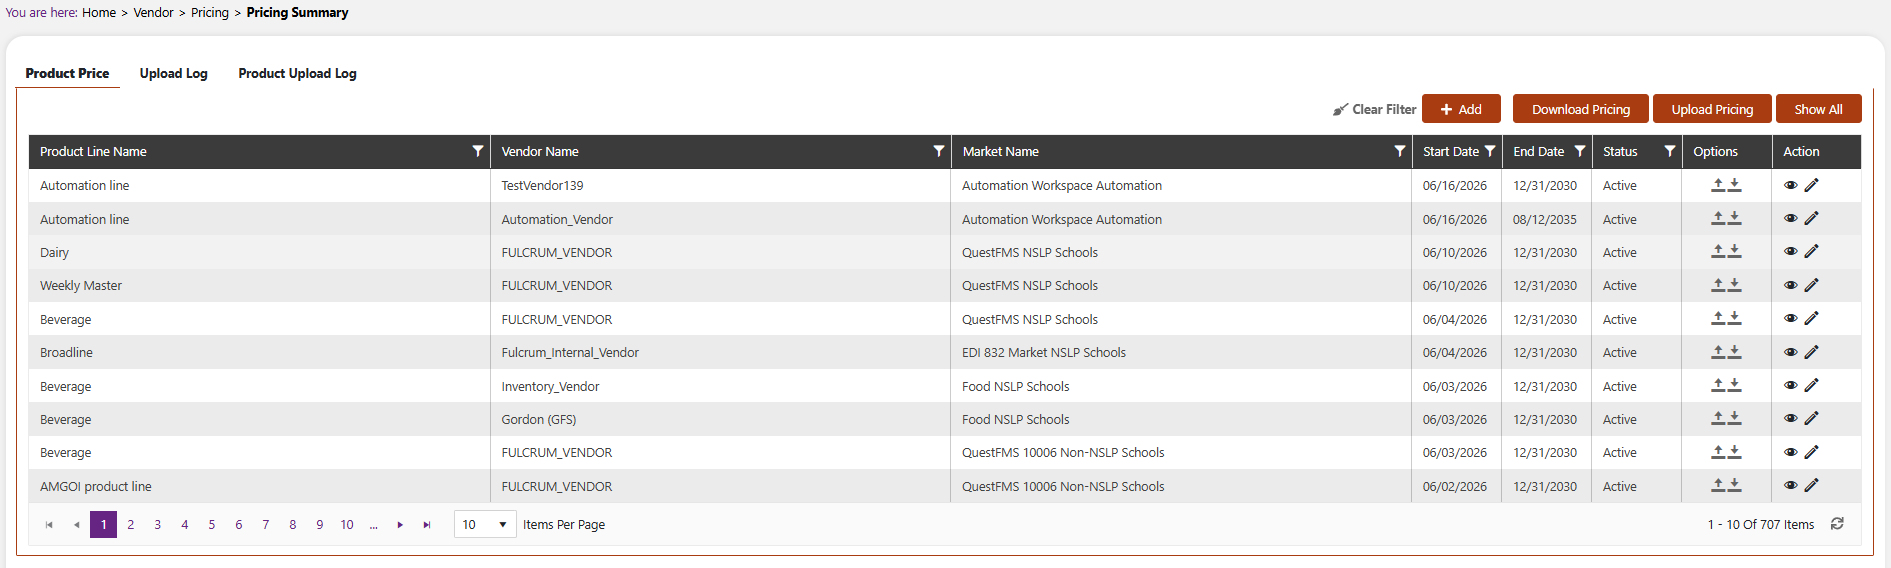
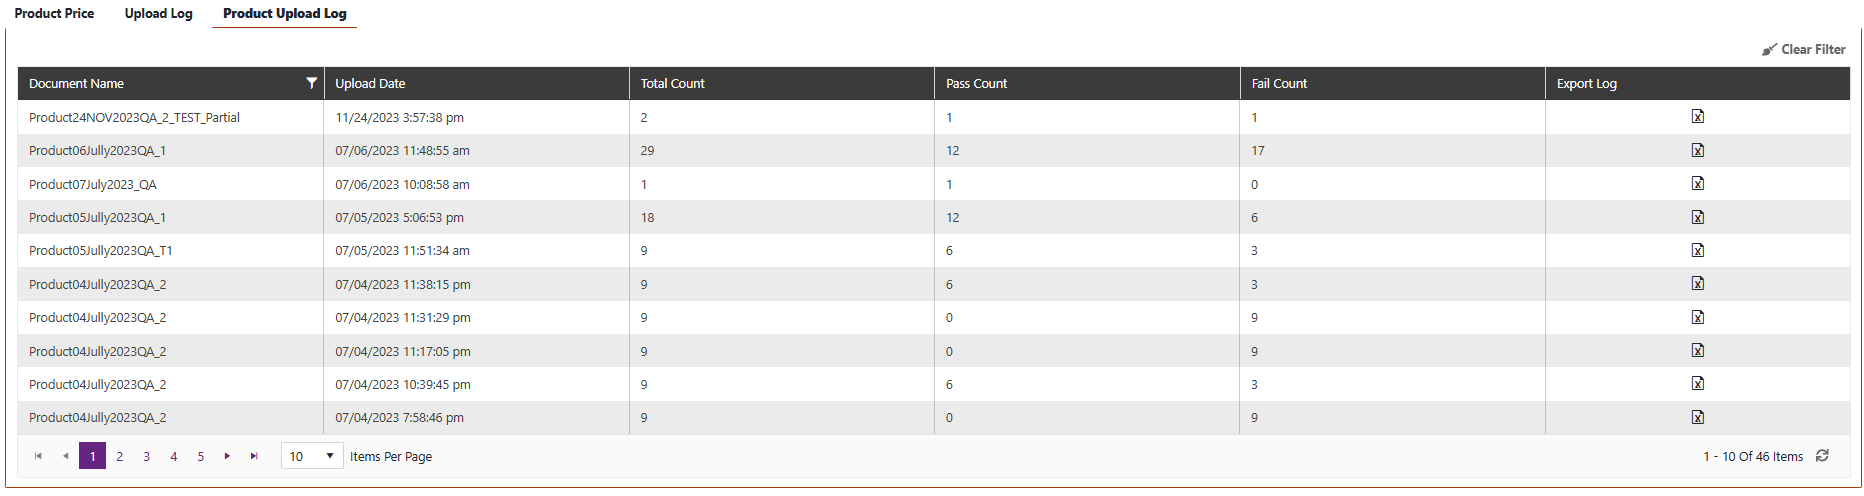
The Pricing Summary window contains three tabs: Product Price, Upload Log, and Product Upload Log.
Product Price Tab
The Product Price tab lists all product lines with their associated Vendor Name, Market Name, Start Date, End Date, Status (Active, Expired, Validated, Pending Approval, Obsolete, Discarded), Options (Upload and Export icons), and Action (View and Edit buttons).
Available buttons: Add, Download Pricing, Upload Pricing, Show All.
Upload Icon (under Options column)
Click the Upload icon under the Options column to open the upload price files window.
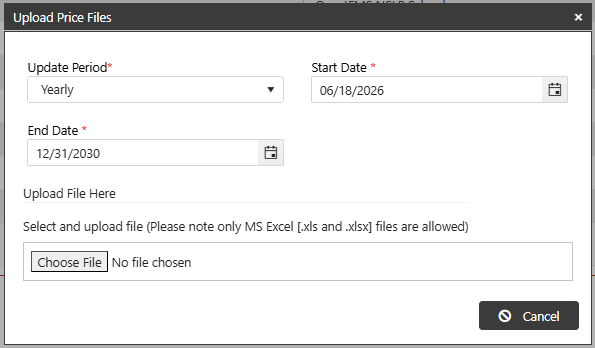
Select the Update Period from the dropdown, enter Start Date and End Date using the date picker, then attach the respective file by clicking the Choose File button. This will upload the file for the selected period.
Edit (Pencil) Icon (under Action column)
Click the Edit icon to open the edit price sheet popup where a user is managing bulk vendor pricing contracts for a specific market or timeline.
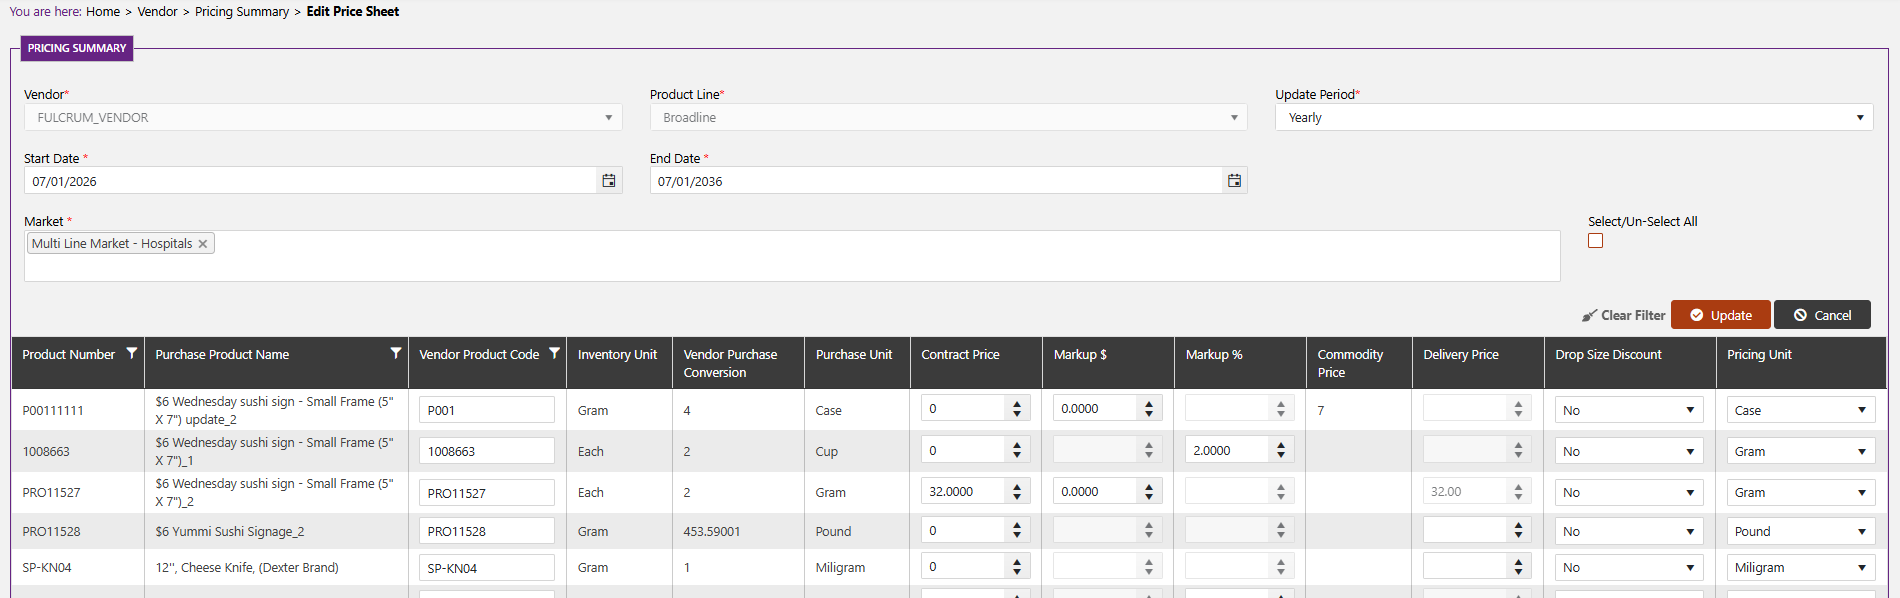
Fields: Vendor (dropdown), Product Line (dropdown), Update Period (dropdown), Start Date (date picker), End Date (date picker), Market (dropdown). Click Save to add the record as a row in the table, or Cancel to discard. The following fields can be updated here:
- Vendor Product Code: Update the vendor’s custom SKU or item identification code to ensure purchase orders map correctly to their ordering system.
- Vendor Purchase Conversion: It will display the numerical multiplier that defines how many inventory units are inside a single purchasing unit (for example, how many Grams or Each are inside one Case or Pound).
- Purchase Unit: It will display the bulk packaging unit type that you use when placing an order with the vendor (e.g., Case, Cup, Pound, Milligram).
- Pricing Unit: Select the specific unit of measure that the vendor uses to calculate your bill.
- Contract Price: Set or adjust your core, pre-negotiated base cost for the product line.
- Markup $ / Markup %: Add or adjust the specific profit margin or distributor handling fee applied to the item, either as a flat dollar amount or a percentage.
- Commodity Price: It will display the baseline government commodity value for tracking pass-through savings.
- Delivery Price: Enter or adjust logistics overhead, shipping costs, or landed freight fees specific to that product.
- Drop Size Discount: Toggle whether this specific item qualifies for volume-based pricing discounts based on the total size of your delivery drop.
Download Pricing Button
Click the Download Pricing button to open the Download Price Files popup.
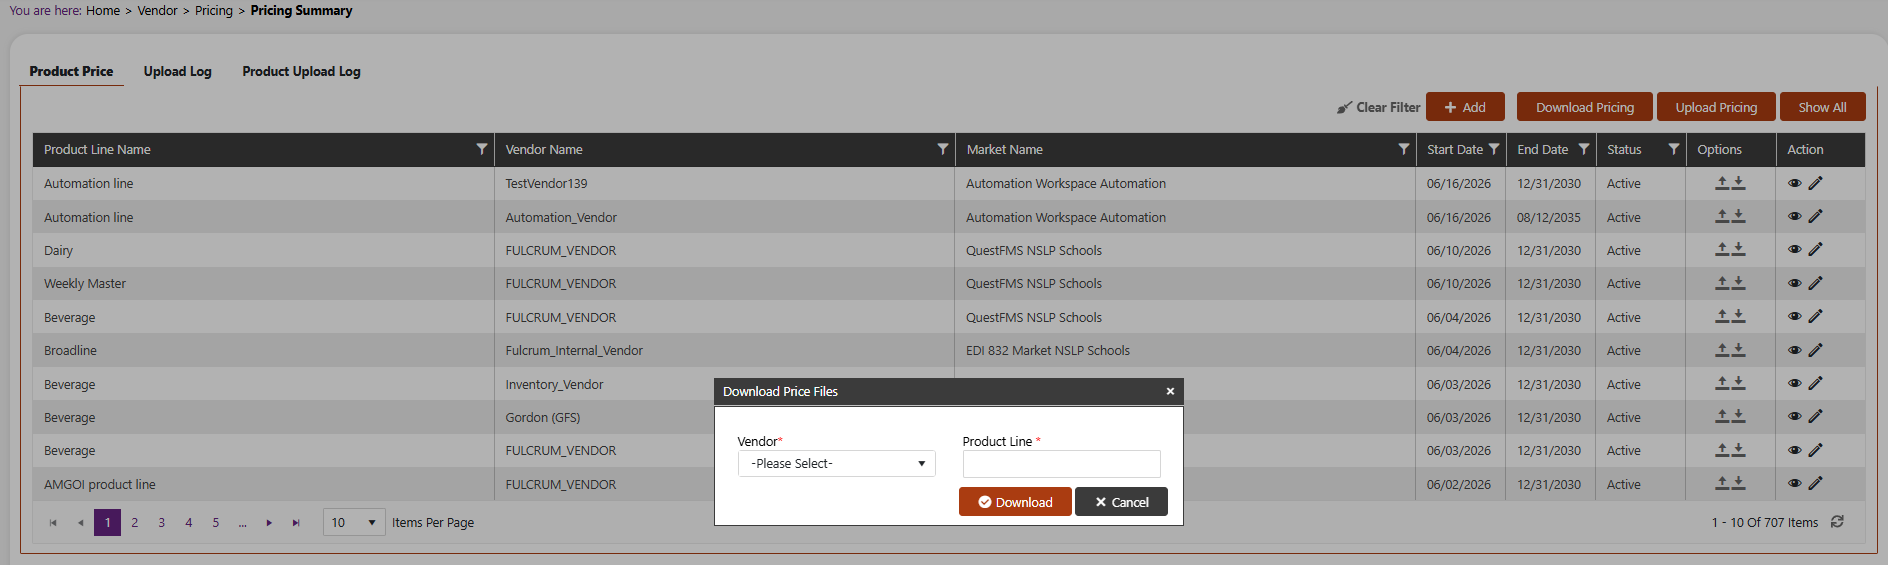
Select a Vendor and Product Line from the dropdown, then click the Download button to download the price file for that vendor, or Cancel to close.
Upload Pricing Button
Click the Upload Pricing button to open the Upload Price Files popup.
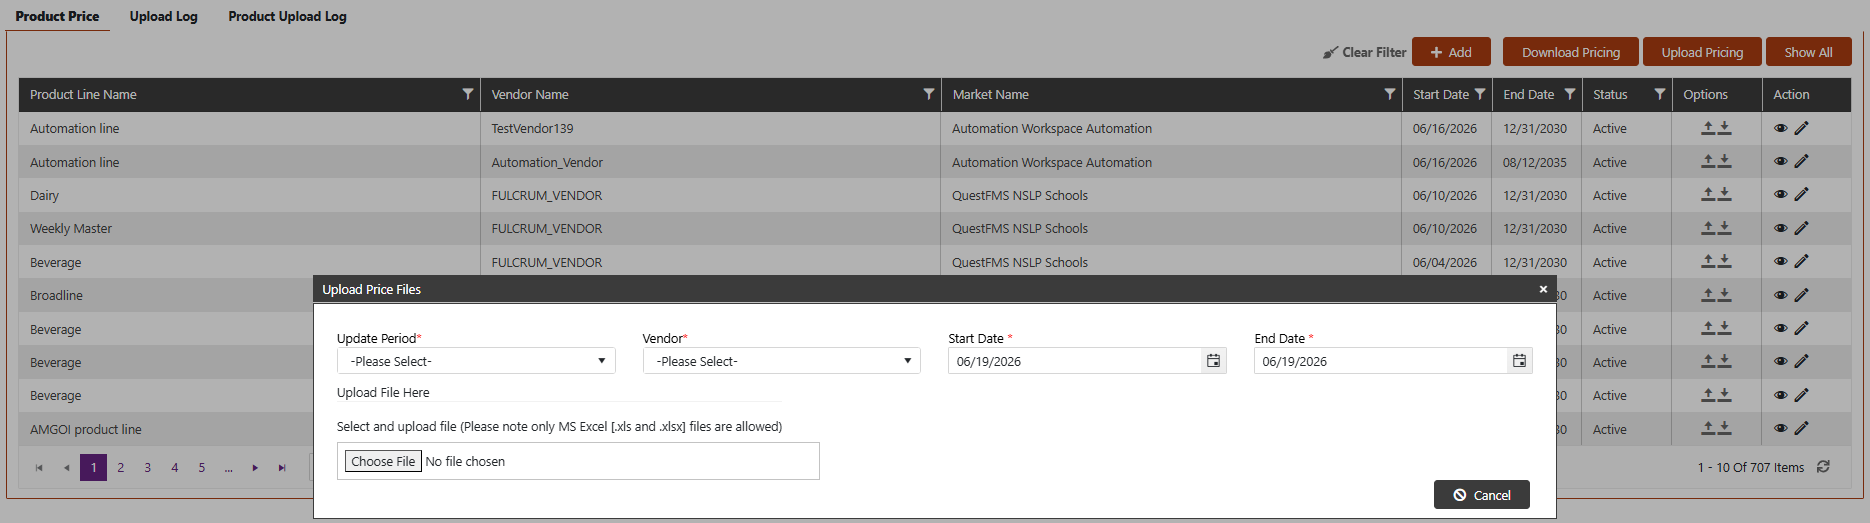
Select the Update Period, Vendor from the dropdown, then select the Start Date and End Date, and choose the files to attach. Click Cancel to close.
Show All Button
Click Show All to display all product lines with their vendors regardless of status. The button label toggles to Show Active so you can return to seeing only active product prices.
Upload Log Tab
The Upload Log tab displays all vendor uploads with their Start Time, End Time, Document Name, Product Line Name, Total Count, Total Pass Count, Total Fail Count, and an Export Log option. This tab is view-only.
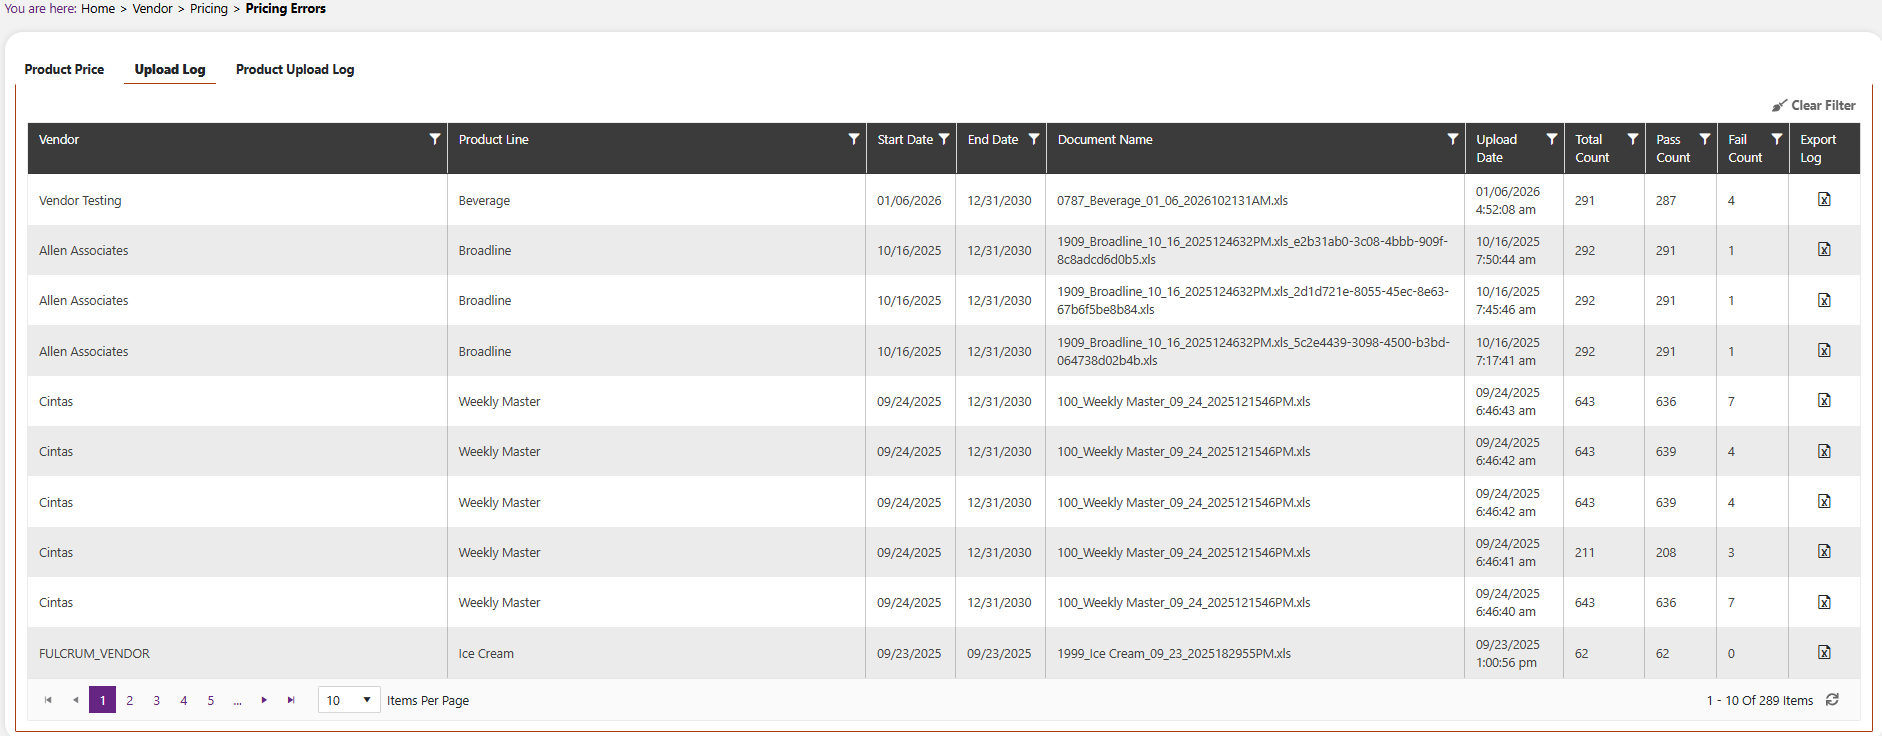
Product Upload Log Tab
The Product Upload Log tab shows the documents uploaded, Upload Time, Total Count, Pass Count, Fail Count, and Export Log option. This tab is view-only.