Vendor Relationship: Account/Location
What Is Vendor Relationship: Account/location?
Vendor Relationship allows you to create priorities for your product lines by vendor and keep track of important dates of delivery, cancellations, and cut off days for each Product Line by vendor. You will be presented with two tabs: Vendor Account and Vendor Location to keep track of vendors by both a specific account or location. This allows your company to keep track of things on both a large-scale account level and a smaller-scale location level to make sure that delivery dates, cancellation times, and cut off days are all accounted for and kept in the system.
Navigate To Vendor Relationship: Account/Location
Click on ERP on the main navigation menu and hover on Vendor.
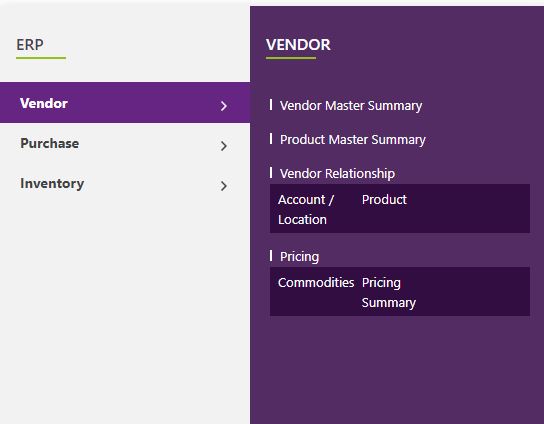
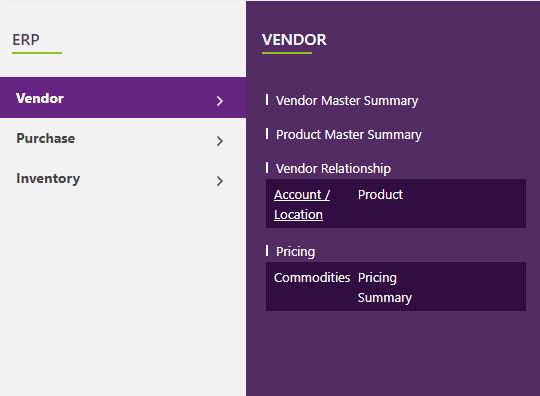
A new screen appears which shows the list of all of the core vendor tables. Locate the one which says Vendor Relationship and hover over it to see a pop out menu that shows Account/Location and click on it.
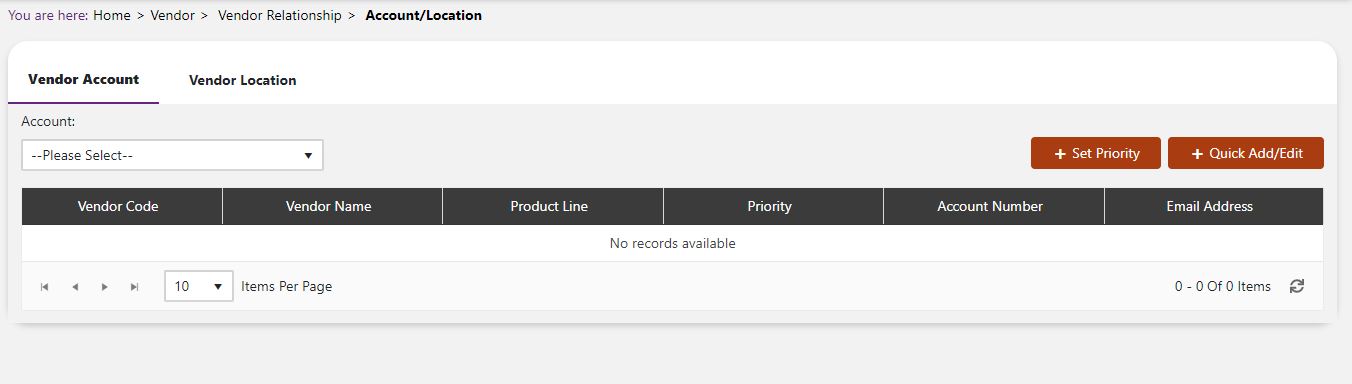
This will open up a screen where you see a search bar titled Account Name
Add New Vendor Relationship: Account/Location
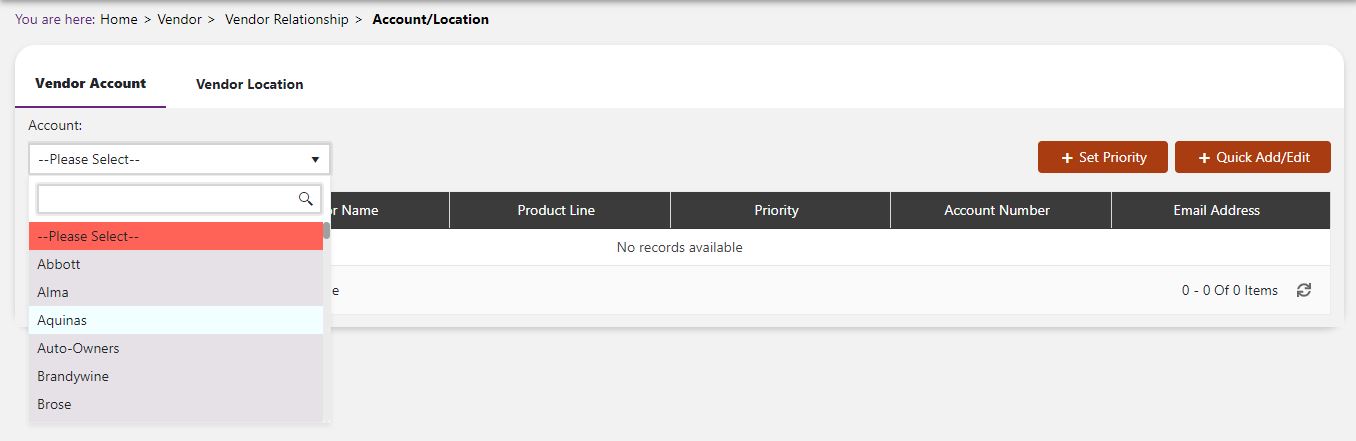
Click the dropdown arrow on the search bar to see all of your accounts listed.
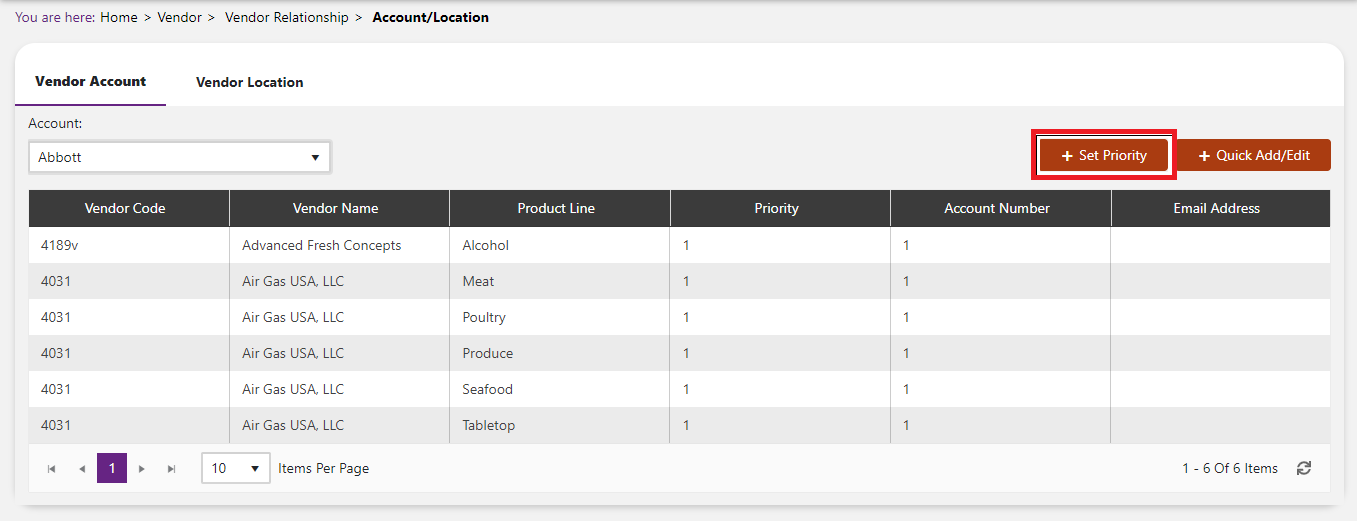
When you choose from the list, a table will generate all the products that are supplied to this account.

Click the Set Priority button on the right side of the screen.
The system will open a popup screen in which you can fill in the following fields (Note: Mandatory fields are indicated by the * next to the name):
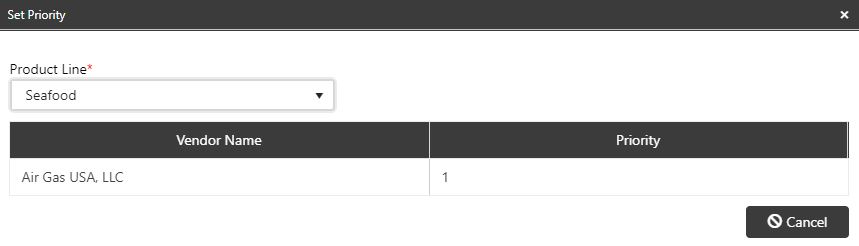
Product Line: Click the dropdown arrow to see a list of Product Lines to choose from. Once you choose the Product Line, you will see a screen like the one below.

Here, you can set the priorities for each product line vendor. You can hit the arrow in the “Move-Up” column to move the priority up for this item and vice versa with the icon in the “Move-Down” column. If you want the product vendor to have the Top priority you could either continuous click the icon in the “Move-Up” column or hit the icon in the “Move-Top” column and the vendor will be at the top, vice versa for the lowest priority using the “Move-Down” and “Move-Bottom” icons.
Click the Quick Add/Edit button to either add or edit product vendors.
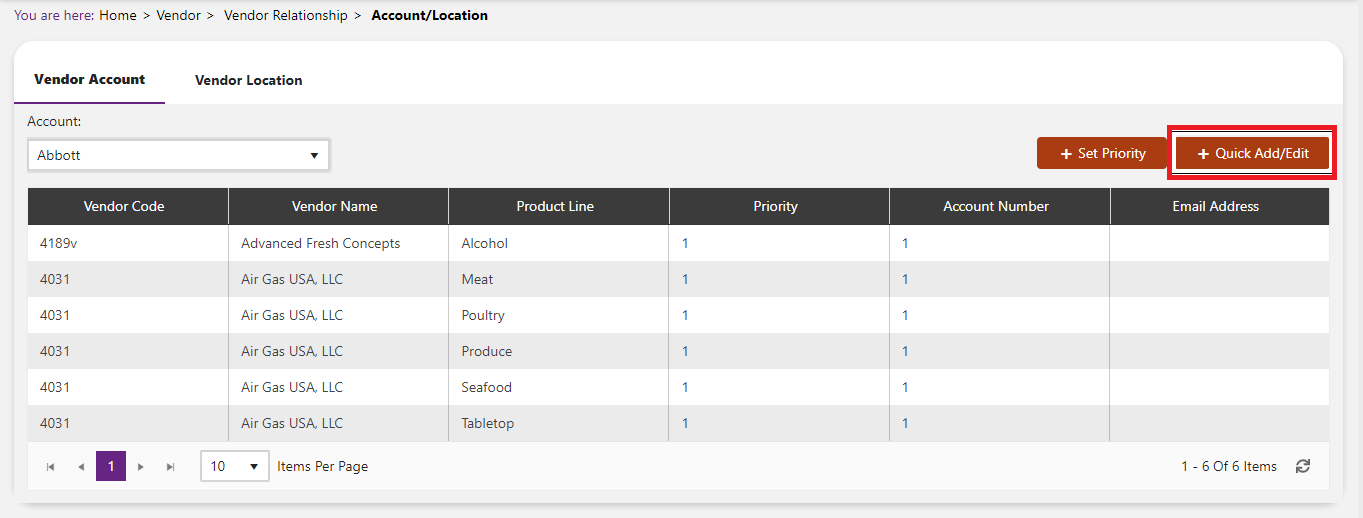
This will which you want to add a product line to. Then hit the add button on the right side of the screen.
You will see a screen that looks like the one below.
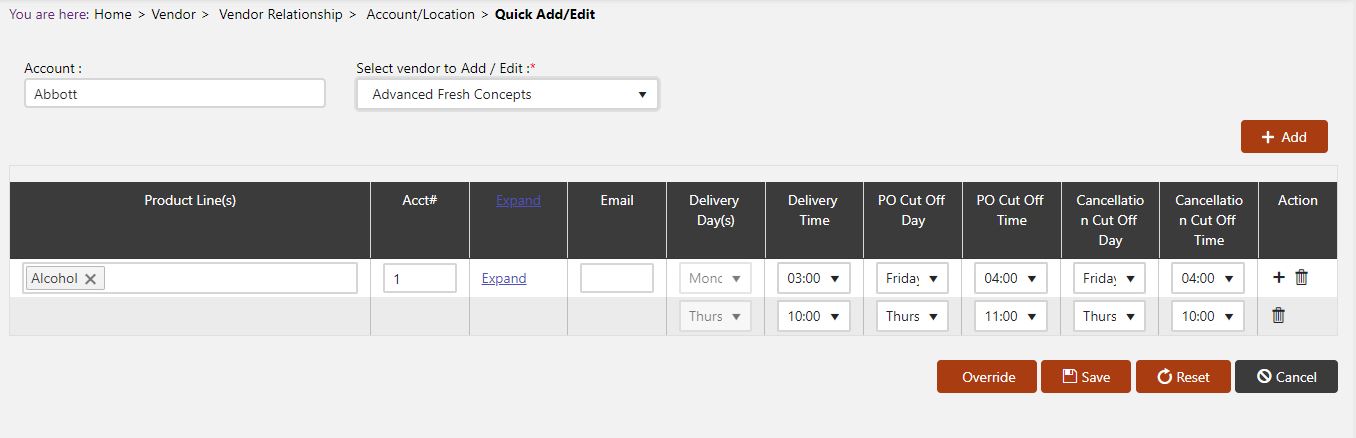
Within the table, you can fill in the following fields:
- Product Line: Click within the box to see a list of Product Lines.
- Acct#: Please fill in the account number here.
- Email: Click inside the entry box for email to see a textbox. Here you can add an email if you like.
- Delivery Day(s): Select a day from the list.
- Delivery Time: Enter the time of the delivery.
- PO Cut Off Time: Select the time which the Purchase Order will be cut off by on the PO Cut Off Day.
- Cancellation Cut Off Day: Select the last day for a cancellation.
- Cancellation Cut Off Time: Select the time on the last day for a cancellation.
- Hit the Add button in this row to add another set of Delivery Days, PO Cut Offs, and Cancellation Cut Offs for the same Product Line.
- Hit the garbage button to delete.
Click the Save button.
For this account, you can set priorities by Location as well. For this, click on the tab Vendor Location on the top of your screen and hit Set Priority.
The system will open a popup screen in which you can fill in the following fields (Note: Mandatory fields are indicated by the * next to the name):
Product Line: Click the dropdown arrow to see a list of Product Lines to choose from. Once you choose the Product Line, you will see a screen like the one below.
Here, you can set the priorities for each product line vendor. You can hit the arrow in the “Move-Up” column to move the priority up for this item and vice versa with the icon in the “Move-Down” column. If you want the product vendor to have the Top priority you could either continuous click the icon in the “Move-Up” column or hit the icon in the “Move-Top” column and the vendor will be at the top, vice versa for the lowest priority using the “Move-Down” and “Move-Bottom” icons.
Click the Save button.