Reconcile Data
At the end of your fiscal period (end of each month for schools, end of each week for B&I's) you must reconcile your POS system records against those in Dine Central to identify errors and make the necessary adjustments.
On the first of the month, Dine Central automatically creates a new reconciliation file for the previous month that you must edit. If you wish to reconcile before the end of the month (e.g. before the Christmas holiday), you can create one any time during the current month.
The reconciliation process in Dine Central starts on the Monthly Reconciliation Summary screen.
NOTE
To limit any potential reconciliation problems, before beginning the monthly reconciliation make sure you
Compare the Sales & Meal Count report to your weekly POS report and fix any issues weekly
Run a claims report from your POS system and update your enrollment and eligibility numbers in Dine Central at the end of the month as needed
Submit your daily data entry in Dine Central
Finalize your catering invoices in Dine Central
Access Monthly Reconciliation Summary
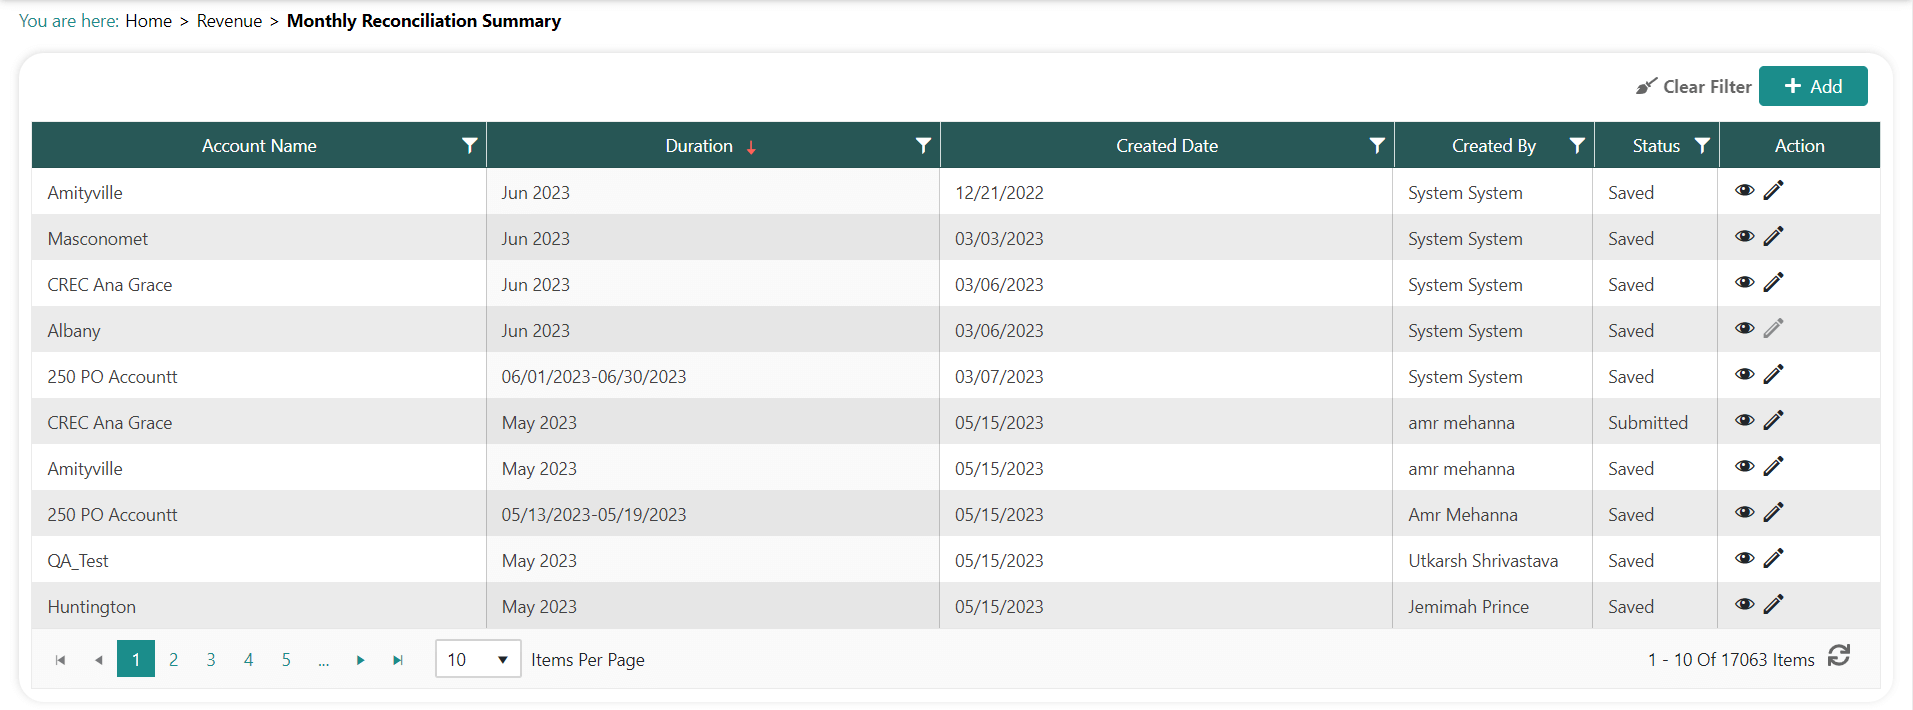
The Monthly Reconciliation Summary screen shows a list of reconciliations for your location(s) along with their current status. From this screen you can create a new reconciliation and/or edit an existing one.
To access monthly reconciliation summary:
- Click Revenue>Reconciliation from the left navigation. The Monthly Reconciliation Summary screen appears:
NOTES:
Click + Add to begin a new reconciliation before the month ends.
The reconciliation screen always shows month-to-date information.
Perform Reconciliation
From the Monthly Reconciliation Summary screen, you can begin the four step reconciliation process: POS Reconciliation, Additional Information; Reimbursement Claiming; Enrollment and Eligibility.
B&I's are only required to complete the first step: POS Reconciliation.
Step 1: POS Reconciliation
This POS Reconciliation step compares the counts and sales you entered on the Daily Data Entry screen with those from the month/week end POS report for each school in the district. This step must be completed in order to move to Step 2.
NOTES:
DO NOT simply type in the numbers you think the system wants. If the numbers are not accurate, the monthly statement and bills to the client may be incorrect.
You can only attach one POS report.
Be sure to use the abbreviations below on your POS report before you attach it.
o ALC – A la carte o OP – Online Prepayments o AS – Adult Sales o PC – Prepaid Collected o B – Breakfast o PR – Prepaid Redeemed POS o L – Lunch o S – Snack
To complete Step 1:
Access the Monthly Reconciliation Summary screen.
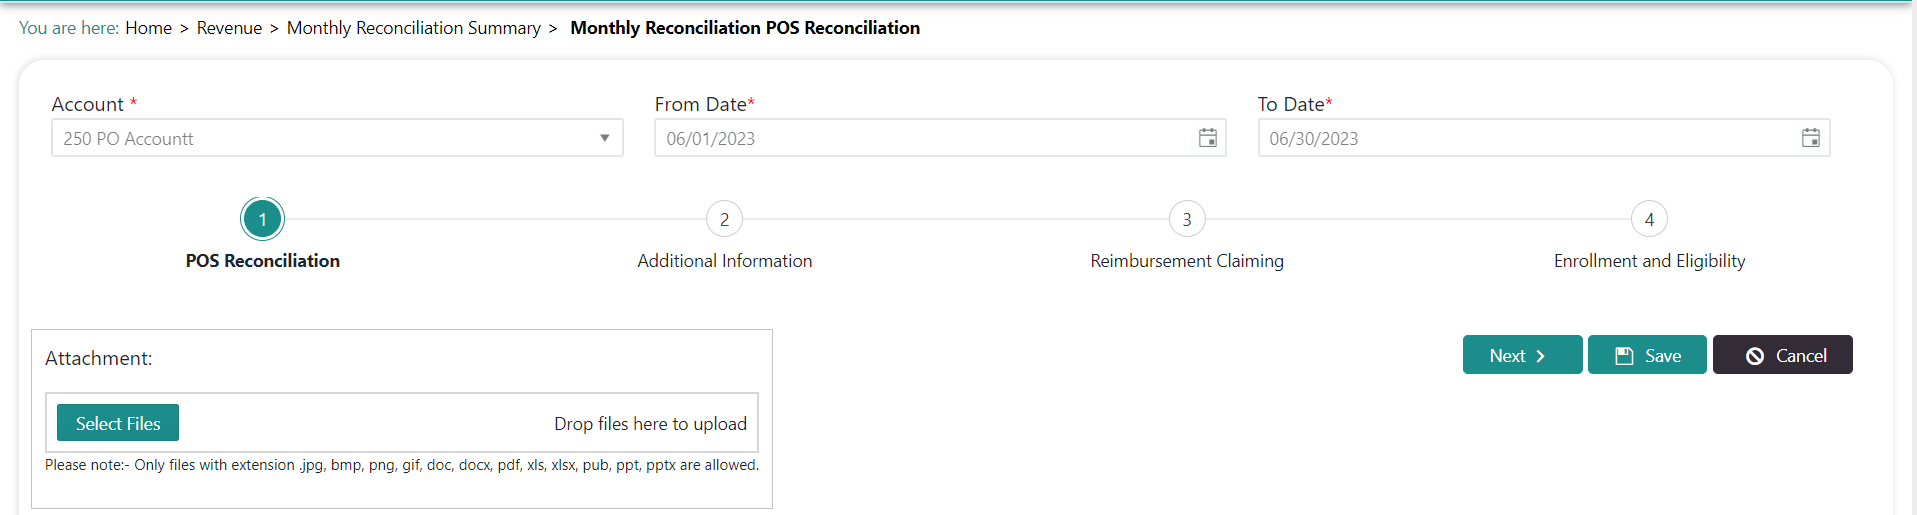
Click the pencil icon to edit the reconciliation. The POS Reconciliation screen appears:
Click the first section to view the details:
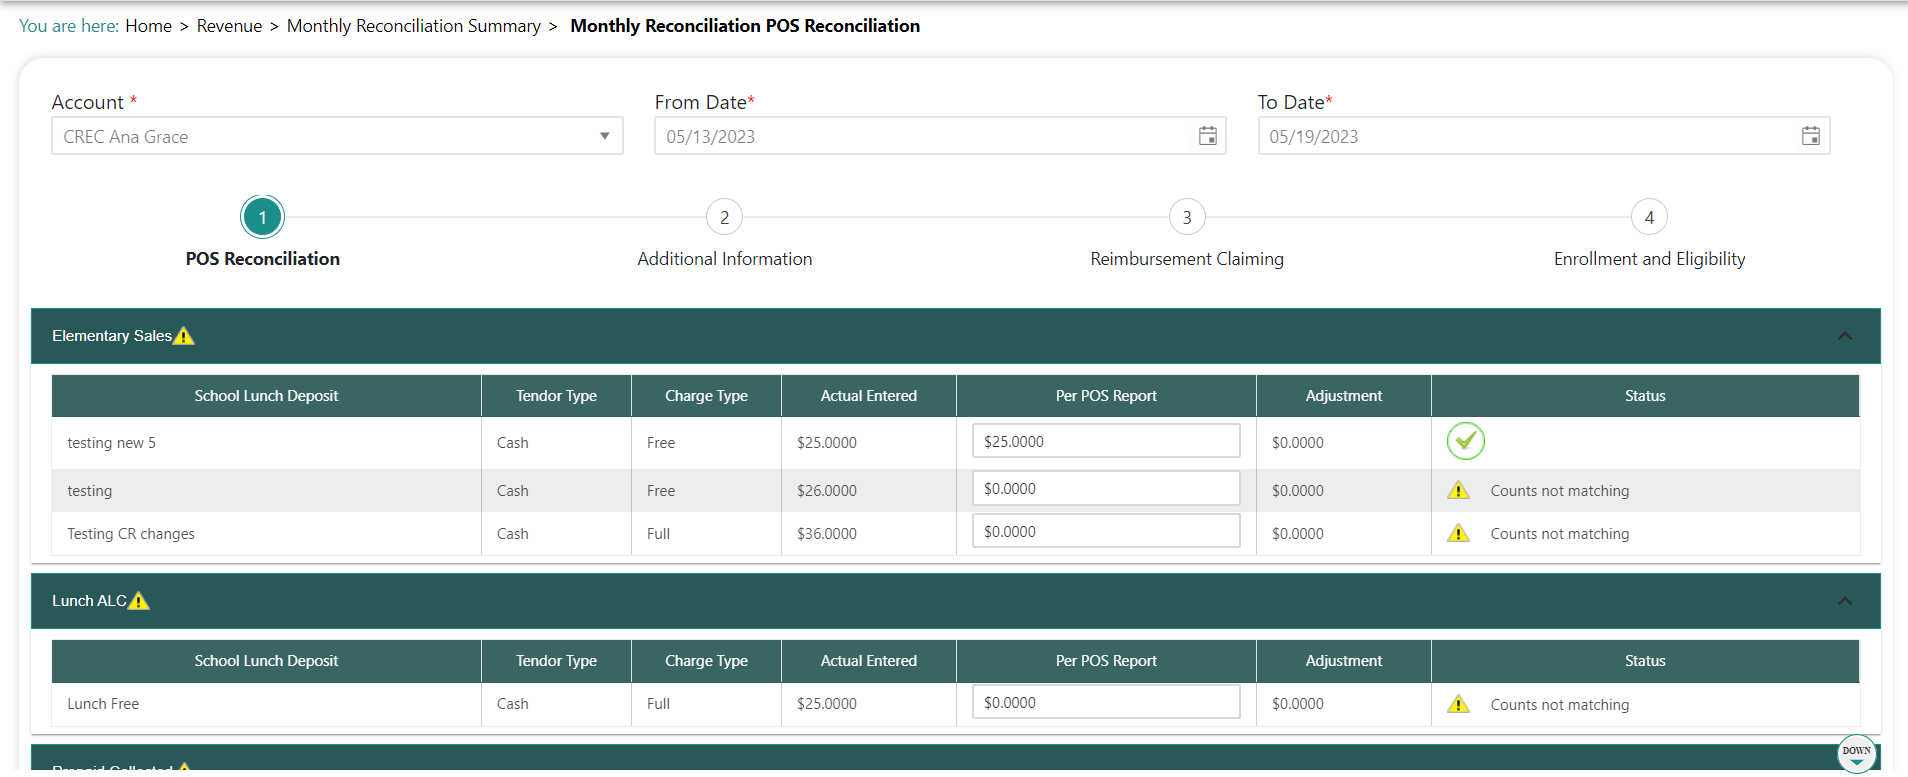
Enter your consolidated POS data for all locations into the appropriate Per POS Report fields.
If the Status column says Counts not matching, you must reconcile the error.
I. Go back to the Data Entry screen and make sure all your days are submitted and to the Catering Invoice Summary screen to ensure all catering is finalized.
II. If there is still an error, click the Warning icon to trace the error. Two buttons appear next to each location: Verify and Change

III. Enter the POS report numbers for each location.
IV. Where the numbers do not match you will still see the Verify and Change buttons.
Click Change to indicate the POS numbers are correct and you wish to change the information in Dine Central to match those in the POS report. The change is reflected on the last operating day of the month.
OR
Click Verify to indicate you have verified that the numbers entered during daily data entry are correct and you wish to override the POS information. Then type an explanation as to why the POS report displays a different value (e.g. POS system was down).
Click Save to save the changes for that section.
Repeat steps 3-6 for each section.
Click Attachment and attach one .pdf of the consolidated POS report.
Click Save.
IMPORTANT:
There is no Undo button for Verify. If you need to make changes after you selected the Verify button, you must change daily data entry to correct the numbers so they reconcile.
If you need to make changes after you selected the Change button, you can simply correct the POS numbers then click Change again.
Step 2: Additional Information
The Additional Information screen is where you record monthly miscellaneous items such as Client Labor, Type 2 Vending Sales or Manual Reimbursements. The items you see here match those that apply to your district. If you do not have any of these items, you can skip this step.
To complete Step 2:
Complete Step 1.
Click Next to move to Step 2: Additional Information. The Additional Information screen appears:
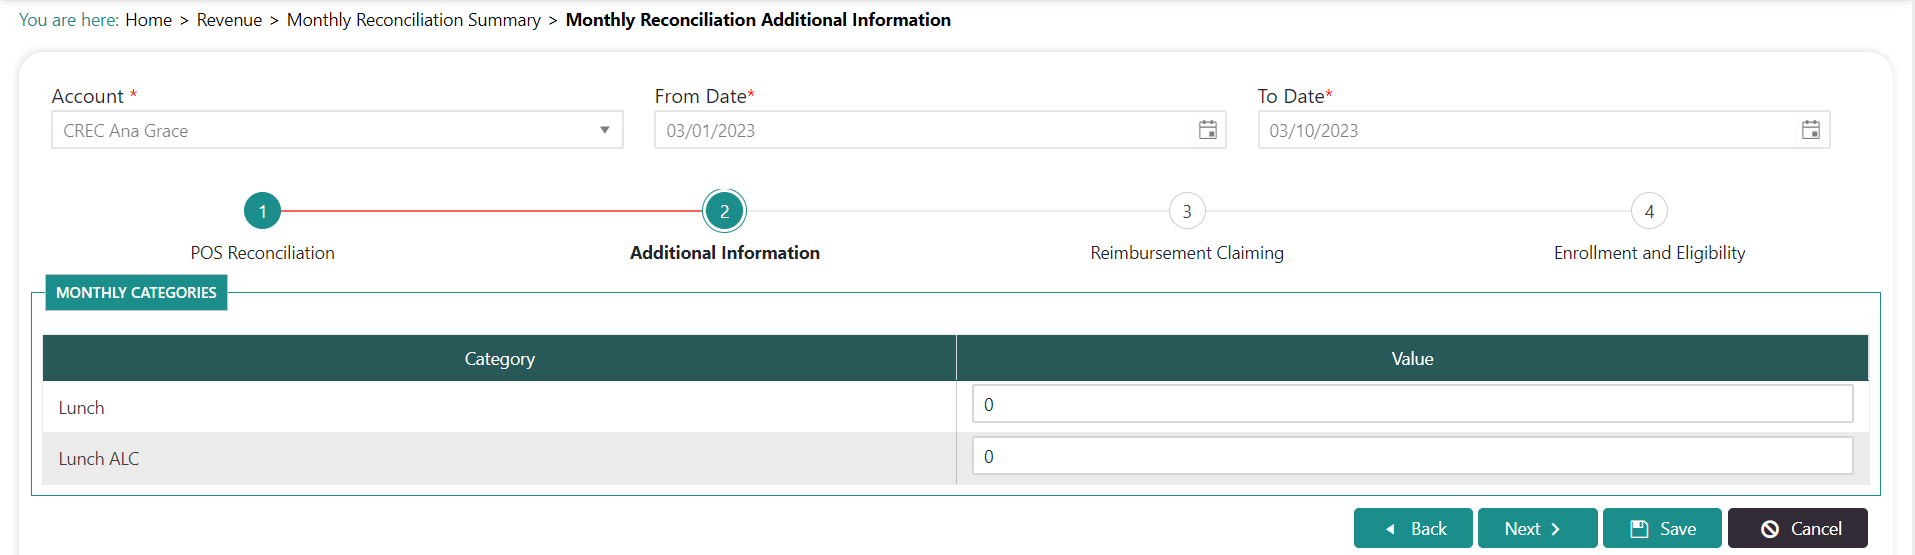
Type in the Value(s), as applicable.
Click Save.
Click Next to move to Step 3: Reimbursement Claiming.
NOTE:
- After completing the monthly reconciliation, print the Sales & Meal Count report from Dine Central and enter the information into Net Chef for the last week of the month.
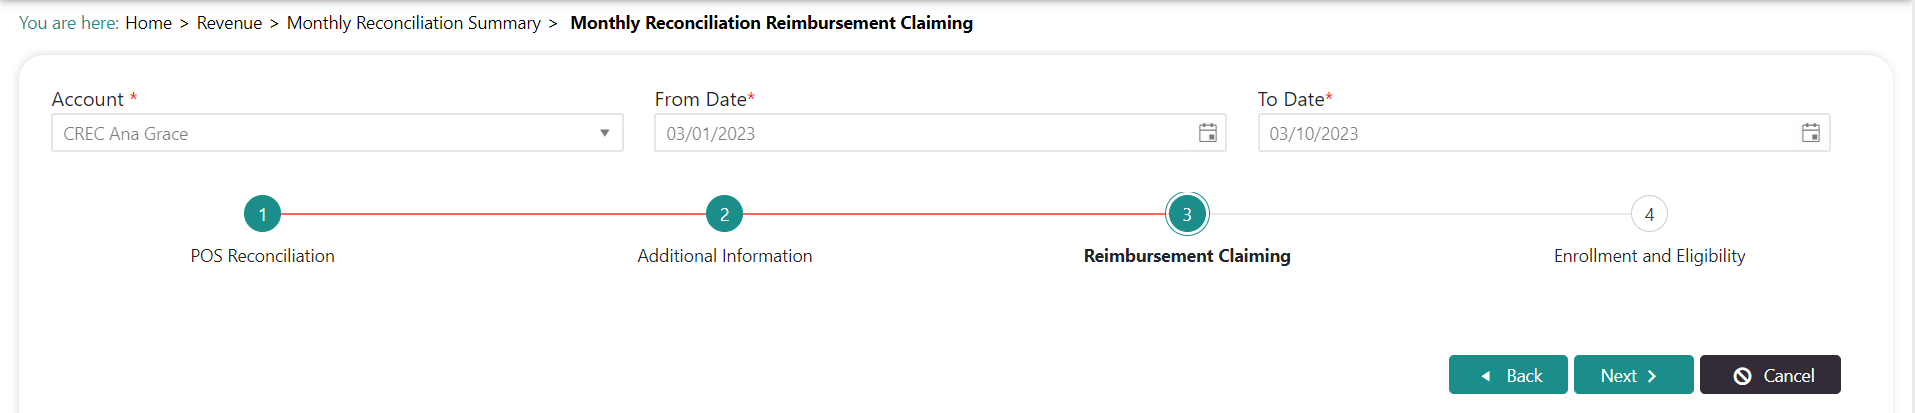
Step 3: Reimbursement Claiming
This screen shows the current monthly total meal counts entered for each category/charge/tender type as compared against the number of eligible approved applications for the free/reduced meal program.
The number of meals served in the program cannot exceed the number of meals that could have been served to all of the eligible students. If the total meals exceeds the total meals that could be served to all of the eligible students then the system displays a warning in the charge type category where the counts exceed. You must correct any warnings before you can proceed to the next step.
To complete Step 3:
Complete Step 2. The Reimbursement Claim Check screen appears:
Look for a warning symbol indicating the data is mismatched.
a. If you see a warning symbol, you must reconcile the error.
i. Click the triangle to the left of the category that has the error to identify where it is.
I. Click Change Eligibility to adjust the number of eligible students.
OR
Go back to the Daily Data Entry screen to change the actual number of meals sold. If you choose this option, you must re-start the reconciliation process at Step 1.
b. If there are no warning symbols, you are ready to complete this step.
Click Save.
Click Next to move to Step 4: Enrollment and Eligibility.
NOTE:
- If the free/reduced meal enrollment numbers for this month are not correct, you must make the correction on the Revenue>Enrollment & Eligibility screen, then come back to the reconciliation process.
Step 4: Enrollment and Eligibility
The final step in the reconciliation process for schools is to indicate the number students expected to use the free/reduced meal program in the upcoming month based on program eligibility.
To complete Step 4:
Complete Step 3. The Enrollment and Eligibility screen appears listing all of your locations with the enrollment number from the previous month:
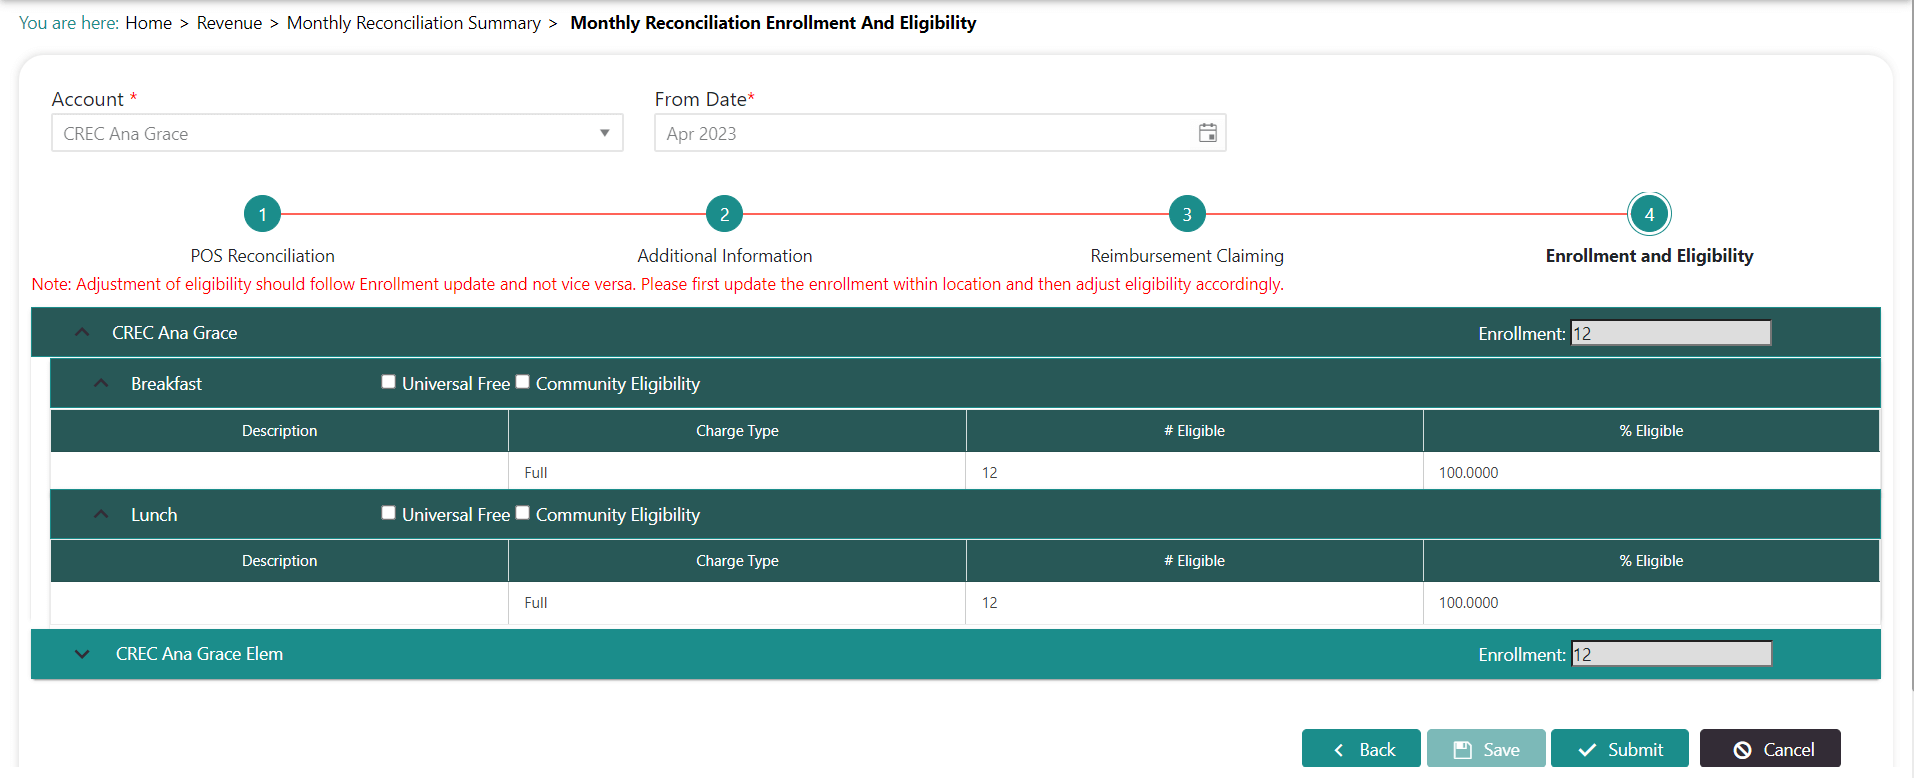
Adjust the Enrollment numbers for each location, as needed.
Click Save.
Click triangle to the left of the location to expand the various charge types of the category that are expected to have eligibility.
Type the number of students eligible for the free/reduced meal program in the Eligible field next to each location.
Click Save.
Click Submit to push the information to the Accounting team for review.
NOTE:
- After completing the monthly reconciliation, print the Sales & Meal Count report from Dine Central and enter the information into Net Chef for the last week of the month.