Process Catering Invoices
Invoices are entered into Dine Central with a different frequency, depending on the type of business:
Accounts that use district or Whitsons catering must create a catering invoice for each catering event.
B&I's with an external catering tracking system must enter one catering invoice per week containing the total dollar value of all catering invoices/adjustments for that week.
Chitz must be entered as part of the daily date entry, not as an invoice.
Processing invoices begins with the Catering Invoice Summary screen. Once an invoice is created you can record payments, edit it, create an adjustment and export it to Excel.
Access Catering Invoice Summary
The Catering Invoice Summary screen shows a list of invoices for your location(s) along with their current status. From this screen you can you can record payments, edit an invoice, create an adjustment and export invoices to Excel.
To access the catering invoice summary:
- Click Revenue> Catering Invoice from the left navigation. The Catering Invoice Summary appears:
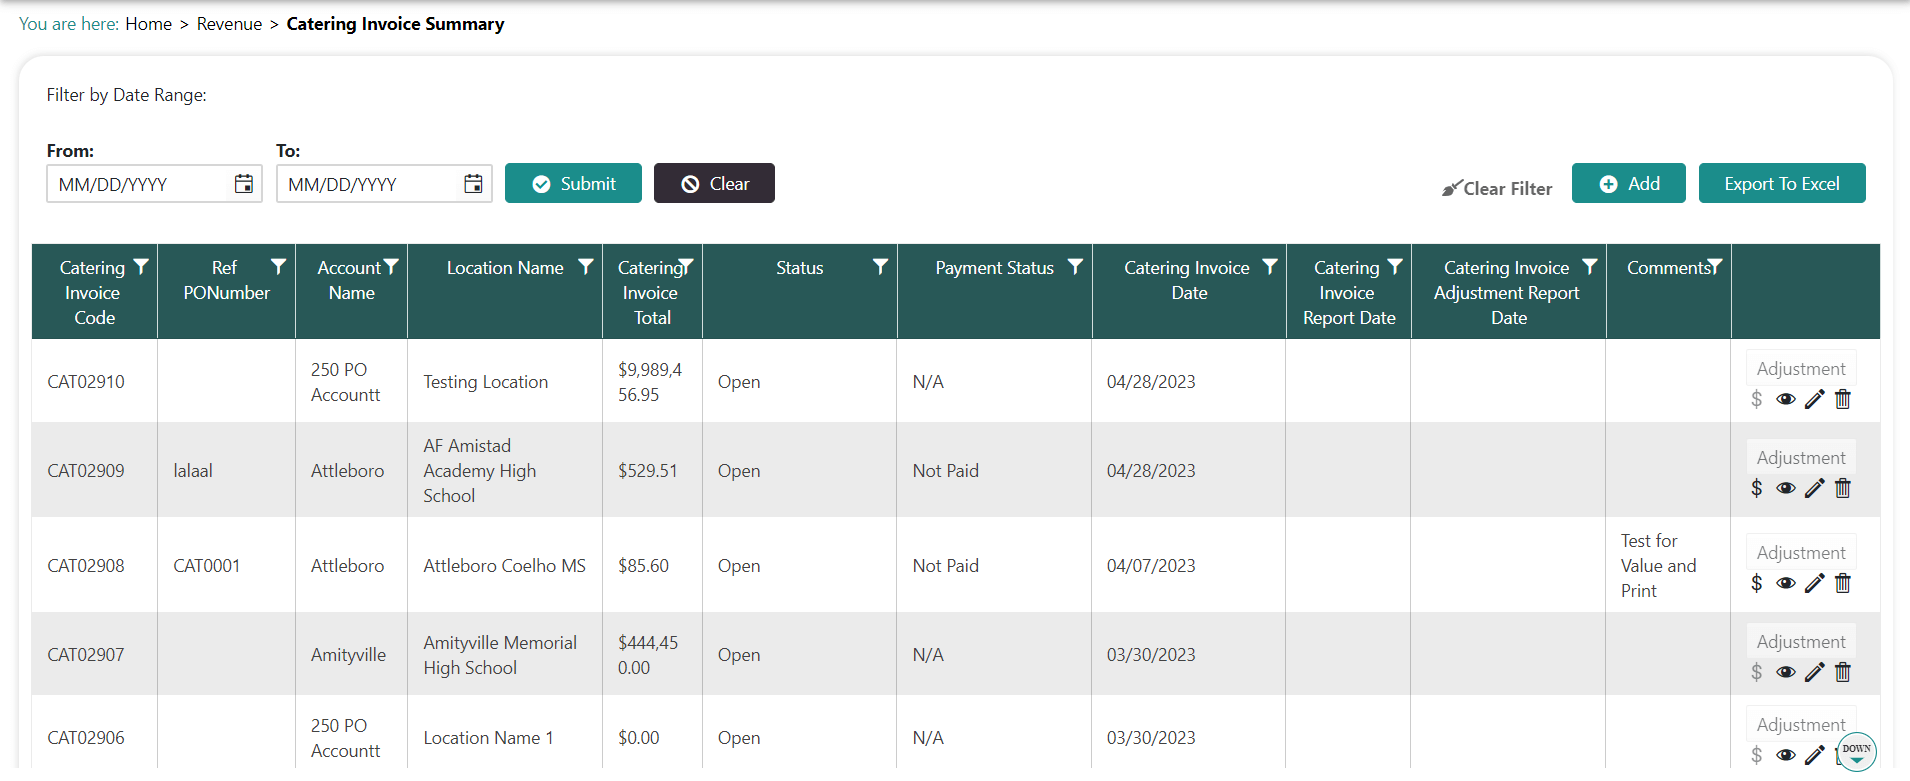
NOTES:
Use the Filter icon in any column heading to apply a filter to the list.
Click Clear Filter to remove your filters.
Use the Export to Excel button to export the full list of invoices.
You can record a payment for an invoice, view the invoice details, edit an open invoice or delete an open invoice using the icons to the right.
Once an invoice is posted, you can make a one-time adjustment using the Adjustment button.
Create an Invoice
You create a new invoice from the Catering Invoice Summary screen. When you create an invoice it counts as a quote until you indicate a posting period and finalize it.
Generate an Invoice Quote
After you generate an invoice, Dine Central automatically assigns a unique invoice number and you can add line items. The quote does not appear on reports and does not count as a sale.
To generate an invoice quote:
Access the Catering Invoice Summary screen.
Click + Add. The Catering Invoice Entry screen appears:
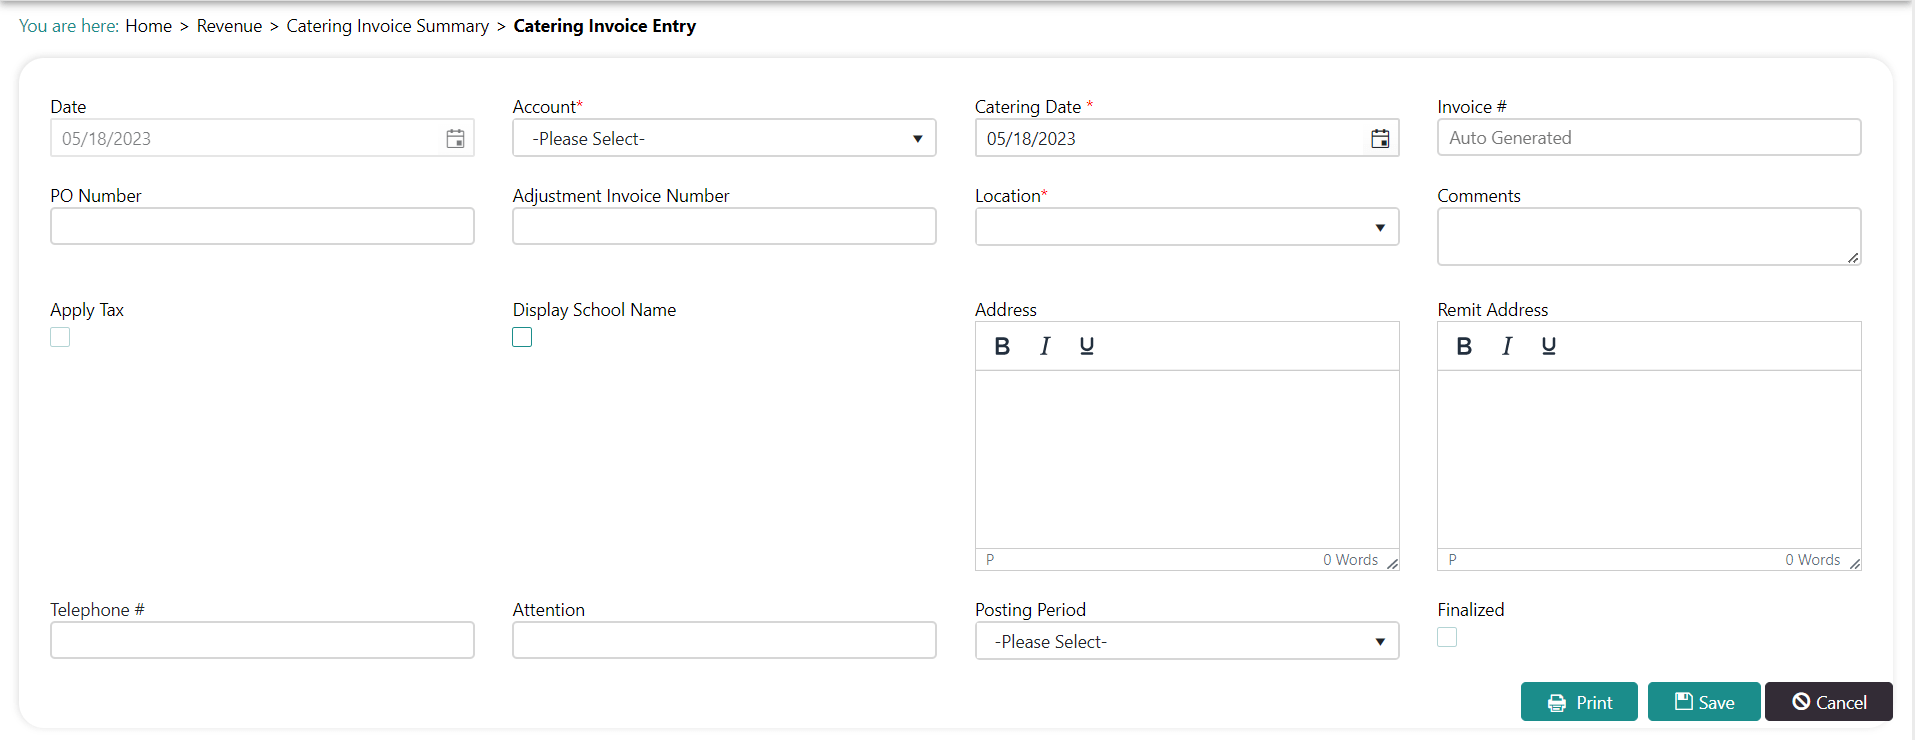
Choose the Account. Several items on the screen populate.
Choose the Catering Date and input an additional information, as needed.
Click Save. An invoice # is generated and a new section appears at the bottom so you can add line items:

- Click + Add to add the first item in the invoice. A blank line item appears:

- Click the Magnifying Glass icon under the Select Product/Recipe... column to open the Search Product/Recipe/Note box:

Type the name of the first line item in the Notes box.
Click Select. You are returned to the catering invoice with that line item populated.
Indicate the Invoiced Quantity and Unit Price.
Click the Check to add the item.
Repeat steps 6-11 for each item on the invoice.
Click Save. The invoice quote is created.
NOTE:
Uncheck the Display School Name box if you are creating an invoice for someone outside the client (aka the local YMCA).
Click Print to view and save a .pdf version of the invoice which you can send to your client.
Finalize the Invoice
When you are ready to complete the invoice and count it as a sale, you must indicate a posting period and finalize it in Dine Central.
To finalize the invoice:
Generate an invoice quote, including line items.
Select a Posting Period.
Check Finalize.
Click Save.
Record a Payment
Team members with accounts that use district catering must record each invoice payment in Dine Central. Payments can be recorded anytime regardless of the status of the invoice.
B&I's as well as NY School accounts that use Whitsons catering do not need to record payments since those payments are processed by the Accounting team.
To record a payment:
Access the Catering Invoice Summary screen.
Click the Money Bag icon to the right of the invoice you want to record a payment for. The Record Payment pop-up appears:
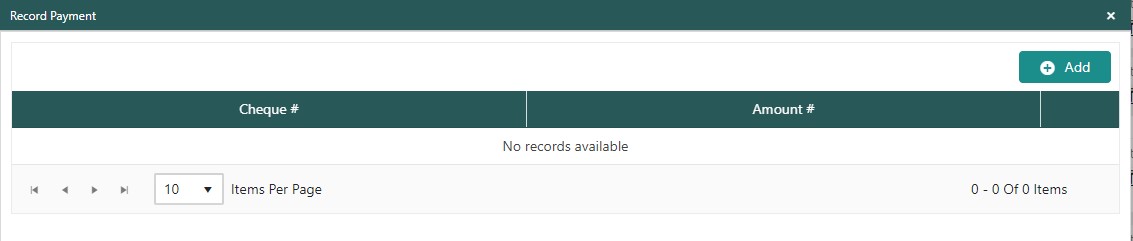
Click + Add. Two fields open up to allow you to enter data.
Enter the Cheque # and payment Amount.
Click the check symbol to update the payment record.
Click X to close the pop-up.
Edit an Invoice
You can edit an existing invoice in the current month provided the period has not yet been locked or posted by the Accounting team. Once a period is locked or posted by accounting, you must make an adjustment.
To edit an invoice:
Access the Catering Invoice Summary screen.
Click the Pencil icon to the right of the invoice you wish to edit. The Catering Invoice Entry screen appears.
Make the necessary changes.
Click Save.
Adjust an Invoice
When you need to make a change to an invoice that has been locked or posted by the Accounting team, you can do so by creating an adjustment (aka credit or debit memo). Adjustments can only be made once per invoice and cannot exceed the total amount of the original invoice. The adjustment amount can be edited until it is locked/posted by the Accounting team.
To adjust an invoice:
Access the Catering Invoice Summary screen.
Locate the Invoice you want to adjust.
Click Adjustment next to that invoice. The Catering Invoice Enrty screen appears:
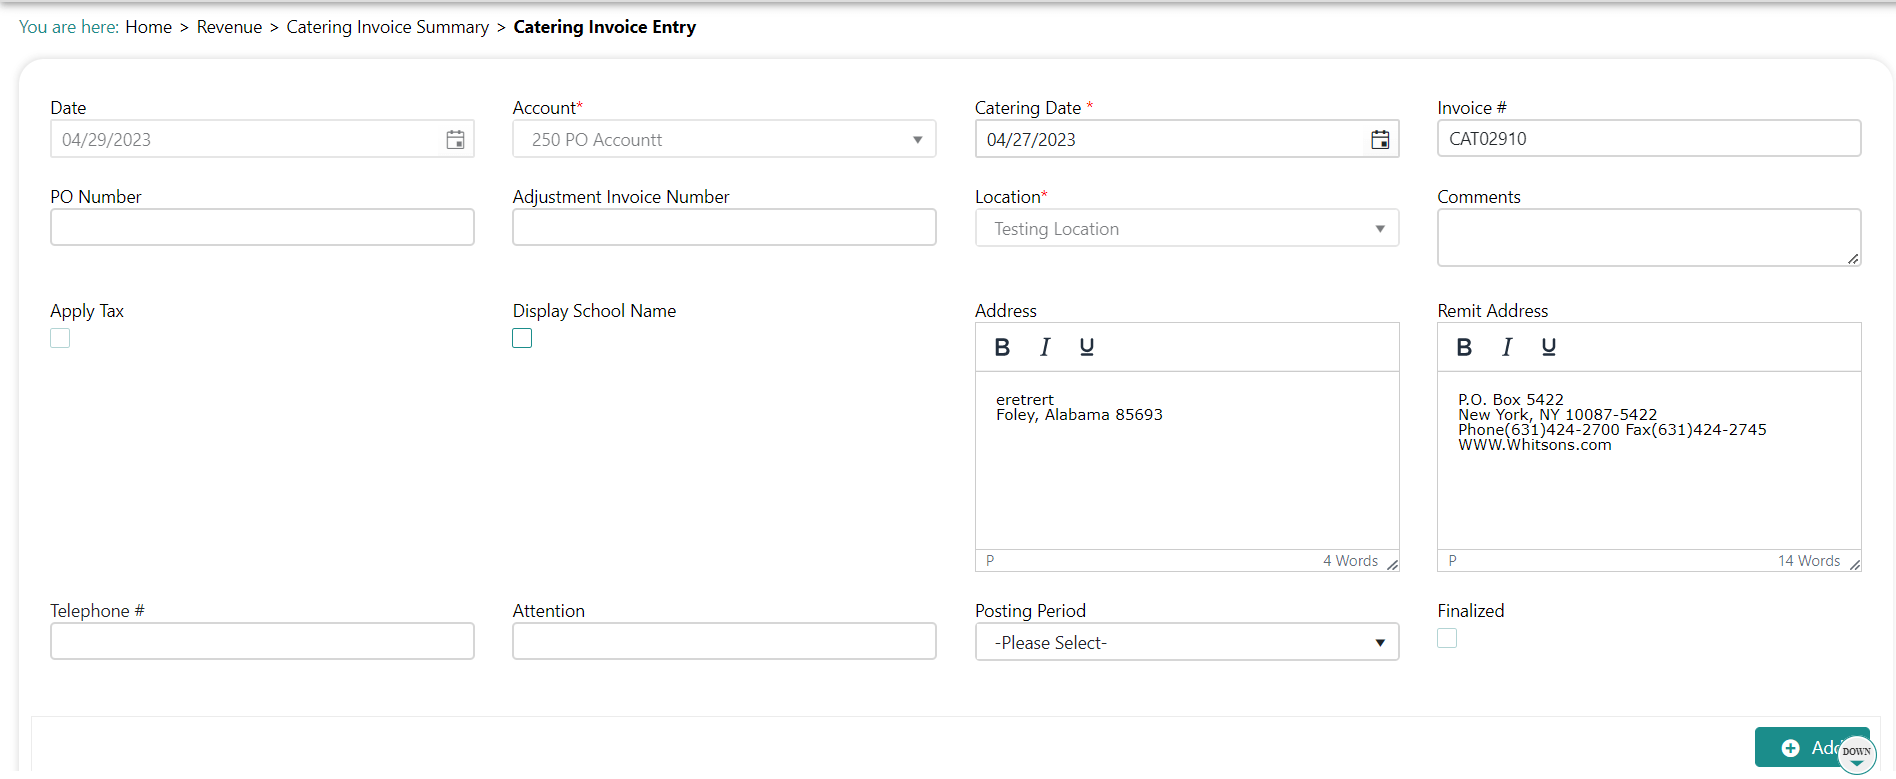
Click Add. Adjustment Details open at the bottom.
Choose either Credit to remove dollars from the invoice or Debit to add dollars to the invoice.
Enter the Adjustment Amount as either a negative number (-) for credits or a positive number (+) for debits.
Click the Check to update.
Click Save.
Export to Excel
You can export the list of all existing invoices to an Excel spreadsheet, as needed.
To export to Excel:
Access the Catering Invoice Summary screen.
Apply any filters to the list.
Click Export to Excel. The Excel file appears in the download bar at the bottom of the browser.
Click the file to view and/or save it.