Enter Sales Data
After you have emailed the Accounting team with any updated pricing or new programs for your location(s), you can enter sales data for each location into Dine Central. Sales and revenue must be entered daily. Entering Sales Data is a 2 step process: after accessing the data entry summary screen, you input daily sales.
NOTES:
Online pre-payments should be entered once on the data entry screen the last business day of the month and reflect the entire calendar month (not weekly).
The Upload File button on this screen is not available at this time. In the future, that button will be used to upload the POS report information into Dine Central.
Access the Data Entry Screen
The Data Entry screen not only allows you to access sales data entry, it also provides information about the status of the data entry and alerts you when entered values do not match the budgeted values.
To access the data entry screen:
Roll your mouse over the Revenue icon
 in the left navigation. A choice
menu opens.
in the left navigation. A choice
menu opens.Choose Data Entry. The Data Entry screen appears.
Choose the Account and Location. The current month's data populates:
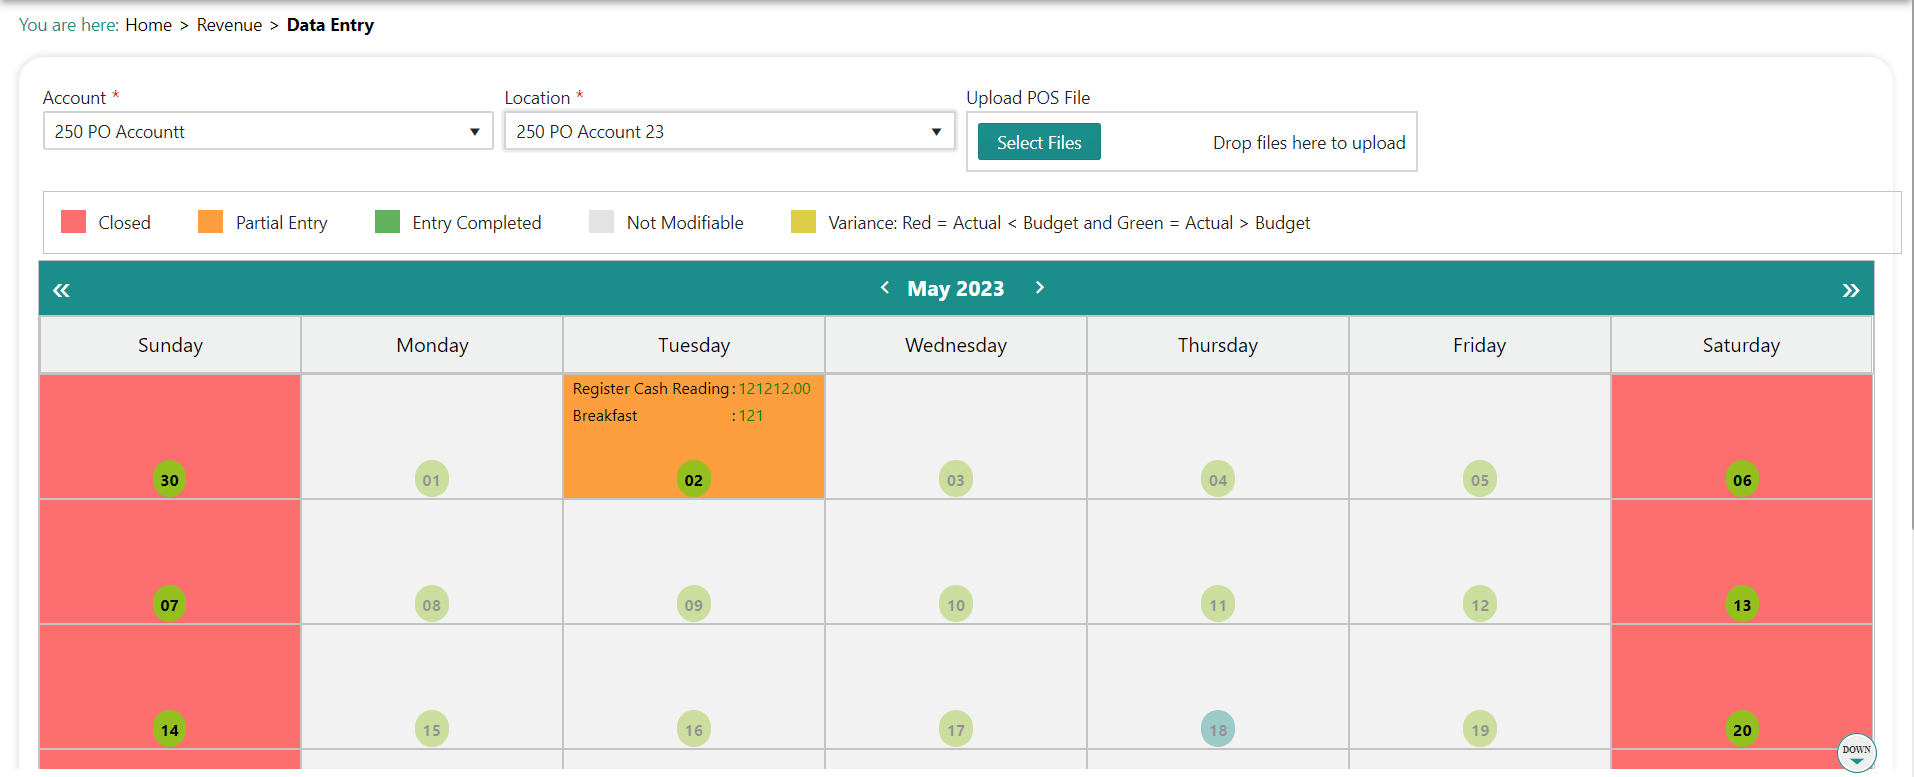
NOTES:
The color displayed on a calendar date indicates the status of the data entry. The legend for these colors is listed at the top.
- Only those dates marked as Entry Complete will appear in the reports and reconciliation screens.
The numbers on a calendar date represent the total meal counts or sales entered for the categories noted. These numbers are compared with the values in the budget module and are color coded to alert you to variations.
Green = The sales entered are => the budgeted values
Red = The sales entered are \< the budgeted values
Grey = The data is not modifiable
Input Daily Sales
The Daily Data Entry screen is where you input daily sales in four groups: Meal Count, Sales, Register, Deposit and a Recap at the bottom. Additionally, cost plus vending is entered here. After you tab out of a field the information is saved automatically. You cannot enter data for future dates.
To input daily sales:
Locate the account on the Data Entry screen.
Click the date you wish to enter sales for. The Daily Data Entry screen appears:
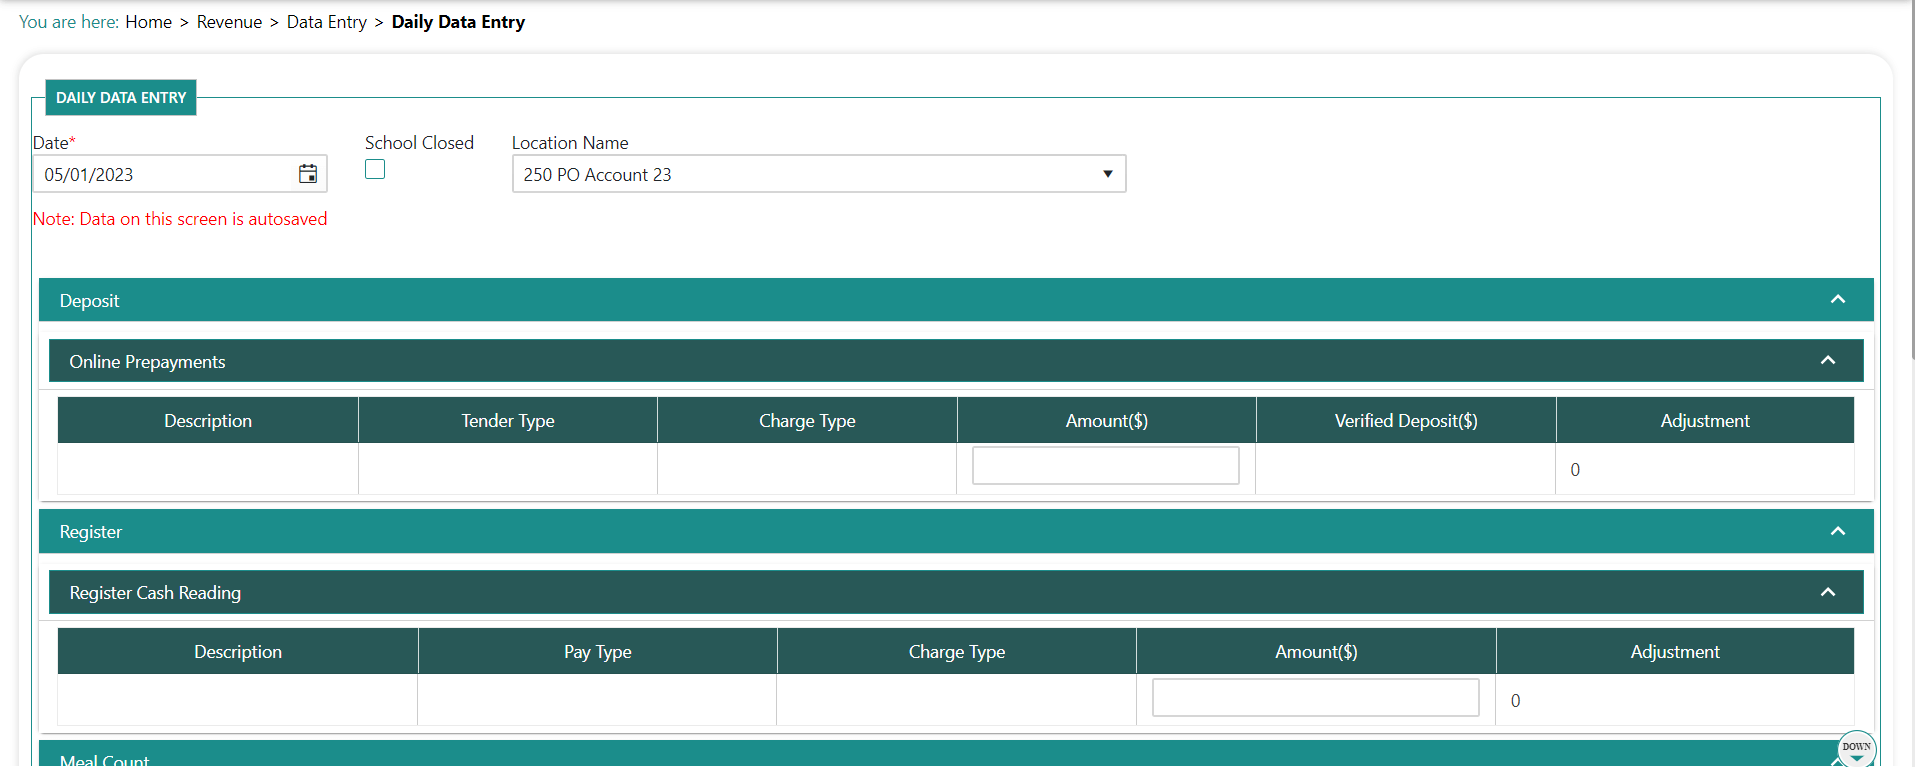
Input the data into the Count or Amount(s) column for each line, as needed. Your changes are saved automatically.
Click Submit when complete to validate the entry so it will show the data during reconciliation and on reports.
NOTES:
The pre-paid collected field is just for the prepaid collected at the register -- it does not include online prepayments.
Type 2 Vending Sales are not entered here -- they are entered in Step 2 of the Monthly Reconciliation.
If you receive a cost plus vending commission check and deposit it, it needs to be entered twice: under vending sales and under vending deposit.
Do not enter 'Zero' if no meals were served. Instead, keep the entry blank.
Potential error messages:
| Error | Indicates | To rectify, you must |
|---|---|---|
| Amount entered is more than 100% compared to the previous day count | The data you entered is more than 100% different than what you entered the previous operating day. | Verify your entry.If the number is correct, ignore this message. |
| You are over/short beyond the allowable amount set up for each location. | Verify your entries. | |
| If the number is correct, ignore this message. | ||
| Data cannot be submitted as total register sales do not match total sales. Enter reason before submitting * | The Total Register Sales value entered does not equal the Total Sales that the system calculated. | Verify your entries. |
| If the data is correct, submit as is and input the reason why when prompted. |
Mark a Location Closed/Open
You can mark a location as closed/open using an indicator on the Daily Data Entry screen (e.g. there is a snow day).
To mark a location closed/open:
Pull up the location on the Data Entry screen.
Click the date you wish to mark closed/open. The Daily Data Entry screen opens.
Either
a. Check the School Closed box to indicate the location is closed. You are prompted to type a reason. Type the reason and click Save.
or
b. Uncheck the School Closed box to indicate the location is open.