Recipe Workflow
After creating a recipe for the first time or editing certain fields of a recipe, the system will ask you to submit this recipe to workflow. The purpose of this activity is to allow the relevant parties to review and validate the recipe before it is produced. The actors and flow of creating a recipe is defined in the Workflow module (which is explained in greater detail in the workflow user guide). Below is an example of the actors and approvers in a typical recipe creation workflow:
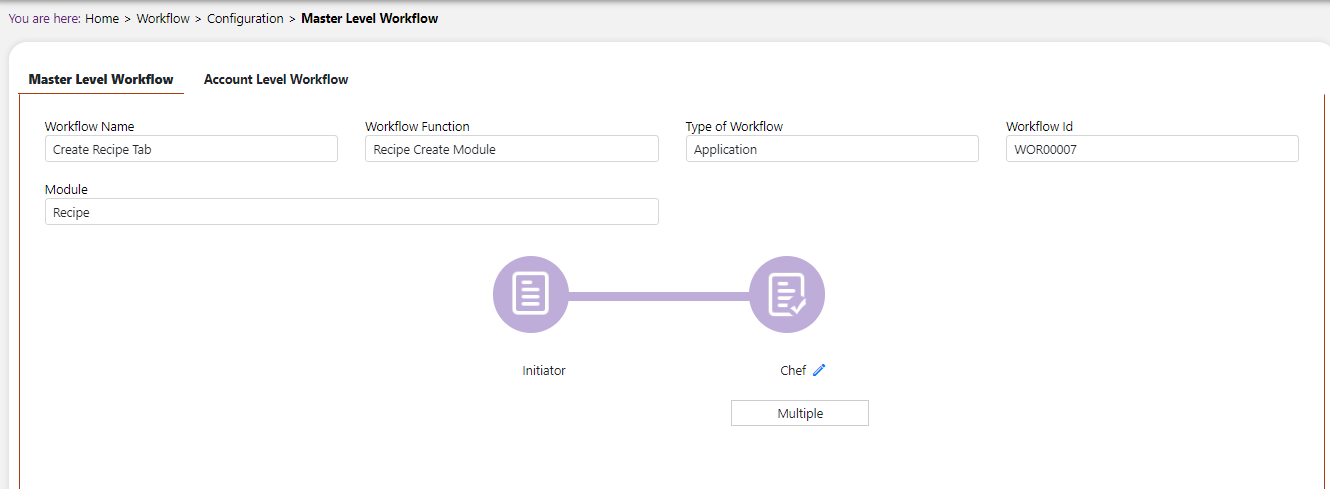
The initiator is the actor which starts the recipe creation. Once they have entered all of the required data, they will submit the recipe for approval to the next actor in the sequence (in this case that is the chef). Once the chef has made the required validation/adjustments, they will submit the recipe for approval to the next actor in the sequence (in this case that is a nutritionist). The nutritionist will review the recipe. If they need to, they can reject the changes and send the recipe back to the chef in the prior step. Otherwise they can make their modifications and submit it for approval to the next actor in the sequence (in this case that is Marketing). Marketing will enter their required fields and when ready they will submit the recipe for the final time. The recipe can now be activated. Until the approval process is complete, a new recipe cannot be activated.
Example:
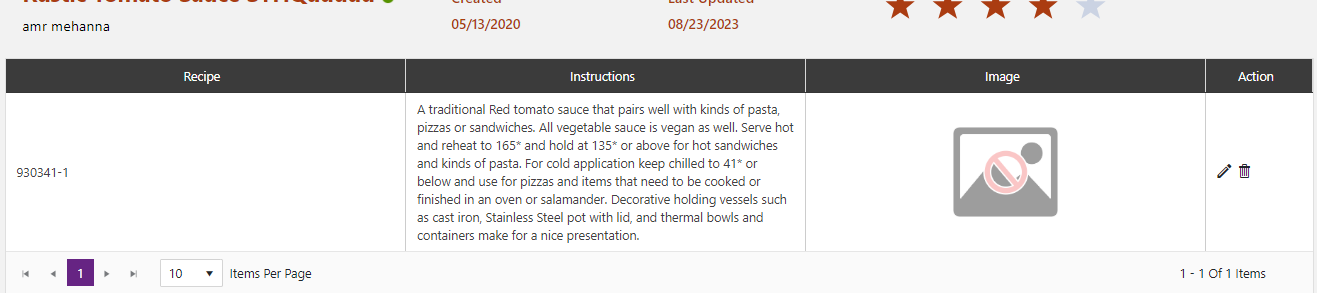
User has just created a recipe for Mac and Cheese and are ready to submit it to a corporate chef to review. They will click on the Submit button at the top of the recipe screen.
The system will ask the user if they are ready to submit. If they are they can click on the Submit button, otherwise they can close the screen by clicking the X at the top.

After clicking Submit, user will be asked to enter comments they have about this recipe?

The chef will now be alerted to look at this recipe and can do so by clicking on the approve/reject button on the recipe summary screen

They can click on the Show Comments button to view the comments that the prior user made when submitting the recipe. They can view the history and compare prior versions. They can make changes to the recipe. When they are ready to move the recipe to the next step they can click on Route button. They can enter their comments before submitting.
The nutritionist will be alerted to review this recipe and can do so by clicking on the approve/reject button on the recipe summary screen. Click on the Show Comments button to view the previous comments entered when the users submitted the prior steps

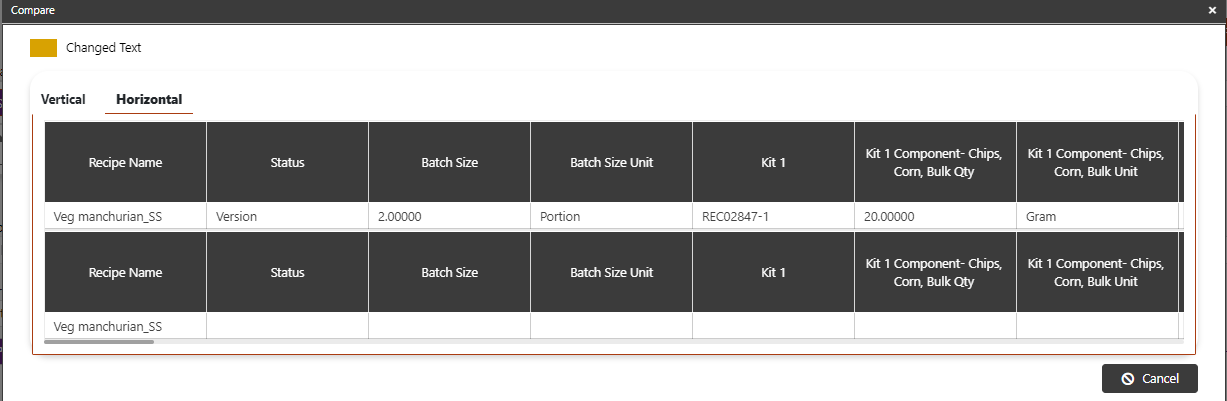
Click on the View History button to compare the changes made to the prior versions of these recipes.
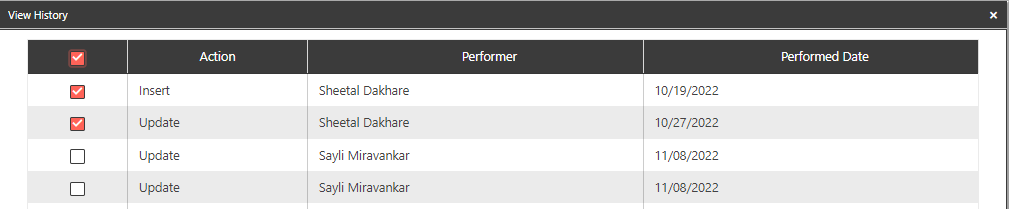
This will open a screen where you can review the changes made to each field. Fields that were changed between versions are highlighted in orange.
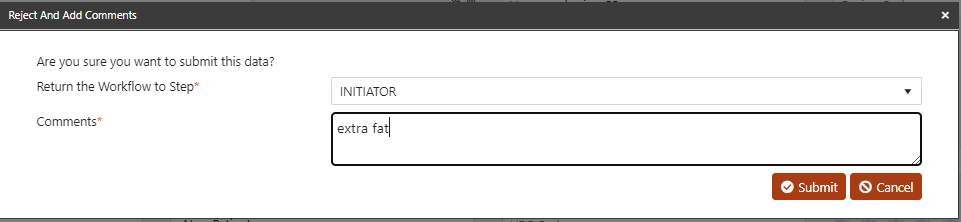
Click on the Route button to reject these changes and send them back to the prior step or approve them.

Click the Approve button to move to the next step or the Reject button to send this back to the prior step with comments. This time we are going to click Reject. A new screen will appear where you can choose the step to send it back to and provide comments. Click Submit to send it.
The actor of the previous step will be notified of this change and they can make the appropriate adjustments. When they are done they will again route it to the next step. The next actor will be notified, review and validate the changes and click on the Route button to submit it to the next step. This time the recipe is approved and is submitted to the next step.


The last actor is notified and will perform all of the steps above. After validating they will route the recipe for the last time. Once submitted, the system will recognize the workflow as complete. The recipe can now be activated.
- Create a new recipe in the system
- Route the recipe through the workflow to the chef
- Make changes to the recipe
- Approve and route recipe to nutrition
- Make changes to the recipe
- Reject the workflow back to the chef
- Review comments and compare versions
- Push workflow through all remaining steps
Activate a Recipe
On the recipe summary screen click on the status icon.
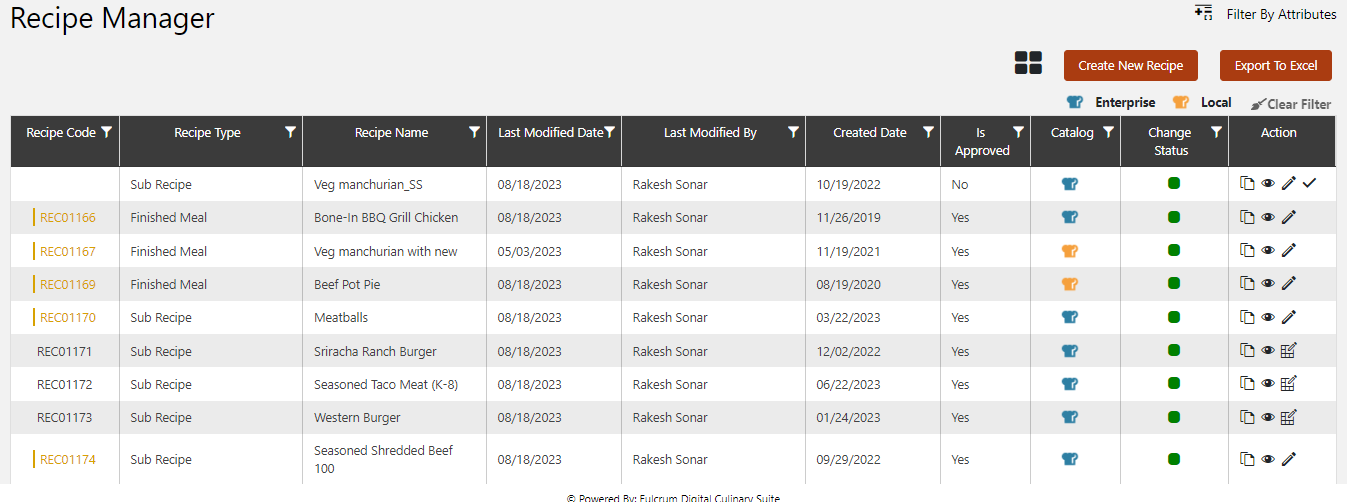
A screen will popup which will have a drop down for the various statuses that you can choose. By default a new recipe will be in “in development” status. To make this recipe available, it must be activated. Choose the status of “Active” in the dropdown and click OK.

The status icon will turn green which will indicate that the recipe is in active status.