Location Transfer Summary
- Find Location Transfer Summary under the Inventory tab.

- Your screen will look like the one below.
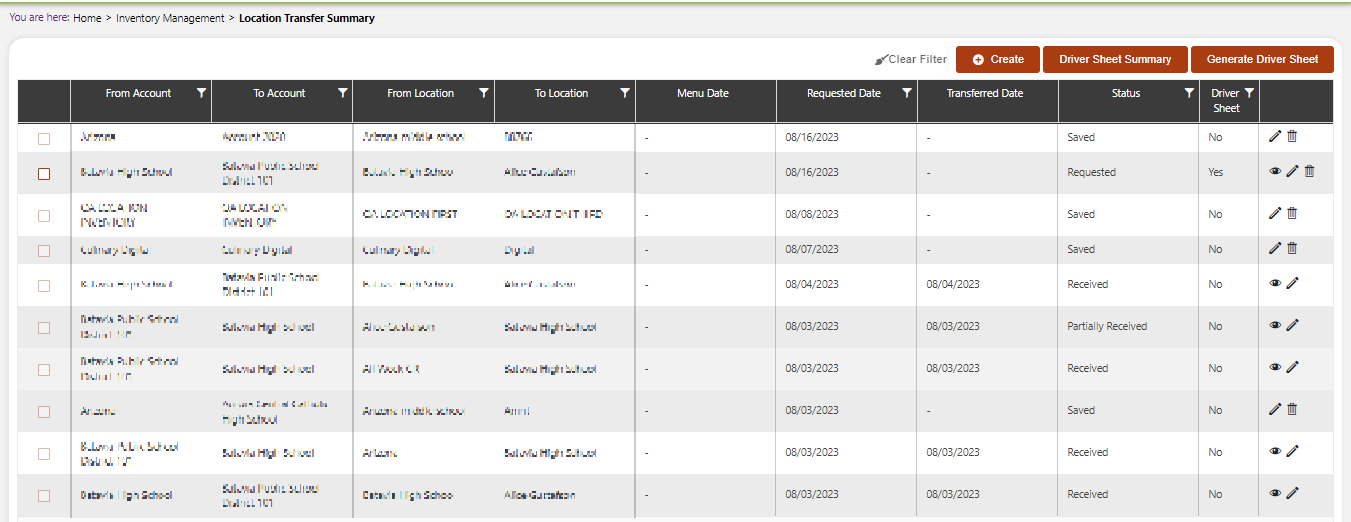
Here you will see the summary of all the location transfers by your company. Through our system, you will be able to see which transfers were requested and saved, which days they were requested and transferred, and which account they were transferred to.
Click the +Create button on the top right to add data to this sheet.
You will be presented with a screen like the one below.
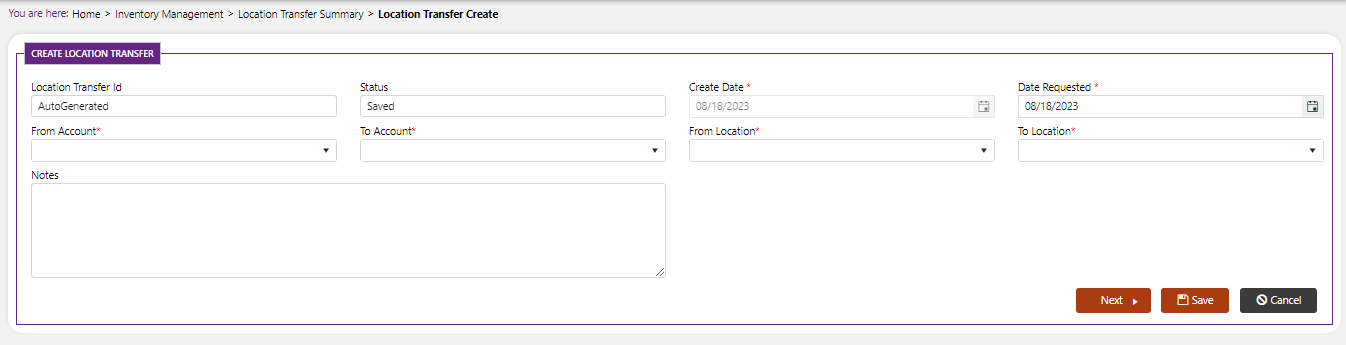
Here you will enter the following information to create a new location transfer:
a. Create Date*: Select the date in which you created this request for an inventory change.
b. Date Requested*: Select the date in which you requested to have the inventory moved.
c. From Account*: Enter the account where this inventory is currently located.
d. To Account*: Select the account where this inventory is going. If it is not going to another account, then just choose the same account for From Account and To Account.
e. From Location*: Enter the location where this inventory is currently.
f. To Location*: Enter the location where you want this inventory to go.
g. Note: Include any notes here about this transfer request.
After entering this information, hit the next button to move onto the next screen to input information. Your screen will look like the one below.
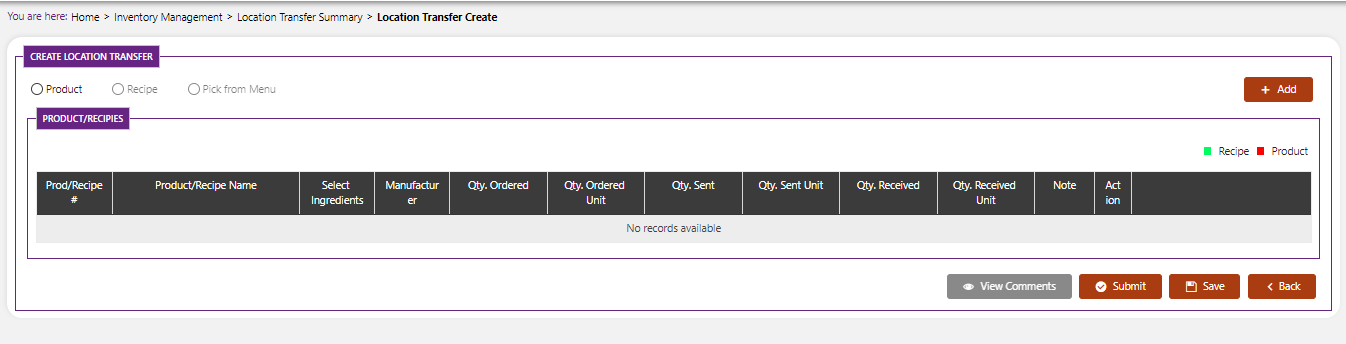
You will need to select whether the item being moved is a product, recipe, or pick from menu.
Hit Next after inputting that data.
You will then see a popup table that will display all the possible products linked that account and location that you can move.

- When you are finished, hit submit and your entry will be submitted.