Conduct Physical Inventory
- Pre-requisite For Physical Inventory and Count Summary.
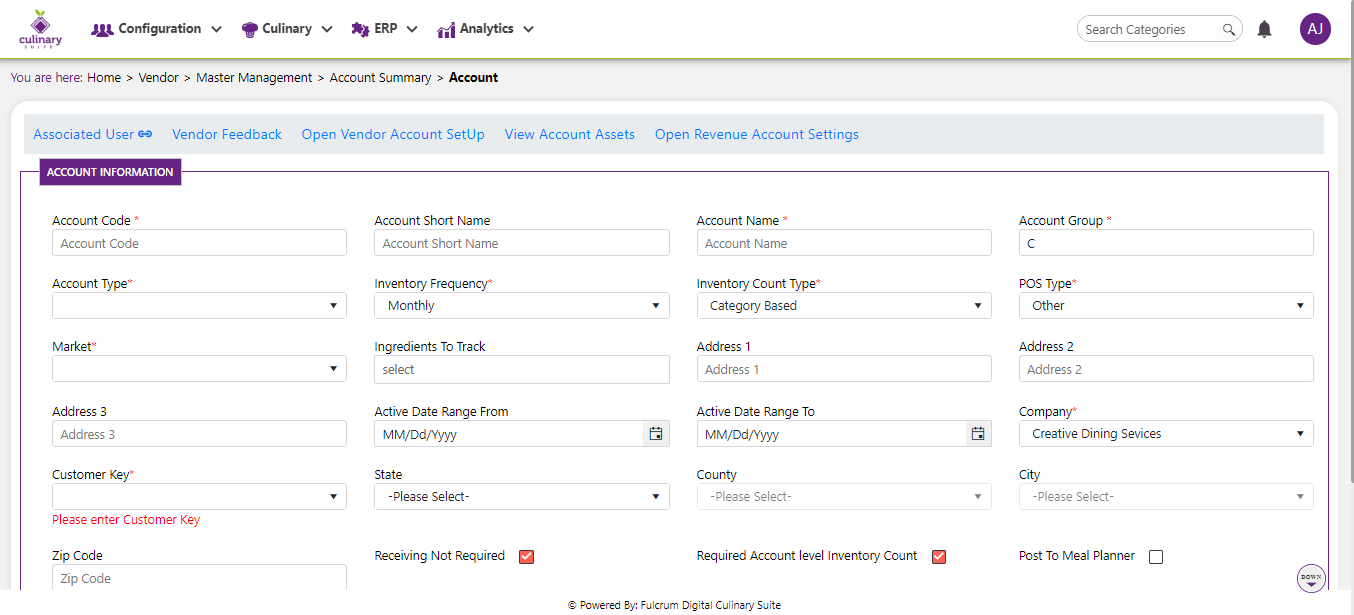
1. Count Summary (Location WISE)
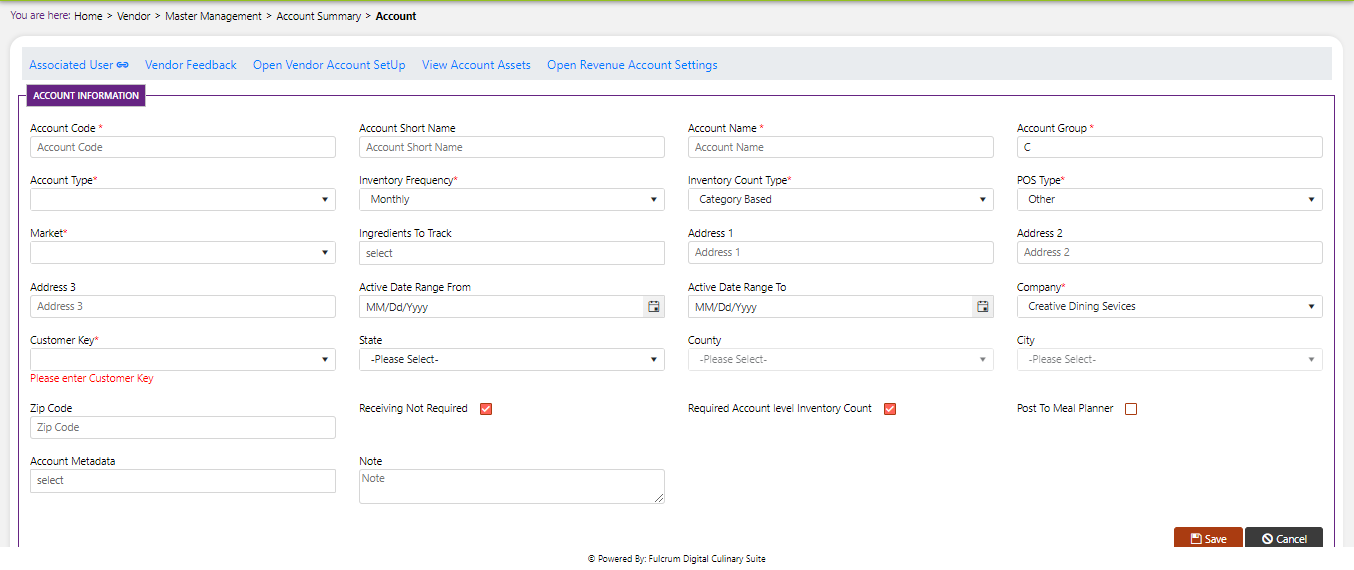
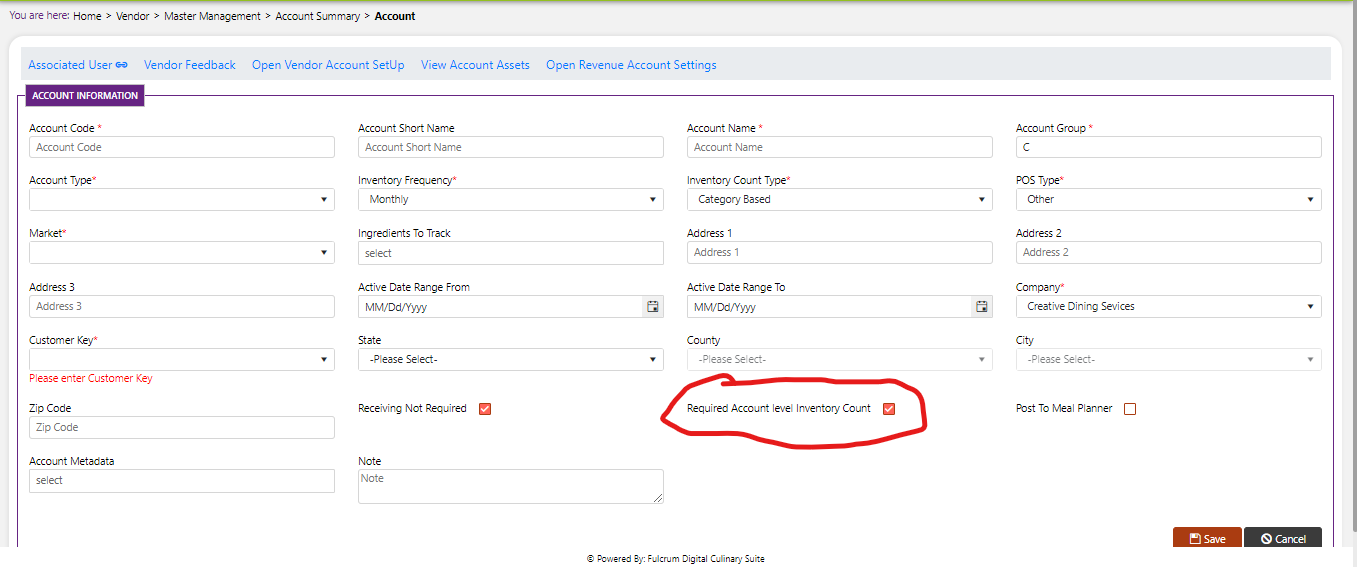
- Check “Required Account level Inventory Count” Should be unchecked
Steps:
    1. Go to Vendor Module

    2. Go to Vendor Management

    3. Click on Account

    4. Click on Add Button.

    5. And uncheck “Required Account level Inventory Count” option
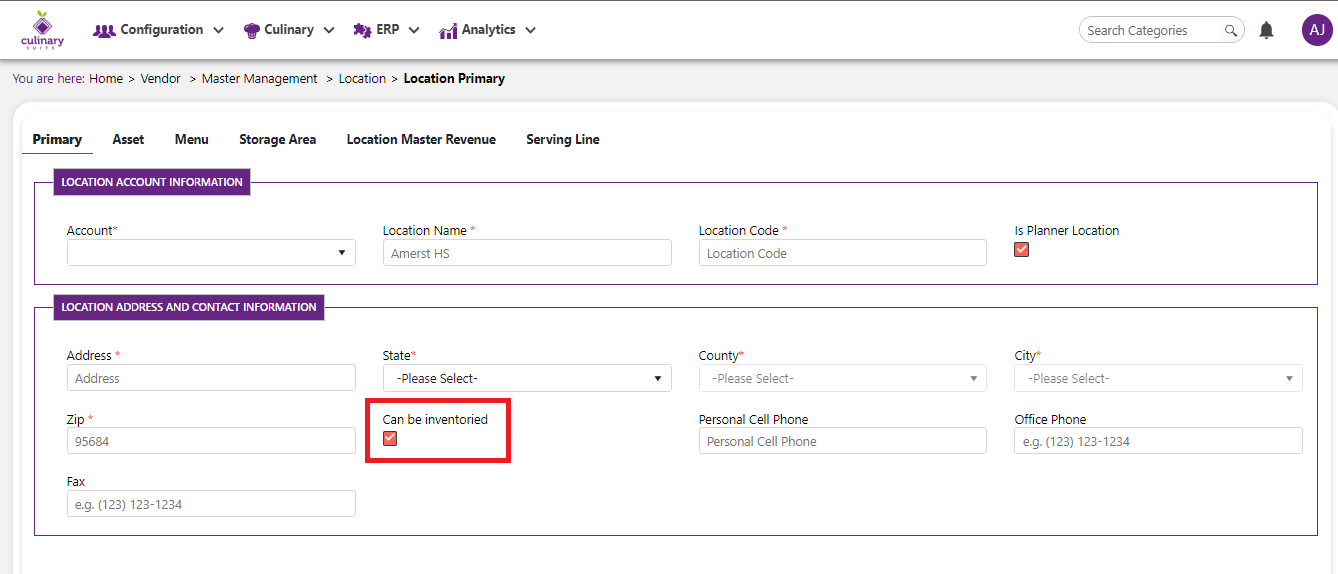
Check “Can be inventoried” check box should be checked
1. Go to Vendor module

2. Go to Vendor Management

3. Click on Location

4. Click on Add button

5. Check “Can be Inventoried Check box” is checked
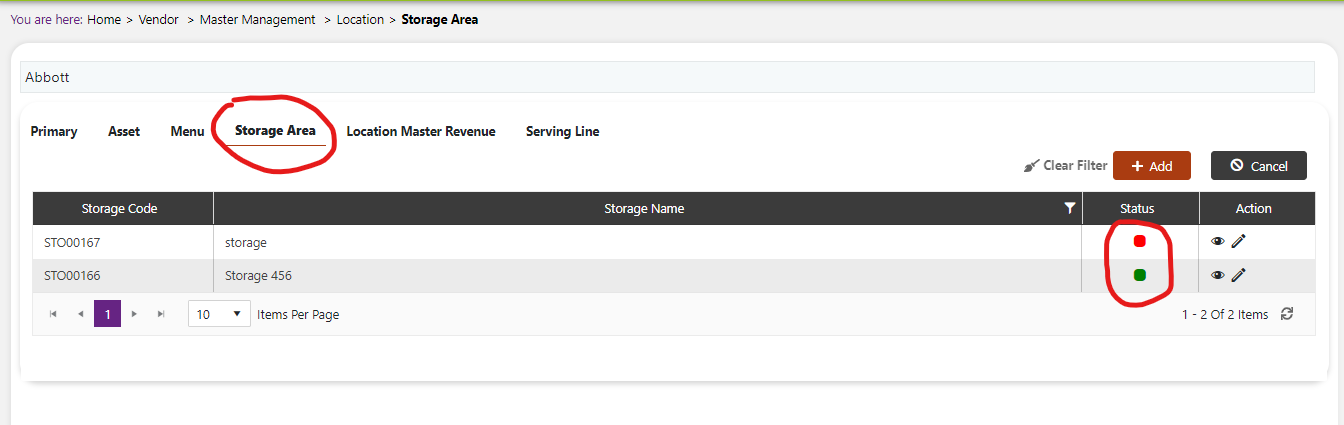
Storage should be added and should be active
1. Go to Vendor module

2. Go to Vendor Management

3. Click on Location

4. Click on Add button

5. Click on Storage Area

6. Click on add and add the storages and activate them
Vendor Account Relationship Should be Mapped
    1. Go to Vendor module

    2. Go to Vendor Account/Relation

    3. Click on Quick/Add edit

    4. Add fill required details and save
The vendor product relationship should be mapped; means for which product we are performing inventory that product should be mapped with vendor, and it should have inventory unit setup.
    1) Go to Vendor

    2) Vendor Relationship/ Product

    3) Select vendor for which products are mapped

    4) And search those products are exists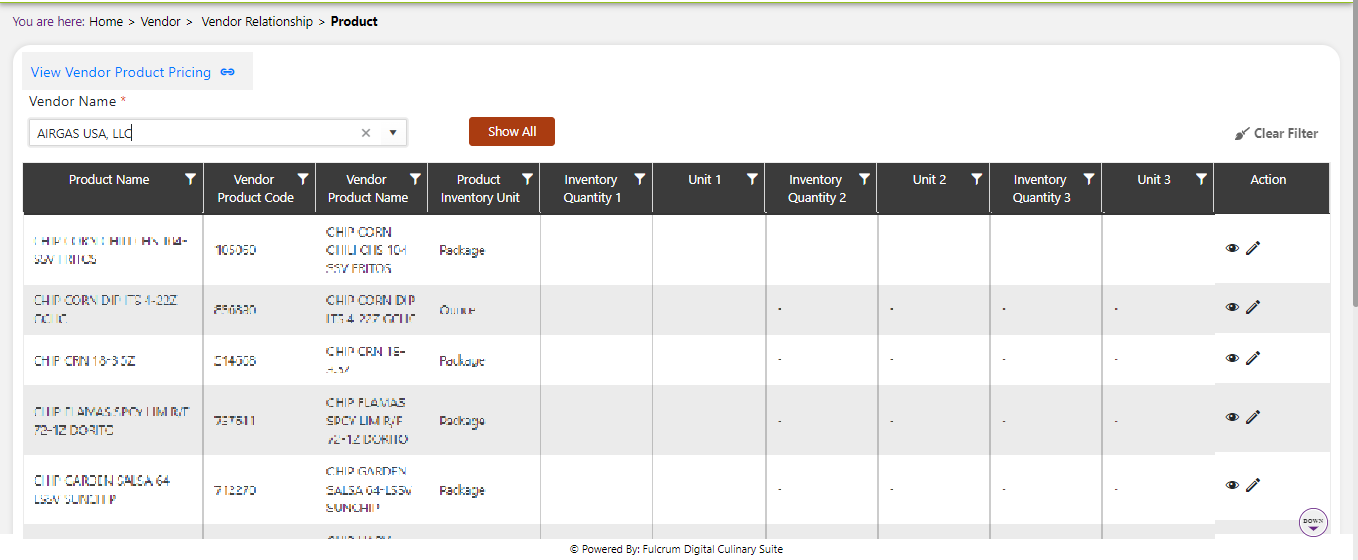
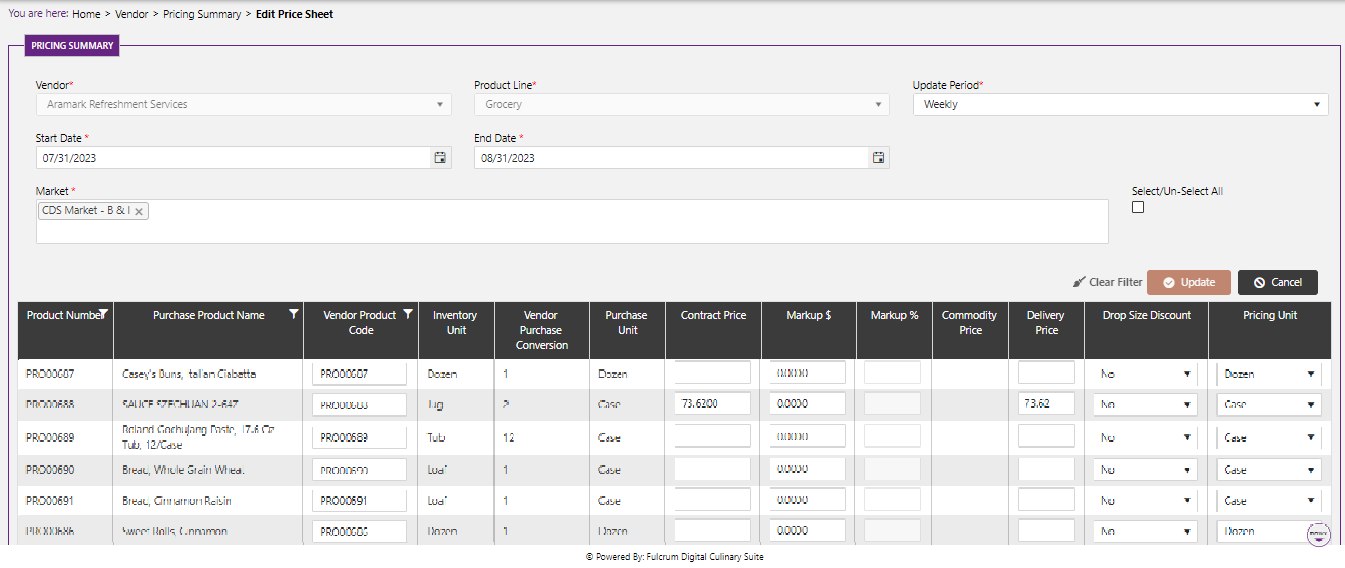
6.Pricing should be there for those products
    1) Go to Vendor

    2) Click on Pricing

    3) Select For which vendor pricing is imported or Added
Inventory Account association Should be there
    1) Go to vendor

    2) vendor master management

    3) Account association and click on add and add Required GL code Account types.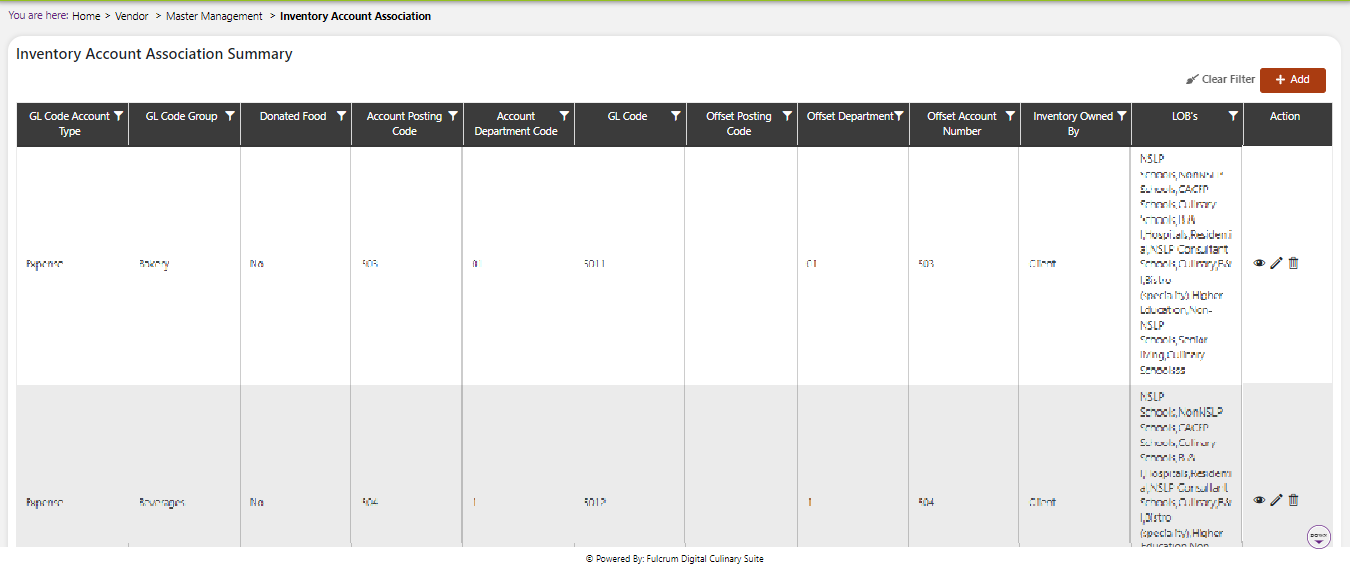
Vendor price association should be there
    1) Go to Recipe Module

    2) Go to master

    3) Click on Vendor Price association

    4) Click on add and Mapp the market, Product line with vendor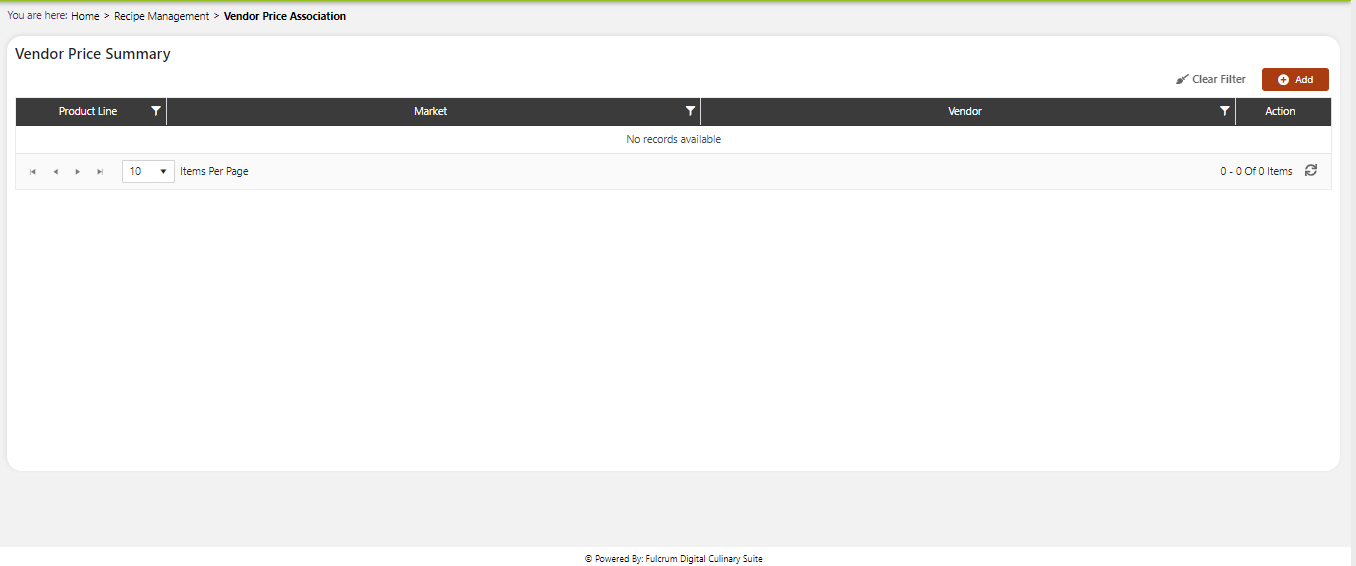
9). Storage area should be mapped for those accounts, location and the products
    1) Go to inventory Module

    2) Click on Storage area

    3) Select Account and Location

    4) The products which are mapped with order guide those products will appear here

    5) Select the storage areas and save
Calendar setup should be there for LOB (products should be there with same lob) , Select Account and the year, month
a. Go to Calendar
b. Click on calendar Configuration
c. Click on Consolidate
d. Select all Required options and select account created and the current Year
e. add inventory Due date reminder as show in below screen shot
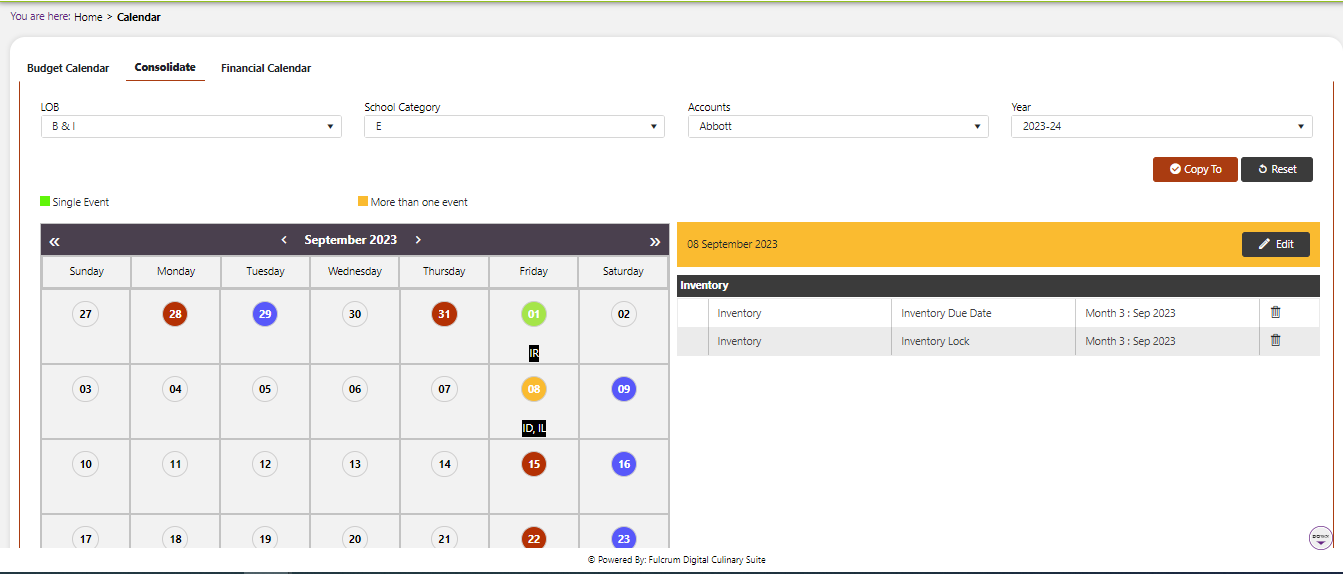
f. and Inventory due date and inventory Lock as shown in Screen shot.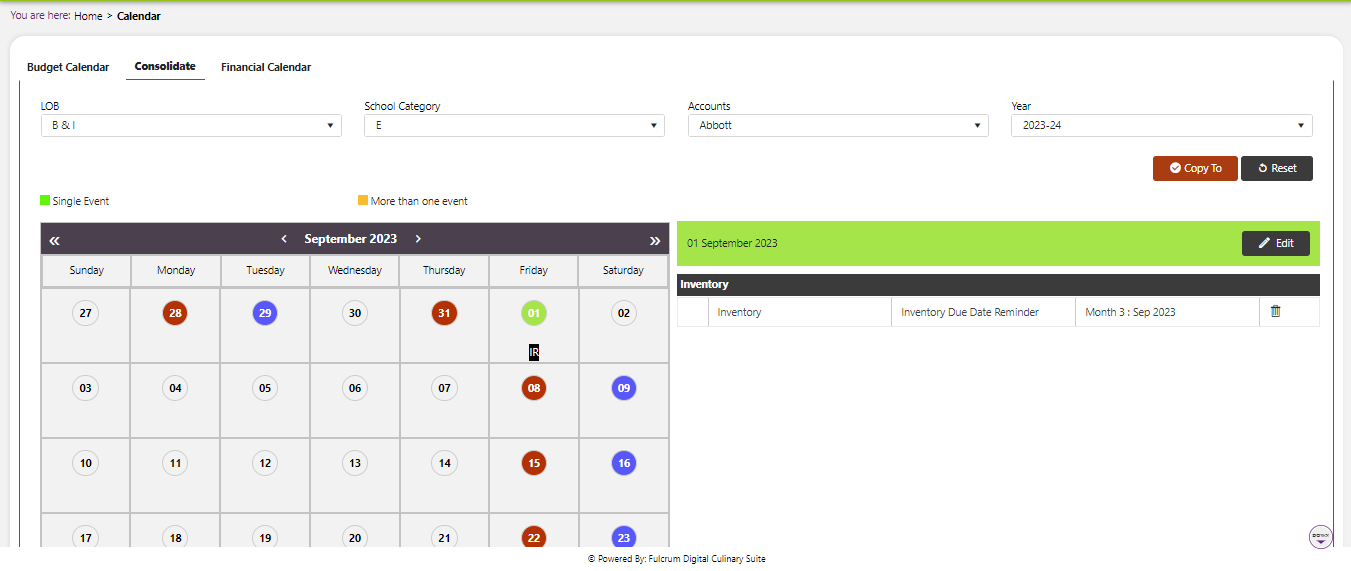
After All these setups done Inventory JOB should be run.
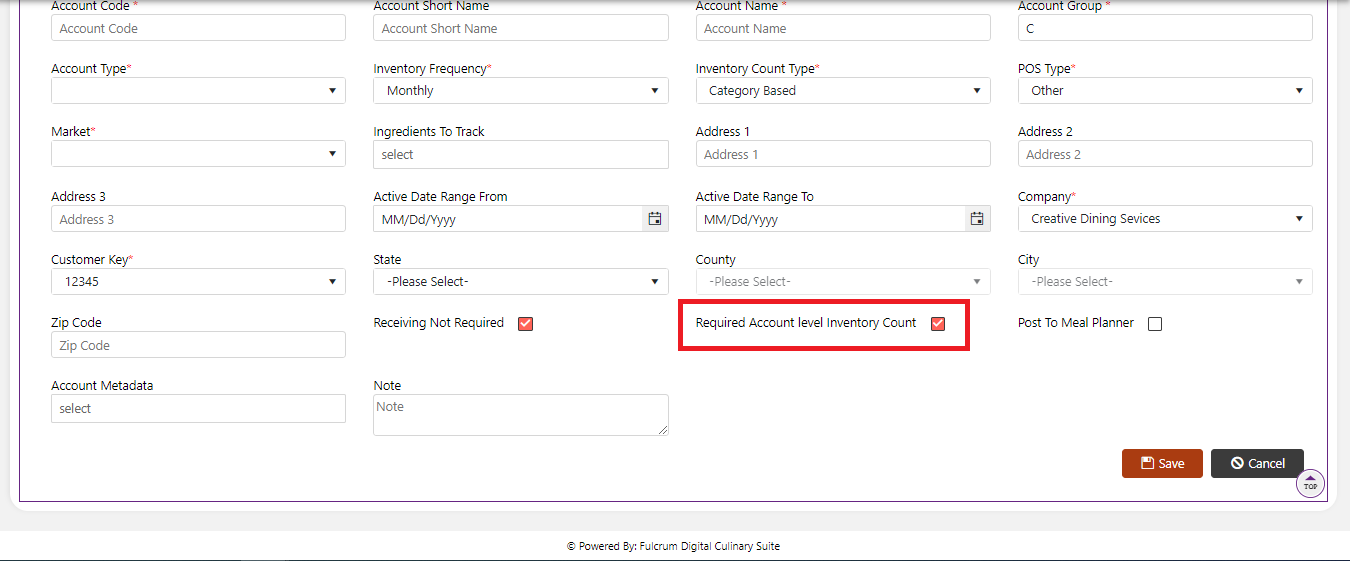
2. Physical Inventory
Note: For Physical inventory All steps will Remain same as Count summary but only difference is while creating Account we should see “Required Account level Inventory Count” option should be checked as in below screen shot.
- The FSD will get a notification (bell icon) that an inventory count is due. The FSD can perform the inventory count by going to the “Physical Inventory” Screen.
1. Hover over the Inventory Icon on the navigation menu. Select Physical Inventory in the expanded list.
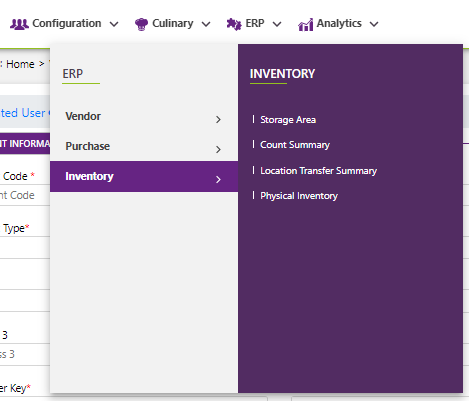
2. The Physical Inventory screen will display once job run.

The following fields can be found on the Physical Inventory screen:
Account Name –name of the account. If you have access to more than one account, the different accounts will display.
Due Date – the date that the Physical Inventory form is due.
Posted Date – the date that the Physical Inventory form posted.
Net Change ($) – following the posted date, the net change month over month
Inventory ($) – following the completion of the inventory form, the value of the inventory
Status – the status of the Physical Inventory Form (Not Started, In Progress, Posted)
Posted By – name of person that completed the task
3. Click on the “pencil” to edit a form. You cannot edit a form that has already been locked by accounting.
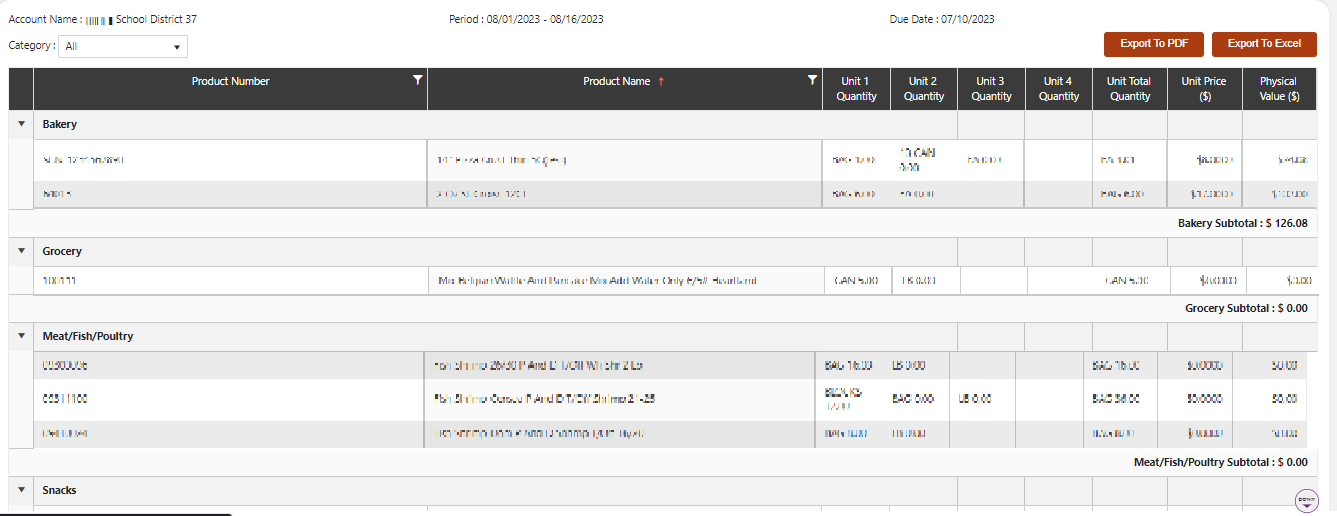
4. The Physical Inventory form will be displayed. The form can be displayed by Category, filtered, sorted ascending or descending.
You can sort the form and then click Export to PDF or Export to Excel or you can Export to PDF or Export to Excel the whole form.
i.e. you can Export to PDF a Count Sheet for just Bakery products
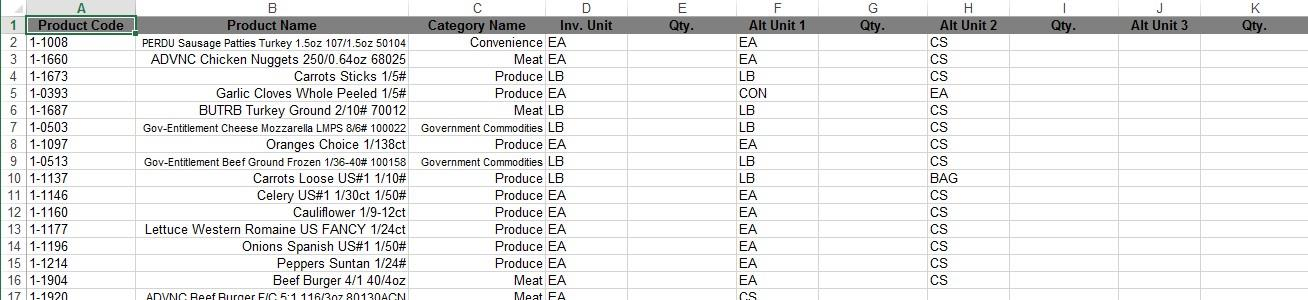
Click the Export to PDF button to produce a Physical Inventory Count Sheet
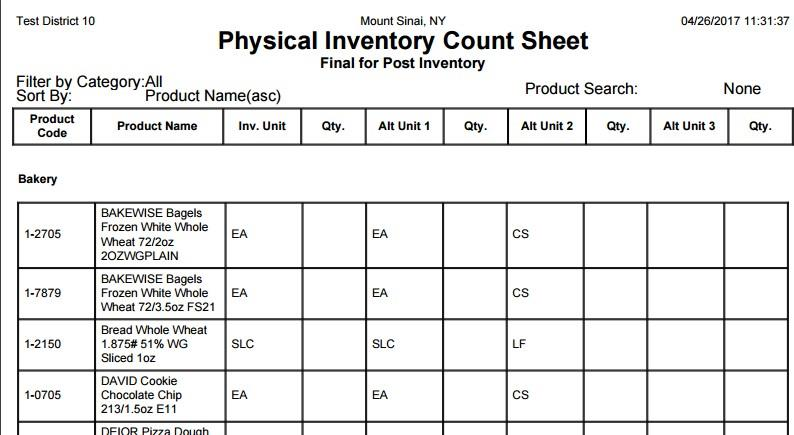
in PDF form that can be sent to leads to complete by hand in each of the schools
Click the Export to Excel button to produce a Physical Inventory Count Sheet in Excel form that can be sent to leads in each of the schools to complete.
5. Once you receive the completed Count Sheets from your leads, click on edit icon to complete the form as a compilation of inventory from all schools.
6. Tab to move from one field to the other. To tab backwards, hit shift and tab.
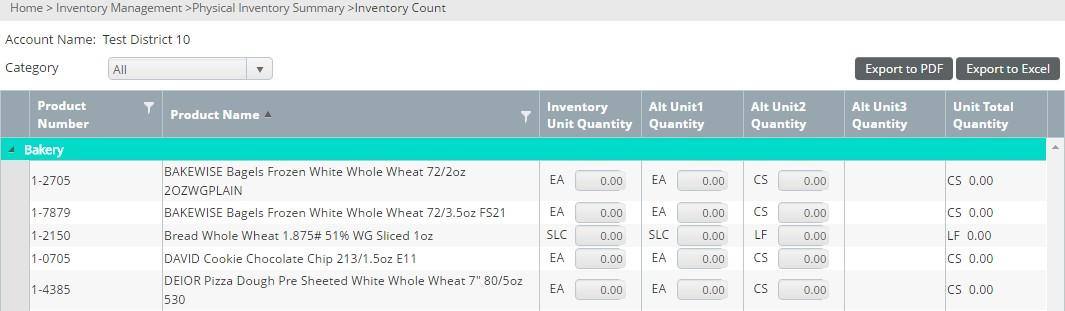
7. Enter the number in the Unit Quantity field.
For example: If you have 1 case of David’s Chocolate Chip Cookies and 4 individual packs, enter 1 CS and 4 EA
The Unit Total Quantity will update with the quantity that has been entered in the columns. In the previous example, 1 case and 4 individual packs of David’s Chocolate Chip Cookies equates to 1.02 Cases.
8. After you have finished entering the counts, click Save.
9. Review for any changes.
10. Click Next.
11. Click the Export to PDF button or the Export to Excel button to produce an Inventory Extended form.
12. To go back to the Summary click Back to Summary.
13. If you are finished and ready to submit it to the Accounting Department, see next session of this User Guide. ORDERING YOUR INVENTORY
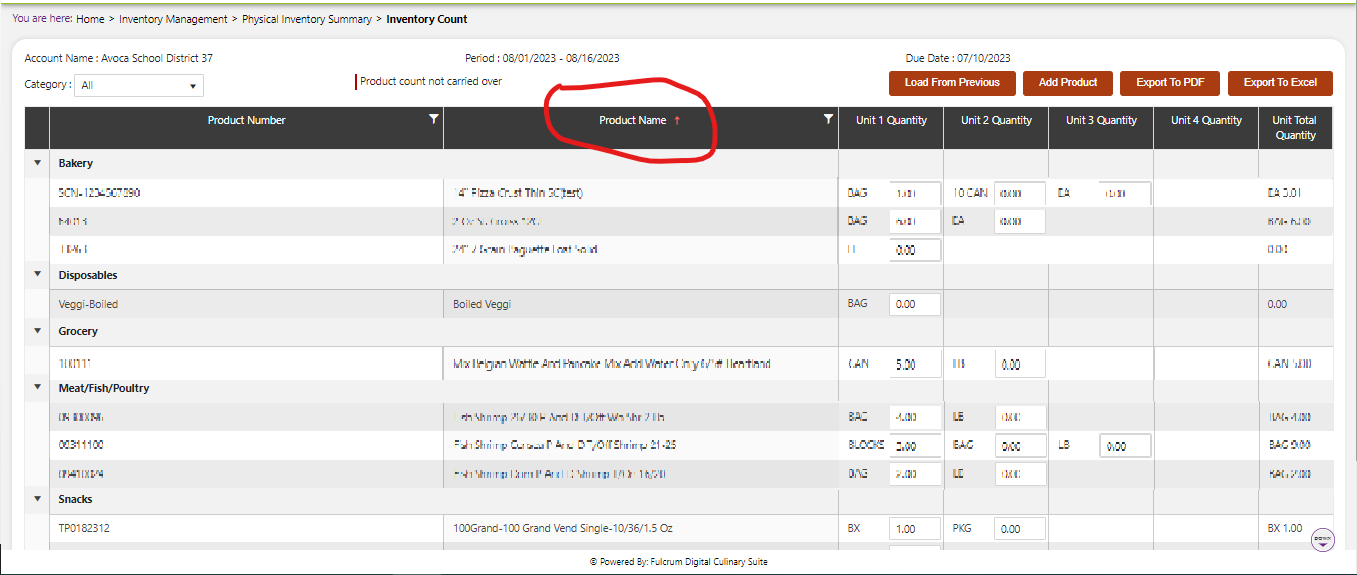
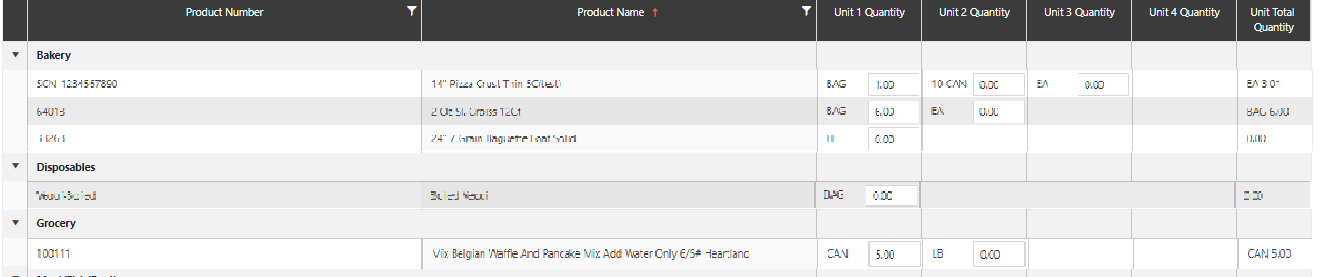
The PDF lists the inventory items alphabetically within each category. In the data entry screen, if you click on the column name “Product Name” it will sort the items alphabetically so that they match the PDF.
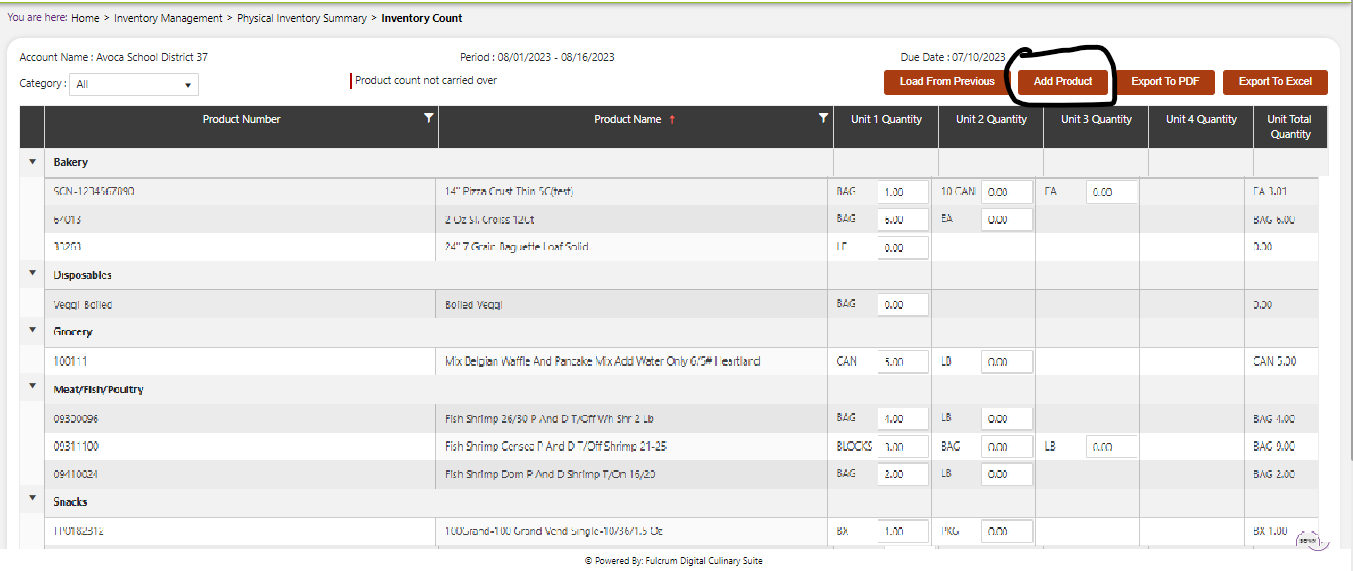
Once You save the counting and if we want to add more produts which are present in order guide and storage areas are mapped to them, Then Click on below add button
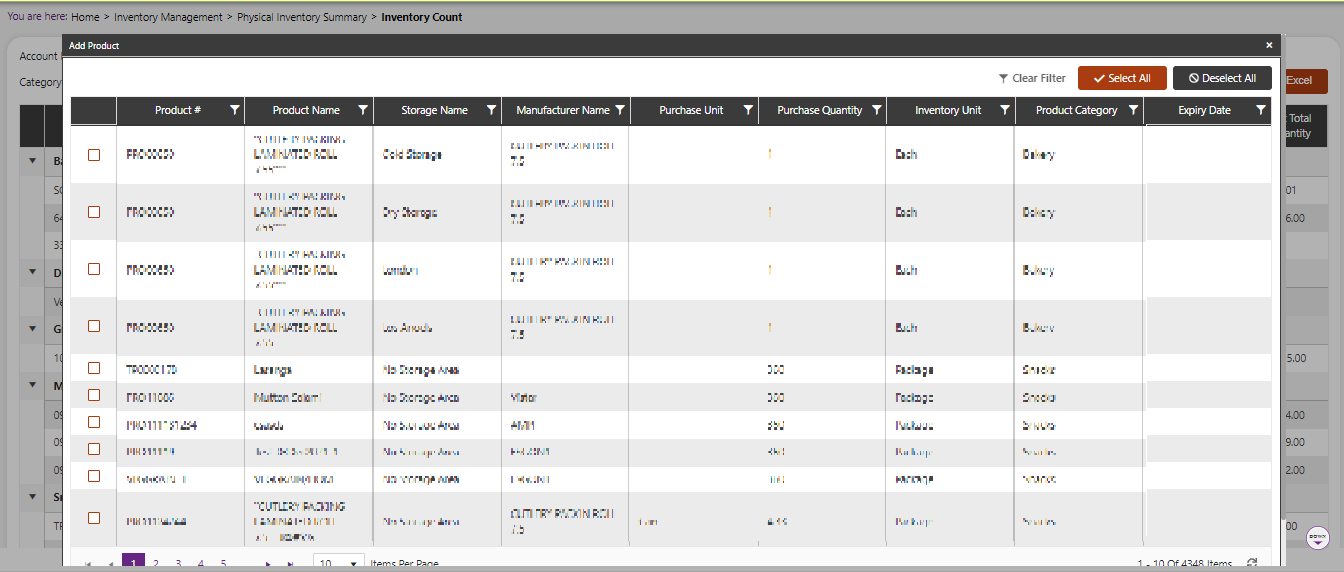
Once u click add button u will get one pop-up from that we can select multiple products and click on add button
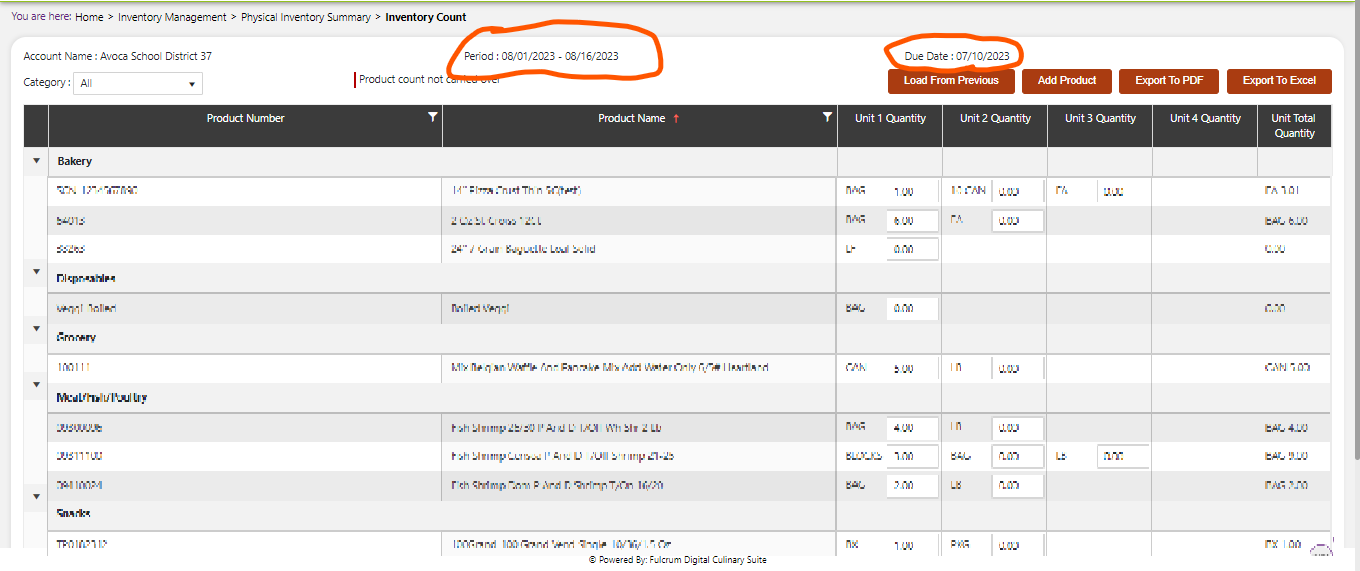
In Below screen shot the highlited Period and due date are coming from the calendar which we have set during the calendar setup which is pre-requisite for the setup of inventory.
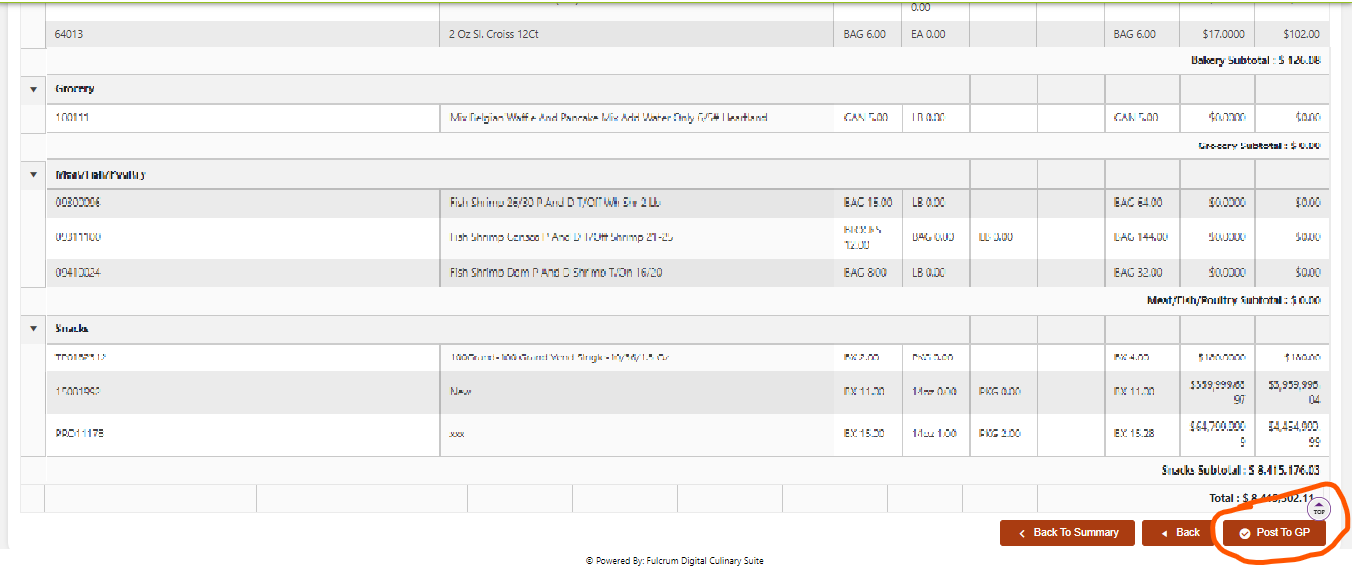
Once we save and verified the Count then we can click on Next button, we will get data successfully save message and POST button will appear On Clicking that we Can post Our Inventory data.
If we have completed inventory for previous month and again we want to do it for current month with same items then we will get One extra option as “ Load from Previous” On clicking this Previous counted values will fill in the quantities.

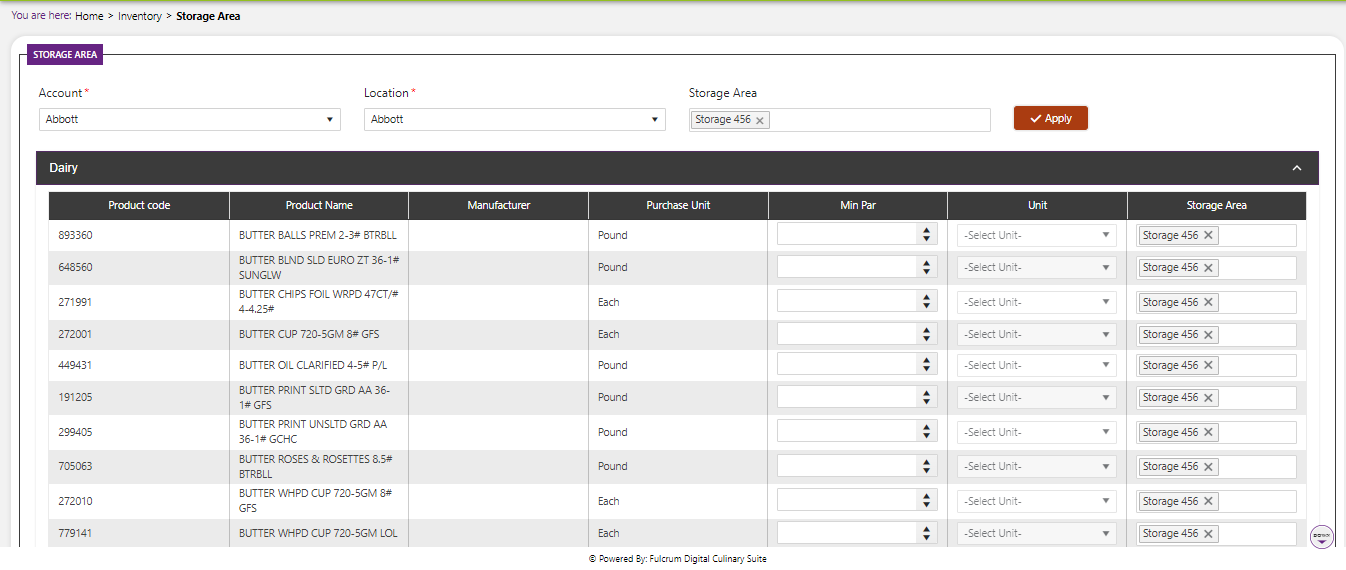
3. Storage Area
You can assign products to more than one location (for example, storage closet and refrigerator). The product will show up in two different locations on the inventory screen.
Assign Storage Area to Products
Hover over the Inventory icon on the navigation menu. Inventory Icon expands to display sub function list.
Select Storage Area on expanded list. New Screen appears. The path at the top of the screen should display Home > Inventory > Storage Area

- Click the dropdown arrow under the Account heading. Dropdown list expands revealing list of all accounts. If you have access to just one account, the account name will be populated.
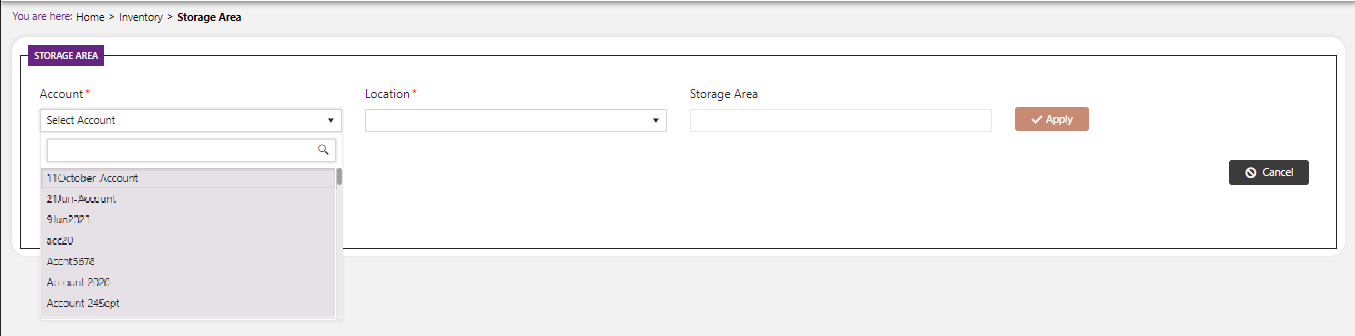
- Select desired Account. Location dropdown list now contains Locations associated with the selected Account.
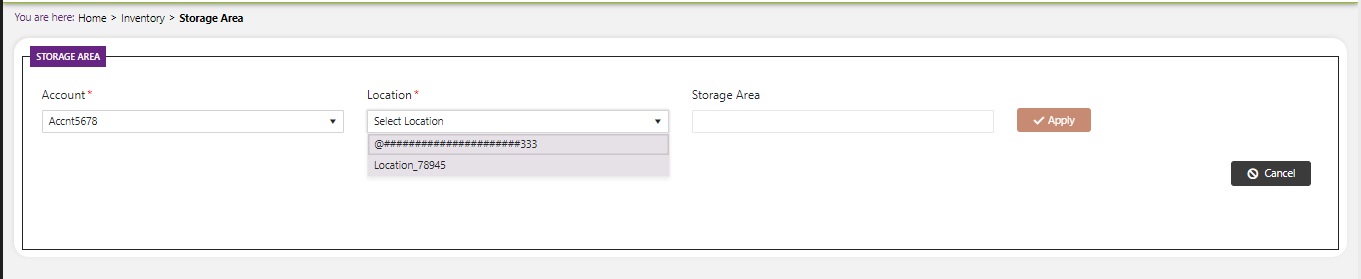
Assign Storage Area Continued
Select desired Location. Collapsed list of product categories appears under the header section of the screen.
Click the arrow to the left of the desired product category. An expanded list of products associated with category appears (in our sample, we selected Beverage).
If storage area has already been assigned, you can remove assigned storage areas by clicking x.
Save time by assigning a storage area to all products in the category, and then reviewing each item in the list to modify or add additional storage locations as needed. This will take less time than assigning a storage area to each individual product.
Assign Storage Area Continued Part - 2
To assign a storage area to all of the products in the category:
· Locate the “Storage Area” field (to the right of the location field). Click the desired storage location to add to all of the products in the category. Storage Area box is populated with the selected Storage Area.

· Click + Apply button. The Selected Storage Area should appear on the Storage Area line for all products within the open category.

· To assign a second storage area to the one item (e.g. product stored in the refrigerator and the freezer), click in the storage area field. A pull-down menu will appear with a list of available storage areas. Select the second storage area.
You can assign products to more than one location (for example, storage closet and refrigerator). The product will show up in two different locations on the inventory screen.
To assign a Storage Area to a single item, click in the Storage Area field to the right of item and select the storage area from the pull-down list
Assign Storage Area Continued Part - 3
Click Save button in bottom right corner. “Product Storage Details Updated Successfully” message appears in bottom right corner and then fades away.
When you are doing this for your district you may have to adjust individual items to match your actual storage areas.
Remove Storage Areas
Remove Storage Area From Multiple Products Within A Category For A Location
Click on the ‘x’ (close) next to the desired storage area to be removed from a category in the upper right of the screen.
Storage Area is removed from the box in the upper right of the screen
Click on the Save button in bottom right corner. “Product Storage Details Updated Successfully” message appears in bottom right corner and then fades away.